Italian Olive Bread Recipe!(Easy No Knead Method)
This Italian Olive Bread Recipe will help you make rustic no-knead artisan loaf with a crispy golden crust, chewy open crumb, and delicious savory olives throughout. The long, slow fermentation develops a rich flavor similar to sourdough, making it an easy homemade bread that's perfect for beginners.
What makes this recipe truly special is the long, slow fermentation. Instead of kneading the dough, you simply mix the ingredients together and let time do the work. As the dough rests, it develops a rich, complex flavor that is surprisingly similar to sourdough, without the need for a sourdough starter or complicated techniques.
Studded with juicy, flavorful olives, every slice is packed with savory goodness. It's delicious served alongside soups, toasted for breakfast, dipped in olive oil, or used to make the most incredible sandwiches.
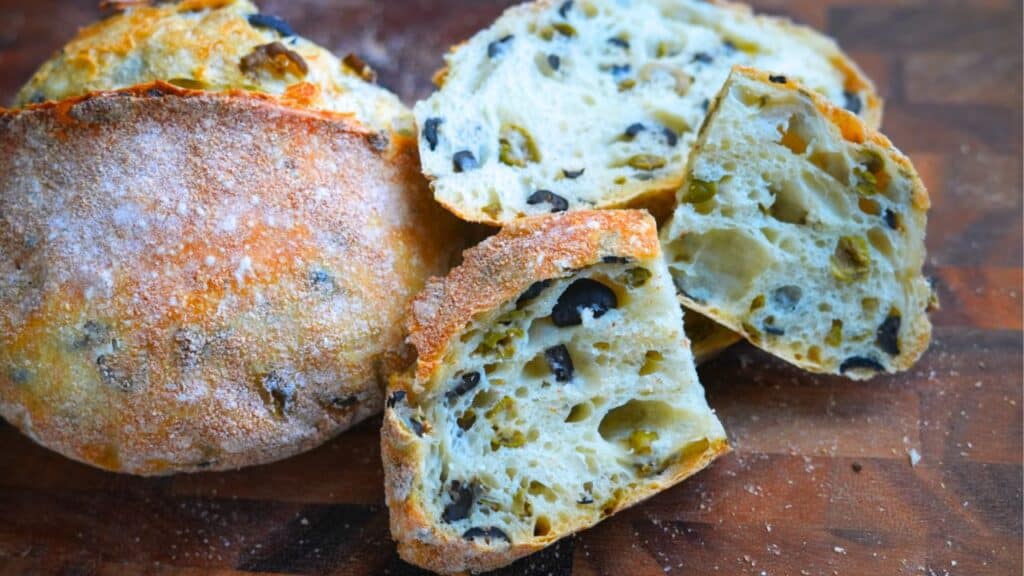
If you've never baked artisan bread before, don't worry. This recipe is wonderfully forgiving and perfect for beginners. With just a few simple ingredients and a Dutch oven, you'll be amazed at how easy it is to create a rustic loaf with a crispy crust, airy crumb, and bakery-quality flavor right in your own kitchen.
Why You'll Love This Italian Olive Bread Recipe
- No kneading required
- Crispy artisan-style crust
- Soft, chewy crumb with beautiful open holes
- Deep, rich flavor from slow fermentation
- Easy enough for beginners
- Dough can be refrigerated for up to 3 days
- Loaded with delicious olives in every bite
What Makes This Italian Olive Bread So Good?
Instead of kneading the dough to develop gluten, this recipe relies on time.
During the long fermentation, gluten develops naturally while enzymes create incredible flavor. The result is a loaf that's surprisingly similar to bakery-style sourdough—with a crackly crust, chewy texture, and an airy, open crumb.
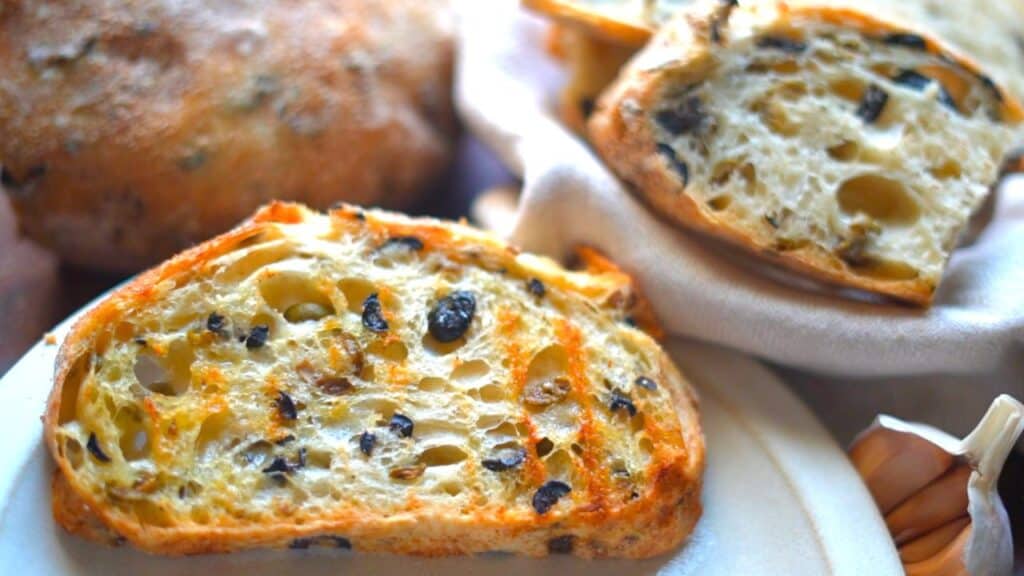
Adding olives gives every bite a delicious savory flavor, making this bread perfect for serving with soups, salads, pasta, cheese boards, or simply toasted with olive oil.
Italian Olive Bread Recipe, Ingredients
For the Dough
- 400 g bread flour (or all-purpose flour)
- 325 g water, at room temperature
- 3 g salt (about ½ teaspoon)
- 3 g instant yeast (about 1 teaspoon)
- 160 g pitted olives, sliced (green, black, or a combination)
For Shaping
- Extra flour for dusting the work surface
- Wheat bran or flour for dusting the kitchen towel
How to Make Easy No-Knead Italian Olive Bread
Step 1: Mix the Dough
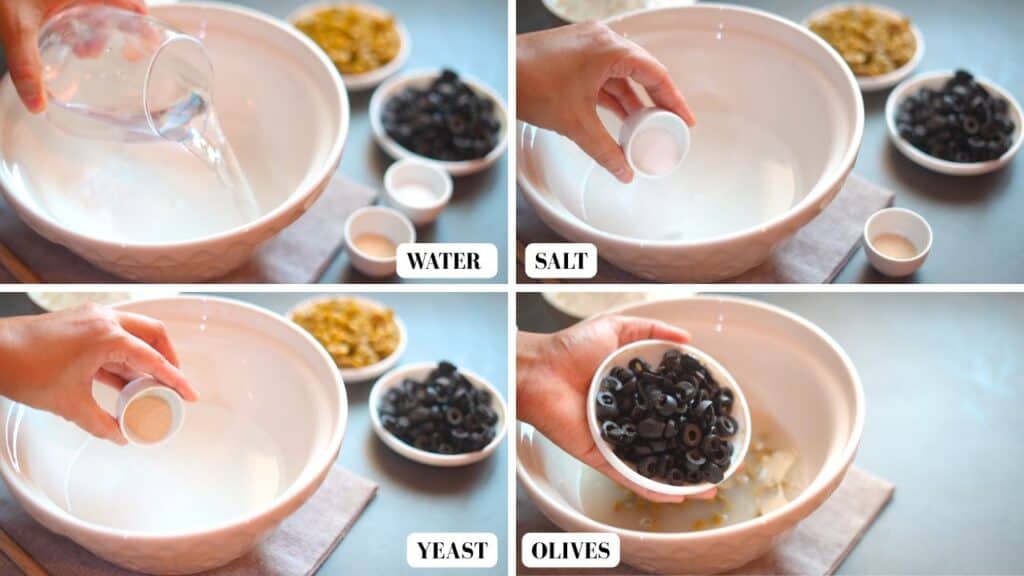
In a large mixing bowl, combine the room-temperature water, salt, and instant yeast. Stir until both the salt and yeast have dissolved. We use less salt than normal as we use olives in this recipe.
Add the sliced olives, then add the bread flour.
Using a wooden spoon or dough scraper, mix everything together until all the flour is fully incorporated. The dough will look sticky, rough, and shaggy, which is exactly how it should be.
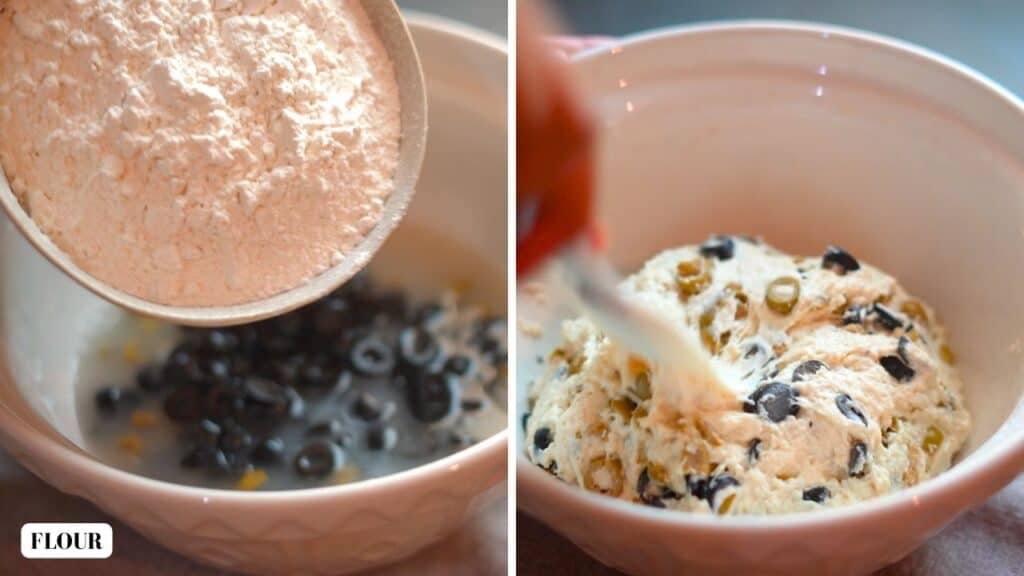
There is no kneading required. Simply make sure there are no dry pockets of flour remaining.
Cover the bowl tightly and leave it at room temperature.
Step 2: Long Fermentation
Allow the dough to ferment at room temperature for at least 6 hours.
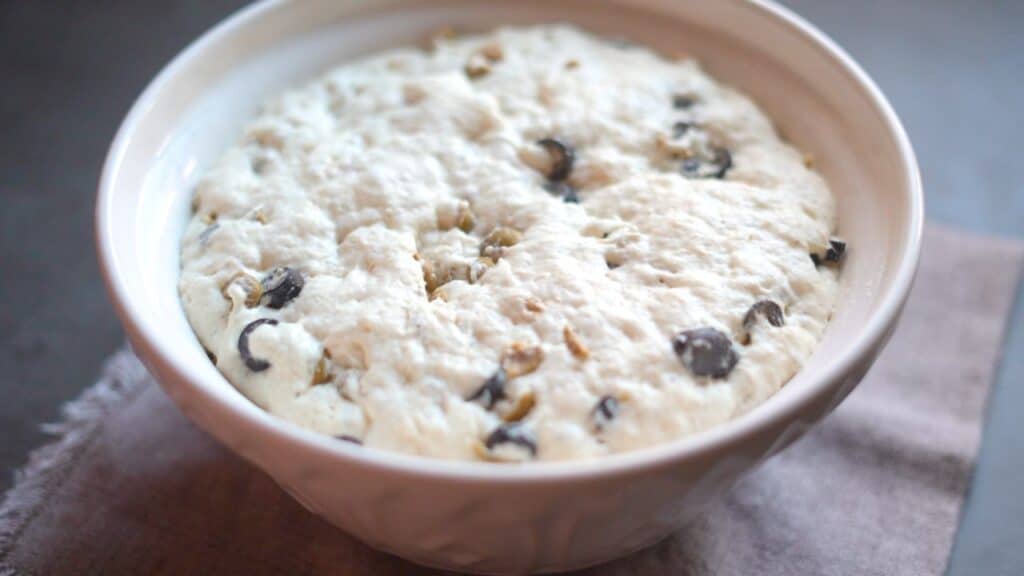
After this initial fermentation, you can proceed directly to shaping if you're short on time. However, for the best flavor, transfer the bowl to the refrigerator.
I like to refrigerate the dough for another 12 hours, which develops an even deeper, richer flavor that's very similar to sourdough.
The dough can remain refrigerated for up to 3 days, making it perfect for baking whenever it's convenient.
Step 3: Shape the Dough
Remove the dough from the refrigerator.
Using a spatula or dough scraper, gently loosen the dough from the sides of the bowl and transfer it onto a generously floured work surface.
Lightly stretch the dough into a rectangle.
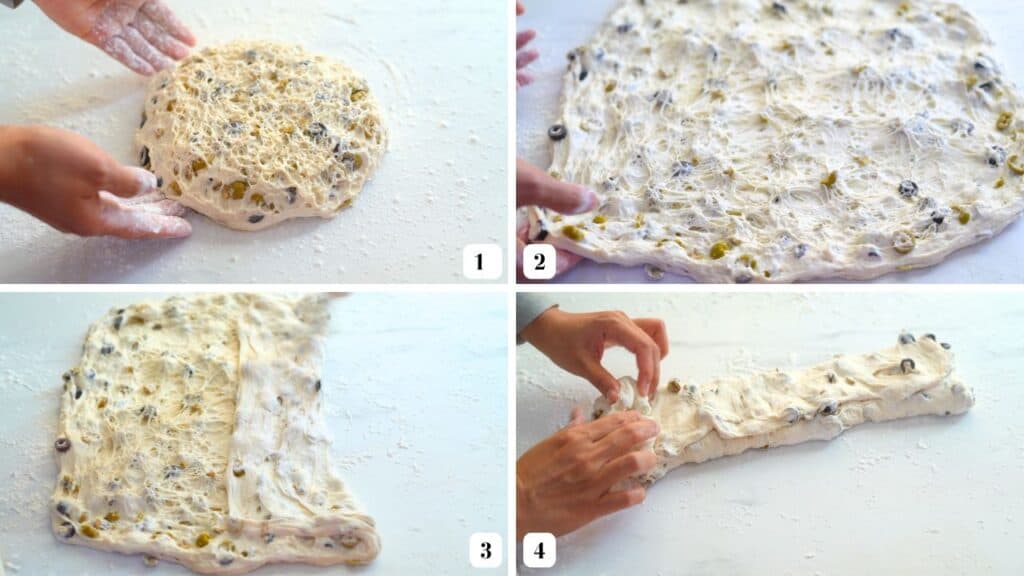
Fold one side toward the center, then fold the opposite side over it. Next, fold the dough from top to bottom to create a compact shape.
Turn the dough over so the smooth side faces up on to a clean work surface.
Using your hands or a bench scraper, gently drag the dough across the work surface several times to build surface tension and form a smooth round loaf.
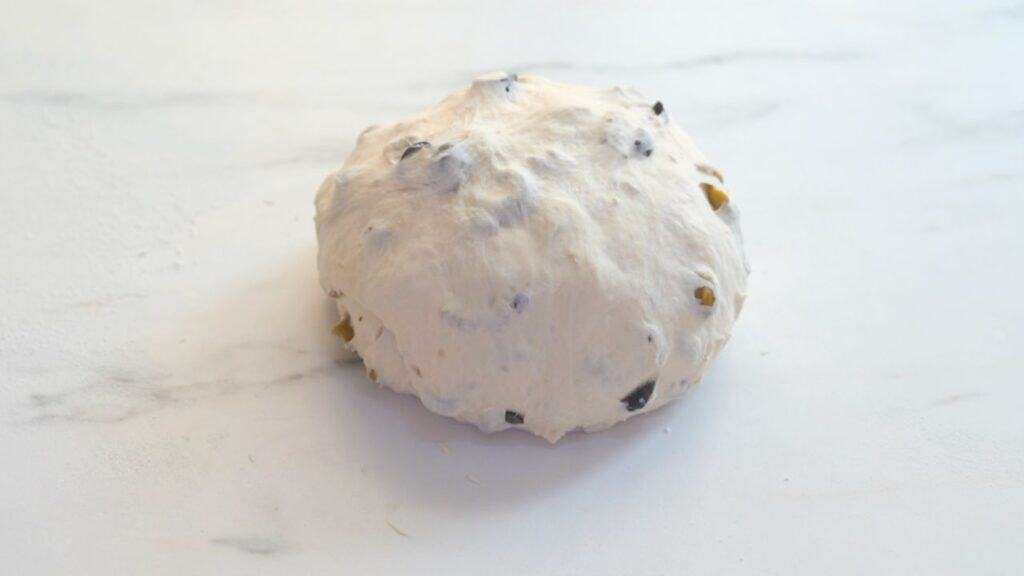
Step 4: Final Proof
Line a bowl with a clean kitchen towel.
Dust the towel generously with wheat bran or flour to prevent sticking.
Place the shaped dough seam-side up into the prepared bowl.
Cover and let it rise at room temperature until doubled in size, about 2 to 2½ hours, depending on the warmth of your kitchen.
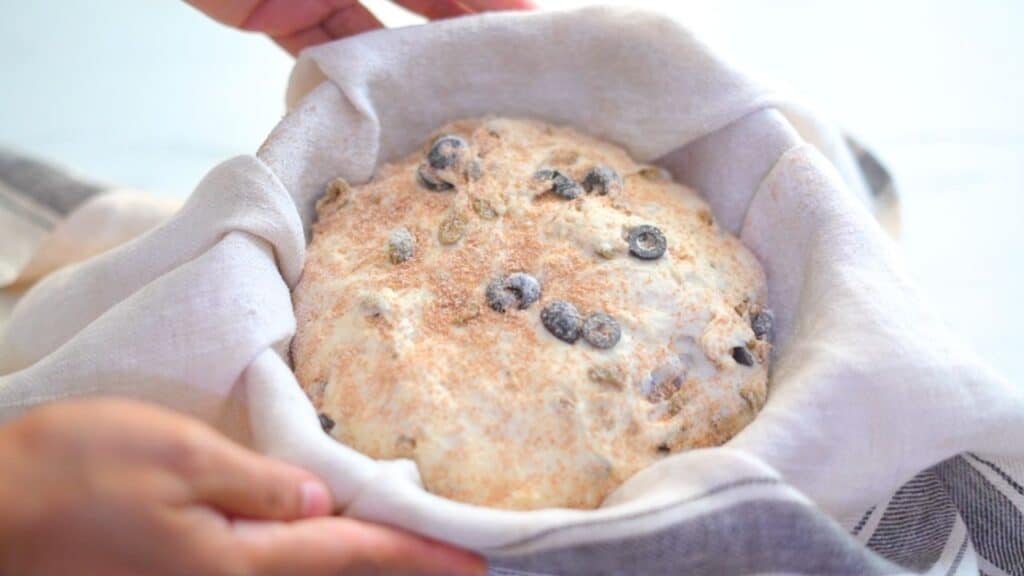
The dough should feel light, airy, and noticeably puffed up.
Step 5: Bake
About 30 minutes before baking, place a Dutch oven with its lid into the oven and preheat to 250°C (480°F).
Once the dough has finished rising, carefully flip it onto a piece of parchment paper.
Score the top using a sharp knife or bread lame.
Using the parchment paper, carefully lower the dough into the hot Dutch oven.
Cover with the lid and bake for:
- 20-25 minutes at 250°C (480°F) with the lid on.
Remove the lid.
Reduce the oven temperature to 220°C (425°F) and continue baking for another 20 minutes, or until the crust is deeply golden brown.
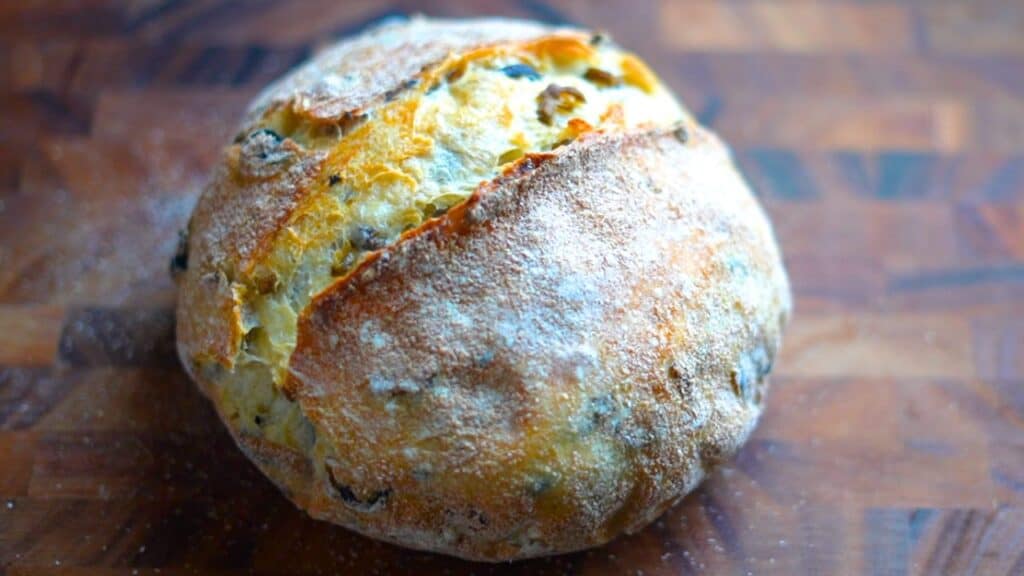
The finished loaf should sound hollow when tapped on the bottom.
Step 6: Cool Before Slicing
Transfer the bread to a cooling rack and let it cool for at least 1 hour.
This resting time allows the crumb to finish setting and makes slicing much easier.
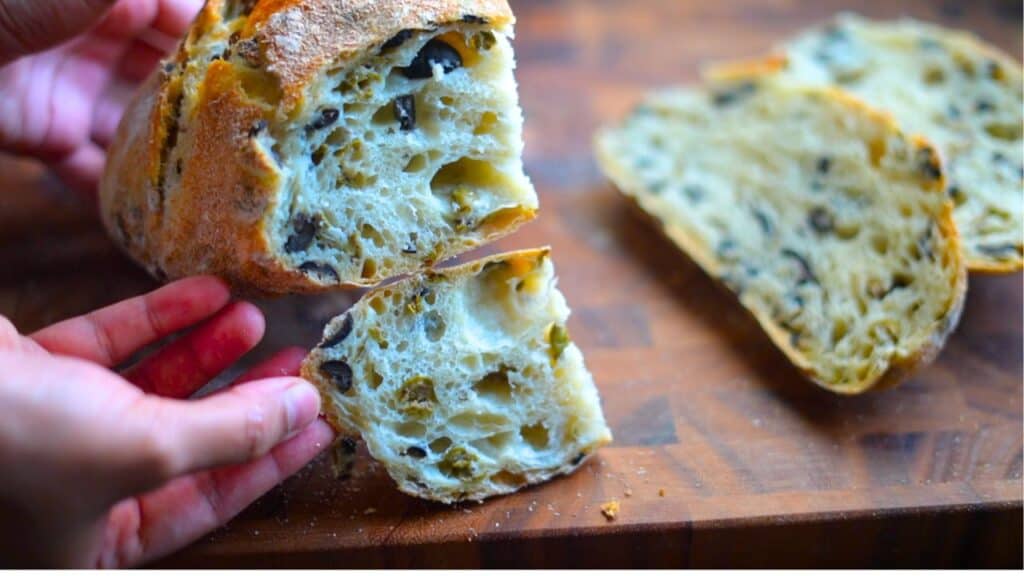
Once cooled, slice into the loaf to reveal a beautiful open crumb with large airy holes, a chewy interior, and a wonderfully crisp crust.
Tips for the Best Italian Olive Bread
Use good-quality olives
Since olives are the star ingredient, choose flavorful olives that you enjoy eating. Green olives, black olives, Kalamata olives, or a combination all work wonderfully.
Don't skip the long fermentation
The extended fermentation develops better flavor, improves texture, and creates the open crumb that artisan bread is known for.
Handle the dough gently
Avoid pressing out the air while shaping. Gentle handling preserves the bubbles that create a light, airy loaf.
Flour generously
This is a high-hydration dough, so don't be afraid to flour your work surface, hands, and towel generously.
Bake in a hot Dutch oven
The covered Dutch oven traps steam, helping the bread rise beautifully during the first part of baking while producing a crisp, crackly crust.
Italian Olive Bread Recipe: Video
Serving Suggestions
This olive bread is delicious served in so many ways:
- Toasted with butter
- Dipped in olive oil and balsamic vinegar
- Served alongside soups and stews
- As part of a cheese board
- Used for gourmet sandwiches
- Made into garlic toast
- Paired with roasted vegetables or pasta
One of my favorite ways to enjoy it is toasted, rubbed with a fresh garlic clove, then finished with a drizzle of extra virgin olive oil. Simple, rustic, and absolutely delicious.
Storage Tips
Store the bread in a paper bag or bread box at room temperature for up to 3 days.
Avoid refrigerating baked bread, as it tends to dry out more quickly.
For longer storage, slice the loaf and freeze it in an airtight freezer bag for up to 3 months. Toast slices directly from frozen whenever you need them.
Frequently Asked Questions
Can I skip the overnight refrigeration?
Yes. You can bake the bread after the initial 6-hour rise. However, refrigerating the dough overnight gives the bread a richer flavor and makes the dough easier to handle.
Can I use all-purpose flour?
Absolutely. Bread flour gives a slightly chewier texture and better oven spring, but all-purpose flour also produces an excellent loaf.
Can I add herbs?
Yes! Fresh rosemary, thyme, oregano, or roasted garlic pair beautifully with the olives.
Why is the dough so sticky?
This is a high-hydration dough. The extra moisture creates the soft, open crumb that's characteristic of artisan bread. Resist adding too much extra flour.
Do I need a Dutch oven?
A Dutch oven produces the best crust because it traps steam during baking. If you don't have one, bake the bread on a baking stone or tray and place a pan of hot water in the oven to create steam.
Enjoy, This Easy Italian Olive Bread Recipe
This Easy No-Knead Olive Bread proves that making bakery-quality artisan bread at home doesn't have to be difficult. With just five basic ingredients, a long, slow fermentation, and no kneading, you'll be rewarded with a loaf that's crisp on the outside, wonderfully chewy on the inside, and filled with rich olive flavor.
Whether you're a beginner or an experienced baker, this recipe is simple, reliable, and incredibly satisfying. Toast a slice, rub it with fresh garlic, drizzle it with good olive oil, and enjoy every bite of this rustic homemade bread. Once you've made it, you'll want to keep a batch of dough in your refrigerator all the time, ready to bake whenever the craving strikes. Happy baking!

Italian Olive Bread Recipe (Easy No-Knead Dutch Oven Bread)
Ingredients
For the Dough
- 400 g bread flour (or all-purpose flour)
- 325 ml water
- 3 g salt (½ teaspoon)
- 3 g instant yeast (1 teaspoon)
- 160 g pitted olives, sliced (green, black, or a combination)
For Shaping
- 3 tablespoon Extra flour for dusting
- 2 tablespoon Wheat bran or flour for dusting the kitchen towel
Instructions
Prepare the Dough
- In a large bowl, combine the water, salt, and instant yeast. Stir until dissolved.
- Add the sliced olives.
- Add the flour and mix with a wooden spoon or dough scraper until no dry flour remains. The dough will be sticky and shaggy.
- Cover the bowl and let the dough rest at room temperature for at least 6 hours.
Cold Fermentation (Optional but Recommended)
- After the initial rise, refrigerate the dough for 12 hours or overnight for deeper flavor. The dough can be refrigerated for up to 3 days.
Shape the Dough
- Turn the dough onto a well-floured work surface.
- Gently stretch it into a rectangle.
- Fold one side toward the center, then the opposite side over it.
- Fold from top to bottom to form a compact dough.
- Turn the dough over and gently drag it across the work surface to create surface tension and shape it into a round loaf.
Final Proof
- Line a bowl with a clean kitchen towel and dust generously with wheat bran or flour.
- Place the dough seam-side up into the bowl.
- Cover and let rise for about 2–2½ hours, or until doubled in size.
Bake
- About 30 minutes before baking, place a Dutch oven with its lid into the oven and preheat to 250°C (480°F).
- Carefully flip the risen dough onto parchment paper.
- Score the top with a sharp knife or bread lame.
- Lift the dough using the parchment paper and place it into the hot Dutch oven.
- Cover and bake for 20-25 minutes.
- Remove the lid, reduce the oven temperature to 220°C (425°F), and bake for another 20 minutes, until the crust is deep golden brown.
Cool
- Transfer the bread to a wire rack and allow it to cool for at least 1 hour before slicing.
Video
Notes
The dough can be refrigerated for up to 3 days before baking.
Bread flour produces a chewier loaf, but all-purpose flour works well too.
Use a combination of green and black olives for the best flavor.
Dusting the proofing towel with wheat bran helps prevent sticking and gives the loaf a rustic appearance.
Allow the bread to cool completely before slicing to preserve the open crumb.