This Fluffy Doughnuts Recipe, will help you make the best fried yeast raised doughnuts that are soft, moist and absolutely delicious in the easiest and fastest method!
Soft and fluffy doughnuts are a beloved treat that offers a melt-in-your-mouth experience. Crafting these delectable pastries at home is a rewarding endeavor, as you have full control over their freshness and flavor.
The secret to their pillowy texture lies in a well-risen dough and a brief yet precise frying process. Whether enjoyed with a cup of coffee in the morning or as an indulgent dessert, soft and fluffy homemade doughnuts are sure to bring joy to your taste buds.
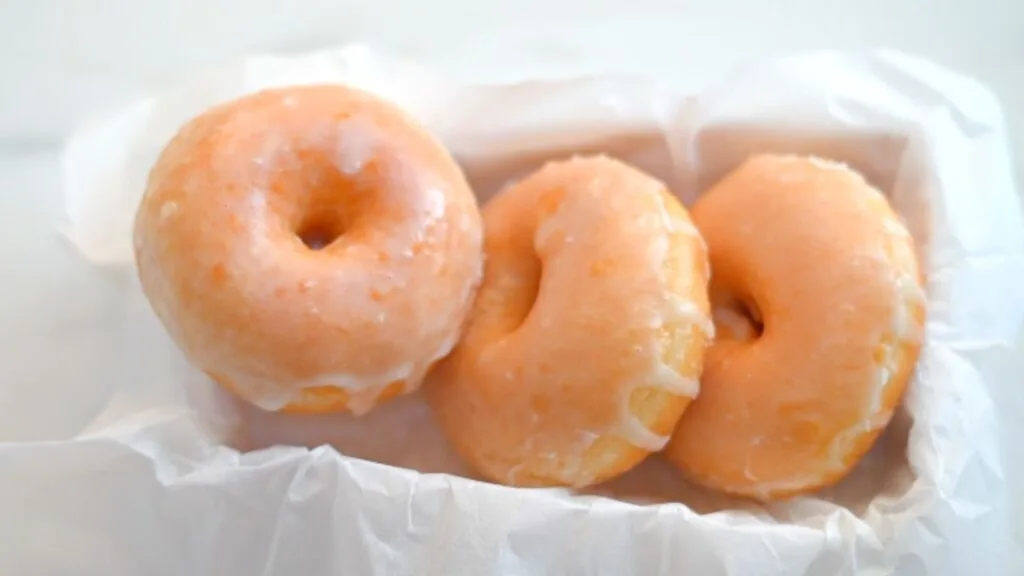
Why You will love this Soft and Fluffy Doughnuts Recipe
- This Quick and Easy Doughnuts Recipe will help you make soft and fluffy doughnuts in less than 2 hours!
- To make this Easy Fried Doughnuts, You will need only seven basic ingredients
- You don’t need any special equipments to make this doughnuts like a cookie cutter or doughnut cutter
- The resulting Doughnuts are beautiful with super soft, moist, fluffy crumb with golden brown crust and tastes divine.
Ingredients for making Soft Doughnuts
For Doughnut Dough
- All purpose flour/Bread flour:390g or 3 cups (loosely packed)
- Milk/Water : 165 ml or 3/4 Cup-1 tbsp
- Unsalted Butter (softened) : 50 g or 3.5 tbsp
- 1 Egg(at Room Temperature)
- Sugar:50 g or 1/4 cup
- Salt :4.5 g or 3/4 tsp
- Yeast (Instant /Active dried yeast) 3g or 1tsp

For Glaze
- Powdered sugar :112 g or 1 cup
- Vanilla extract :4.5 g or 1 tsp
- Milk or water :30 ml or 2 Tbsp
How to Make Fluffy Doughnuts
This Fluffy Doughnuts Recipe is so easy.We can make soft and fluffy fried donuts in FOUR SIMPLE STEPS.
- Prepare the dough
- Divide and Shape the doughnuts
- Proof the doughnuts
- Fry the doughnuts
If you want to skip frying and instead want to bake these doughnuts, you will love this quick and easy Baked Yeast Doughnuts Recipe
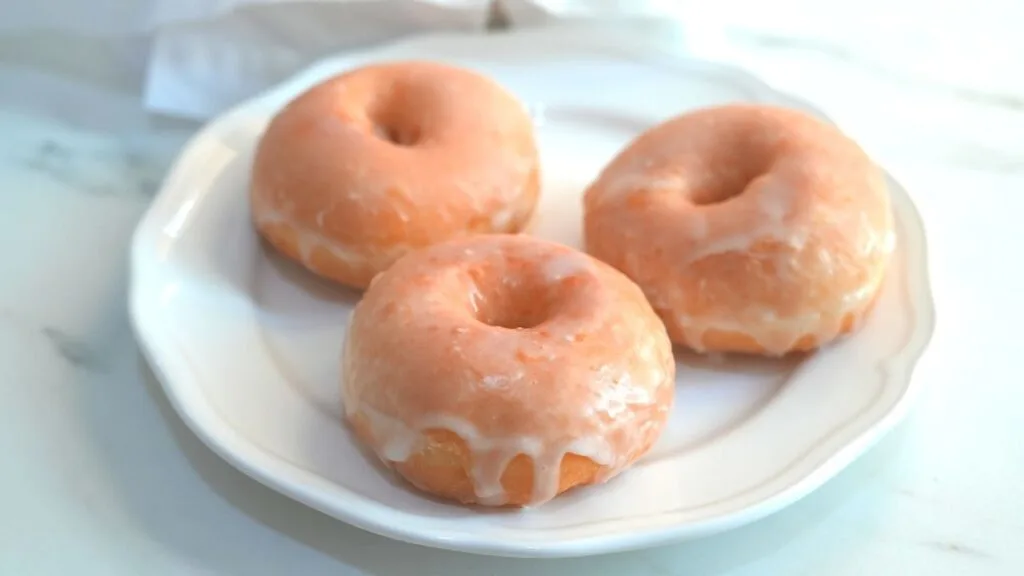
1.Prepare the Dough
Into a bowl, add in the milk, sugar, salt, yeast, egg.
Give it a good mix.
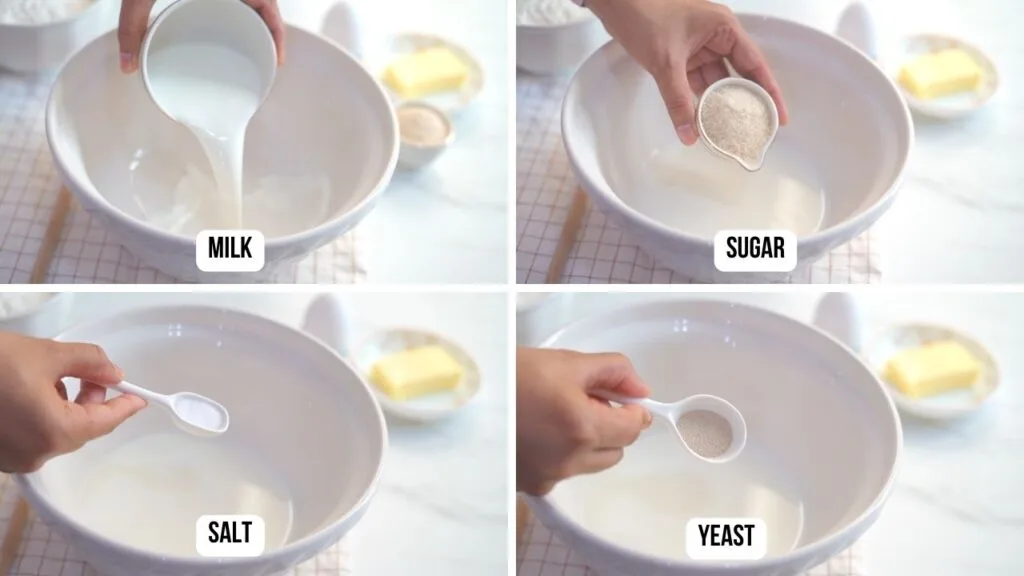
Then add in the softened unsalted butter and then the flour.Mix everything together ,until we get a shaggy mass of dough.

Transfer the dough on to a clean work surface and we need to knead the dough.
This doughnut dough is not a very sticky dough and so you will find it easy to knead by hands.
After kneading the dough for about six minutes, we will get a soft and smooth dough.
But to make light and fluffy doughnuts we need a dough that is more soft and smooth.
So add a little more more water to the dough and knead it once again.
I added 1/2 tbsp water of extra water into the dough.
As the dough contain moisture, you will find the dough to be sticky in the beginning of kneading.
At the point, we may get tempted to add more flour into this.
But don’t do that.Just continue to knead and you will see all those extra moisture will get absorbed by the dough in about five minutes.
And our dough will turn more soft and smooth.
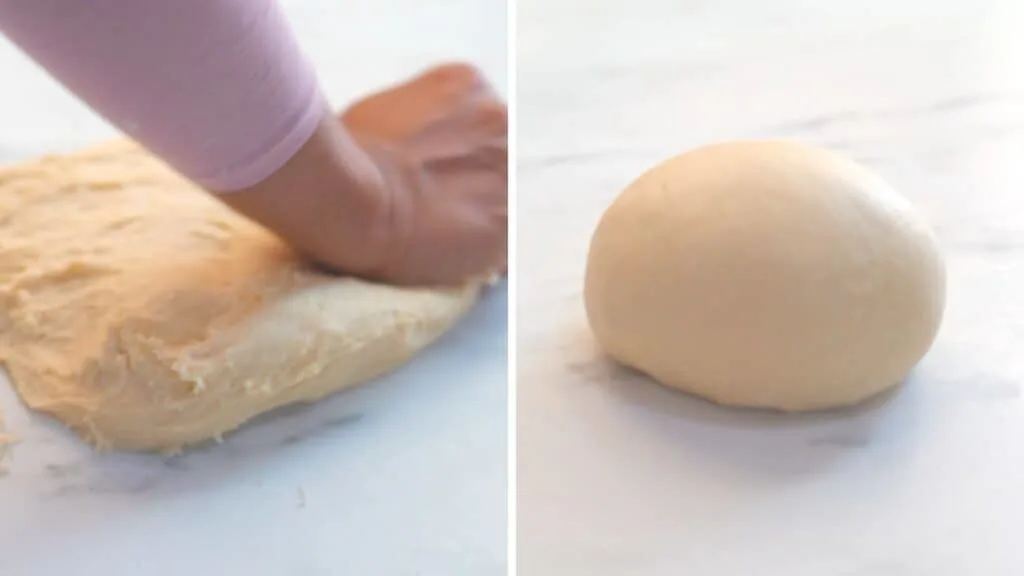
Our doughnut dough should be well hydrated, soft and smooth; but at the same time should be able to hold the shape of donuts when shaped.
Now cover the dough with a bowl and let it rest for 15 minutes.
This will give some time for the gluten strands to relax and this will reduce it’s elasticity and the rebounding tendency of the dough.
How should I know if my doughnut dough is kneaded well?
We can test the doneness of donut dough.
If properly kneaded, the dough should stretch, without tearing or breaking, into a thin membrane that you can see through.
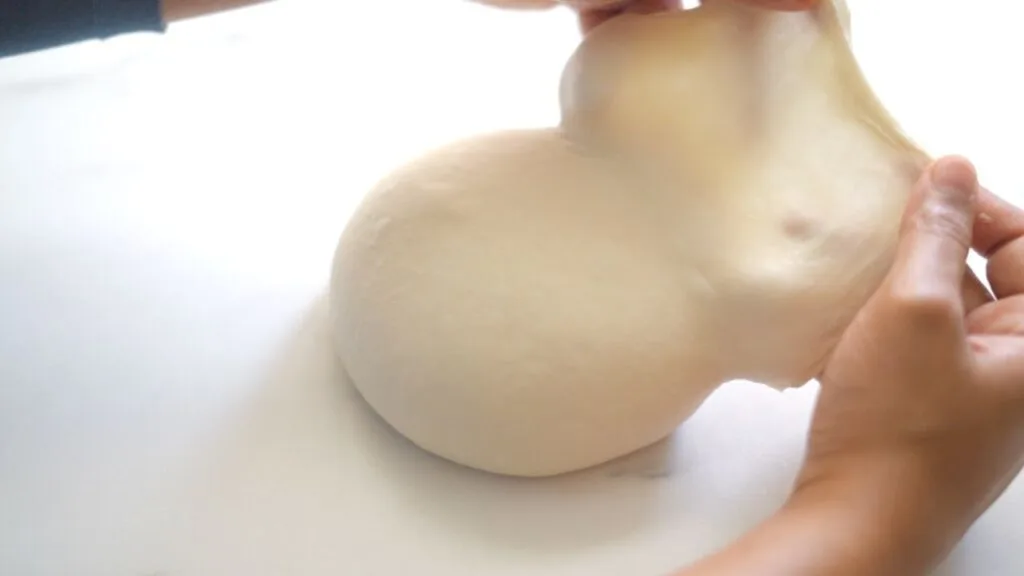
If we are using bread flour it is easy to attain this stage of dough (it may take around 10 minutes of kneading).As bread dough contains more proteins than all purpose flour.
But if we are using all purpose flour,it may take longer to attain this stage of perfection.
Our doughnuts would still be good and soft even if our dough didn’t pass this window pane test.
But if the dough passes the window pane test ,and the 35-40 minutes proofing after the final shaping, then it is guaranteed that your doughnuts will be super soft and fluffy.
It will be so much easier if you are using a stand mixer to prepare the dough.In a stand mixer, just knead the dough for 8-10 minutes using the dough hook attachment.
2.Divide and Shape The Donut Dough
After 15 minutes of resting, our dough is ready for the next step.
Divide the dough into 12 equal pieces.
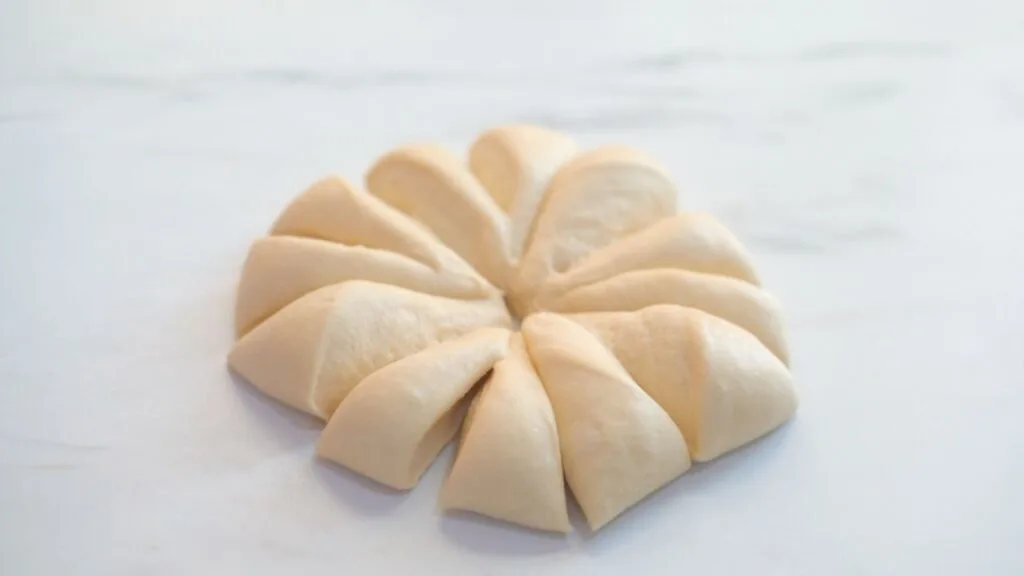
For more precision,I weighed each of them and they were 59-60 g in weight.
Take each portion of the dough.
Degas the dough.Then tuck in the edges towards the centre and roll it into small round balls.

Cover the dough balls with a kitchen towel and let them sit and rest for another 15 minutes.
Final Shaping of Doughnuts
After 15 minutes of rest, dough balls are ready for the final shaping.
Dust the surface of the balls with some flour, so that they will not stick to the hands while shaping.
Then press on top of the ball to flatten it a bit.
Gently Press in the middle of the dough ball with the tip of the thumb to form a small hole.
Then widen the hole using fingers to form the shape of a doughnut.
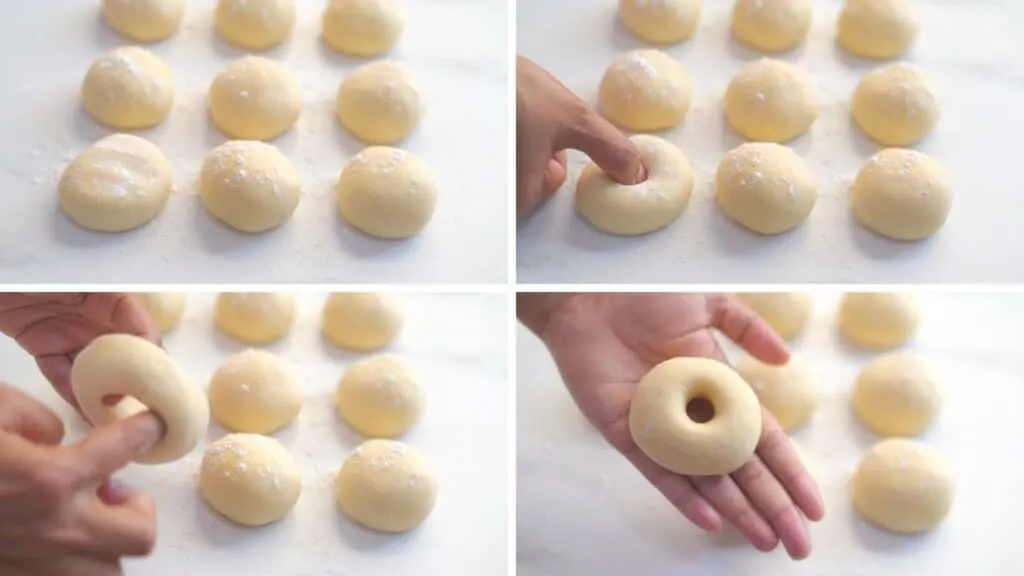
Place the shaped doughnuts on to a parchment lined baking tray.
Dust the surface of the shaped doughnuts with some flour to prevent any chance of dough sticking to the cling film.
Then cover the tray with a cling film.
3. Proof The Doughnuts
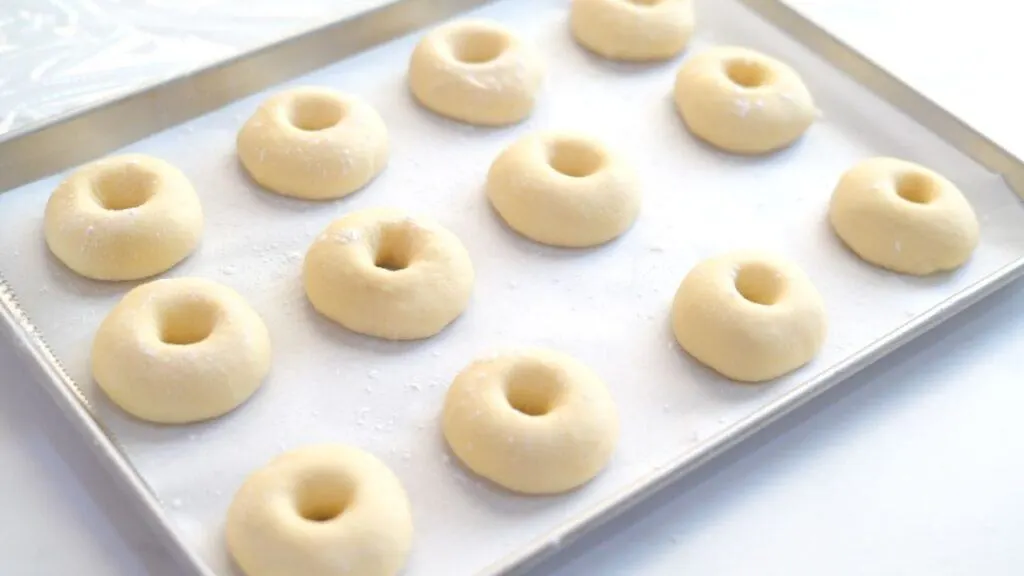
Let the shaped doughnuts sit and rise in a warm environment for 35-40 minutes or until they are light and puffy.
4. Fry The Raised Yeast Doughnuts
After 40 minutes, they have puffed up and they are ready for frying.
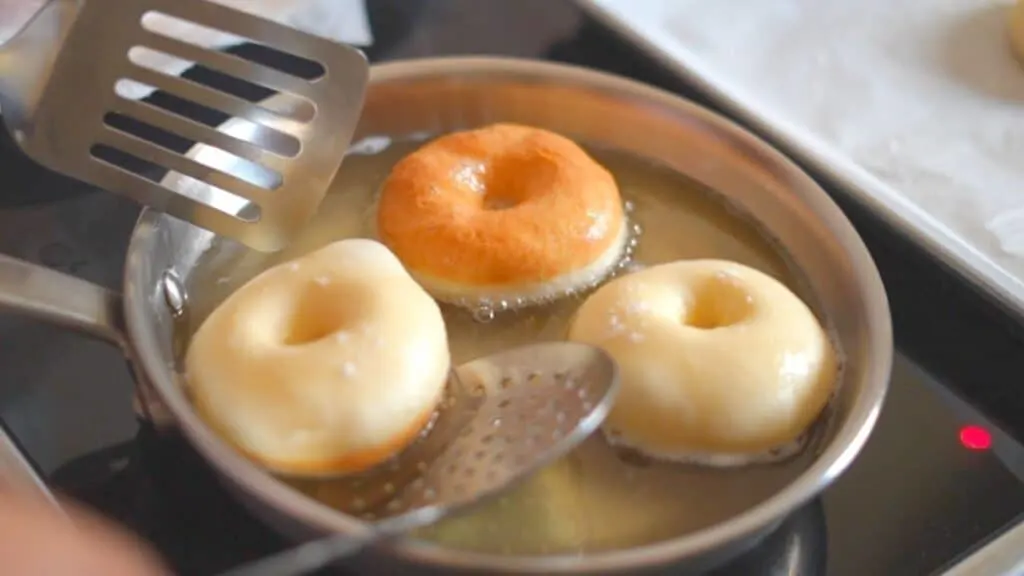
How to Fry Yeast Doughnuts
Frying doughnuts perfectly requires attention to detail and a few key steps to achieve that coveted golden-brown exterior and soft, fluffy interior.
Heat the Oil: Pour enough vegetable oil into your pot or deep fryer to ensure that the doughnuts can float while frying. Heat the oil to a consistent temperature of 350°F (175°C). Use a candy thermometer to monitor the temperature, as maintaining a steady heat is crucial for even frying.
Fry in Batches: Carefully place a few doughnuts into the hot oil, ensuring you don’t overcrowd the pot. The number you can fry at once will depend on the size of your pot or fryer. Crowding can cause the temperature to drop and result in uneven frying.
I have also noticed that, when the doughnuts are very close to each other or close to the edges of the pan, the white rim that form around the center of doughnuts may also turn golden brown and that white rim may fade.We can prevent this from happen, if we don’t overcrowd the pan and also if we use shallow open pan for frying rather than deep pans like dutch oven or sauce pan.
Monitor and Flip: Fry the doughnuts for about 1.5 minutes on each side or until they turn a beautiful golden-brown color. Use a slotted spoon to gently flip them. Keep an eye on the temperature to maintain consistency.
Drain Excess Oil: Once they’re done, use the slotted spoon to lift the doughnuts out of the oil and onto a tray lined with paper towels. This will help absorb any excess oil and keep them from being greasy.
Cool and Glaze (Optional): Allow the fried doughnuts to cool slightly on the paper towels before glazing or adding toppings.
Glazing is optional but adds a delightful sweetness and flavor to your doughnuts.
You can coat the soft homemade doughnuts with superfine sugar or powdered sugar
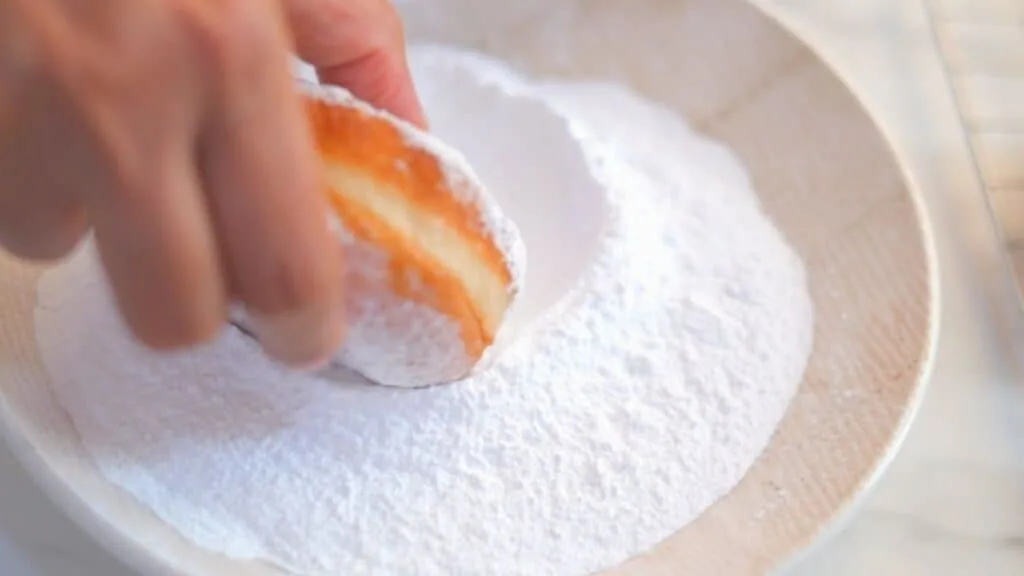
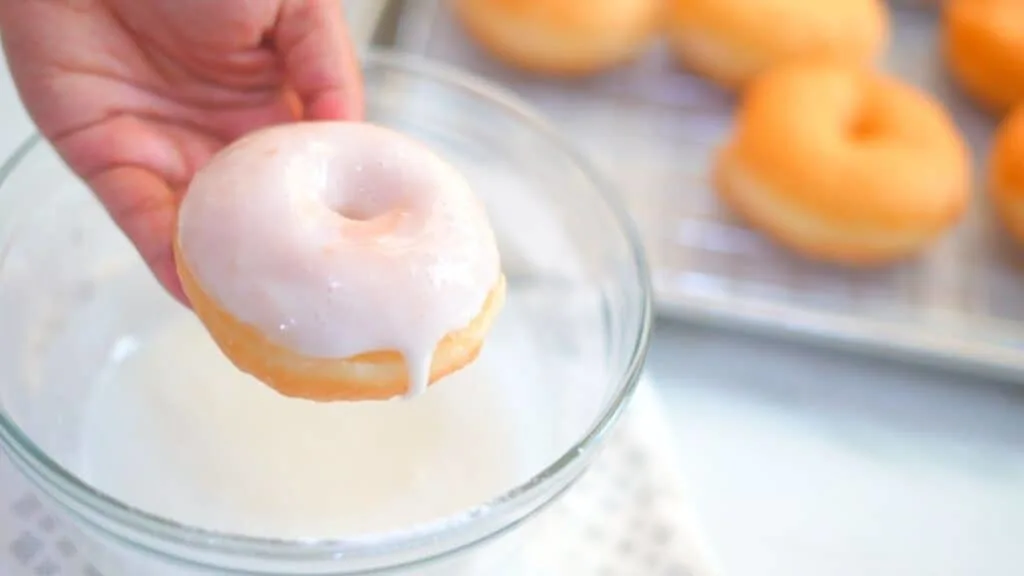
Or you can dip them in a glaze made of powdered sugar, milk, and vanilla extract.
How to make Glaze for Homemade Doughnuts
It’s so easy to make this glaze for doughnuts.
Into one cup of powdered sugar, add in 1 tsp of vanilla sugar.
Add 1-2 tablespoons of milk into this.
You can adjust the amount of milk according to how thin or thick you want your glaze to be.
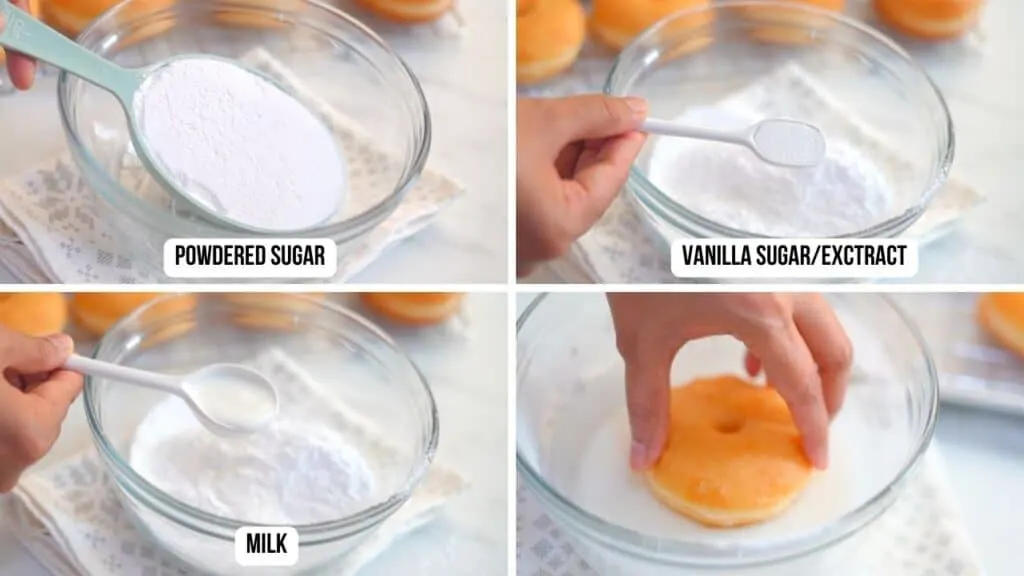
Place the glazed doughnuts on a wire rack or a tray to allow the glaze to set. It will take about 15-30 minutes for the glaze to harden, depending on the thickness.
Tip :To ensure a smooth and lump-free glaze, start by sifting the powdered sugar into a mixing bowl. This step is essential to avoid any clumps in your glaze.
Can I turn this Fluffy Doughnuts Recipe to Eggless Doughnut recipe
Yes,It is so easy to substitute egg in this fluffy doughnut recipe and make it into an eggless doughnut recipe.
As one egg is approximately 45 ml,just replace the same volume with milk or water.So you can add about 3 tablespoon of water or milk in place of one egg.
Can I turn this Fluffy Doughnuts Recipe to Dairy free Doughnut recipe
Yes, you can adjust and change the ingredients of this fluffy doughnuts recipe to make it dairy free.You can use equal amount of water for milk and equal volume of vegetable oil instead of butter.
How to make soft and fluffy Doughnuts Step by step Video
How to store Homemade Doughnuts at room temperature
Room Temperature : If you plan to consume the doughnuts within a day or two, you can store them at room temperature. Here’s how:
- Place the doughnuts in an airtight container or a resealable plastic bag.
- Ensure they are completely cool before storing to prevent condensation inside the container.
- Room-temperature storage is best for maintaining the doughnuts’ texture and flavor for a short period.
Refrigeration is suitable for storing doughnuts for a slightly longer period, up to 3-4 days. However, it can affect the texture, making them firmer.
How to store Homemade Doughnuts in freezer for long term storage
If you want to store doughnuts for an extended period, freezing is the best option. Properly frozen doughnuts can stay good for up to 2-3 months. Here’s how to freeze them:
- Allow the doughnuts to cool completely at room temperature.
- Individually wrap each doughnut in plastic wrap or aluminum foil. This prevents freezer burn and preserves freshness.
- Place the individually wrapped doughnuts in an airtight container or resealable freezer bags.
- Store the doughnuts in the freezer.

Fluffy Doughnuts Recipe (The Best Fried Doughnuts Recipe)
Ingredients
For Doughnut Dough
- 390 g All purpose flour/Bread flour or 3 cups (loosely packed)
- 165 ml Milk/Water : 165 ml or 3/4 Cup-1 tbsp
- 50 g Unsalted Butter (softened) or 3.5 tbsp
- 1 Egg(at Room Temperature)
- 50 g Sugar or 1/4 cup
- 4.5 g Salt or 3/4 tsp
- 3 g Yeast (Instant /Active dried yeast) or 1tsp
For Glaze
- 112 g Powdered sugar 1 cup
- 4.5 g Vanilla extract/Vanilla sugar 1 tsp
- 30 ml Milk or Water 2 Tbsp
Instructions
Prepare the Dough
- Into a bowl, add in the milk, sugar, salt, yeast, egg.Give it a good mix.
- Then add in the softened unsalted butter and then the flour.Mix everything together ,until we get a shaggy mass of dough.
- Transfer the dough on to a clean work surface and we need to knead the dough for about 10-12 minutes in total.Our dough should be well hydrated, soft and smooth; but at the same time should be able to hold the shape of donuts when shaped.
- Now cover the dough with a bowl and let it rest for 15 minutes.
Divide and Shape the doughnuts
- After 15 minutes of resting, our easy doughnut dough is ready for the next step.Divide the dough into 12 equal pieces.For more precision,I weighed each of them and they were 59-60 g in weight.
- Take each portion of the dough.Degas the dough.Then tuck in the edges towards the centre and roll it into small round balls.
- Cover the dough balls with a kitchen towel and let them sit and rest for another 15 minutes.
- Final Shaping of DoughnutsAfter 15 minutes of rest, dough balls are ready for the final shaping.
- Dust the surface of the balls with some flour, so that they will not stick to the hands while shaping.Then press on top of the ball to flatten it a bit.
- Gently Press in the middle of the dough ball with the tip of the thumb to form a small hole.
- Then widen the hole using fingers to form the shape of a doughnut.
- Place the shaped doughnuts on to a parchment lined baking tray.
- Dust the surface of the shaped doughnuts with some flour to prevent any chance of dough sticking to the cling film.Then cover the tray with a cling film.
Proof the soft doughnuts
- Let the shaped doughnuts sit and rise in a warm environment for 35-40 minutes or until they are light and puffy.
Fry the yeast raised doughnuts
- After 40 minutes, they have puffed up and they are ready for frying.
- Heat the Oil: Pour enough vegetable oil into your pot or deep fryer to ensure that the doughnuts can float while frying. Heat the oil to a consistent temperature of 350°F (175°C). Use a candy thermometer to monitor the temperature, as maintaining a steady heat is crucial for even frying.Fry in Batches: Carefully place a few doughnuts into the hot oil, ensuring you don’t overcrowd the pot. The number you can fry at once will depend on the size of your pot or fryer. Crowding can cause the temperature to drop and result in uneven frying.Monitor and Flip: Fry the doughnuts for about 1.5 minutes on each side or until they turn a beautiful golden-brown color. Use a slotted spoon to gently flip them. Keep an eye on the temperature to maintain consistency.
- Once they’re done, use the slotted spoon to lift the doughnuts out of the oil and onto a tray lined with paper towels. This will help absorb any excess oil and keep them from being greasy.
- Glazing is optional but adds a delightful sweetness and flavor to your doughnuts. Once the doughnuts are cool to touch, you can coat the soft homemade doughnuts with superfine sugar or powdered sugar Or you can dip them in a glaze made of powdered sugar, milk, and vanilla extract
- Enjoy!
Tubolayefa
Saturday 10th of February 2024
Nice recipe my donoughts were really soft and fluffy
Bincy Chris
Saturday 10th of February 2024
I am so happy to hear you made these donuts and they turned out really well.Thank you so much for sharing your feedback.
Rachelle
Wednesday 27th of December 2023
I have tried a few recipes for frying donuts at home. I liked how these turned out more than the others. I can tell the kneading wasn’t good enough for sure and I will try again another day and probably try without the egg next time, too. Just taste preference. Thank you for the recipe!
NGO
Tuesday 12th of September 2023
Hello Bincy, Im waiting to try these donuts. Would it be possible to skip the egg in the recipe?