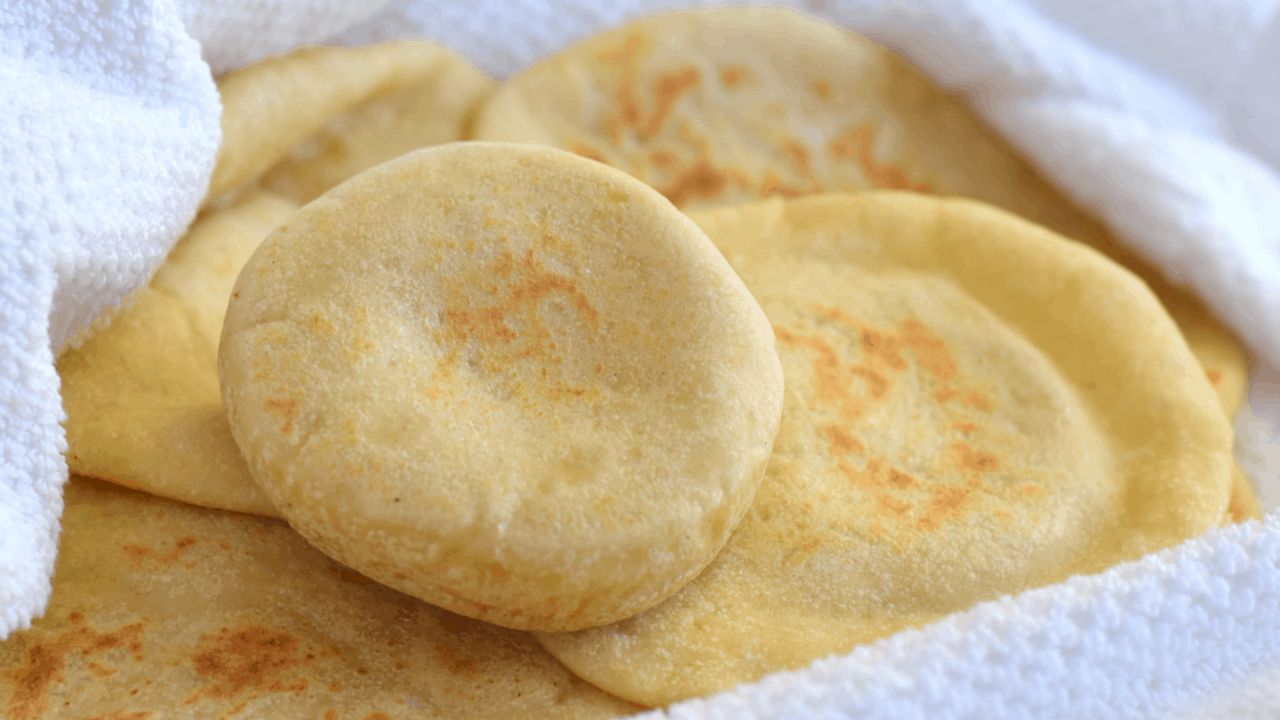
HOW TO MAKE HOMEMADE PITA BREAD
This Pita bread recipe is so simple.It is super easy to make, soft, chewy Pita breads at home and the flavor is just so good!
We live in Qatar,a middle eastern country;where pita breads are easily available at stores.But these homemade pita breads are so much better when compared to the store bought ones..they are so soft and fluffy.
The Pita “bread dough” is made with basic ingredients (flour, water, salt, oil, sugar and yeast) then rolled thin and baked at a high temperature. As it bakes, it will puff up and create a pocket perfect for filling.
Serve it with hummus or you can fill the pita pockets with whatever you prefer and have it as delicious pita sandwich.
Pita bread Ingredients
- 1 cup warm water (not hot nor cold; just slightly warm)
- 1/2 teaspoons active dry yeast
- 2 cups all-purpose flour
- 3/4 cup of whole wheat flour(we can use all purpose flour instead of whole wheat flour)
- 1 teaspoon salt
- 1 tablespoon Sugar
- 1-2 teaspoons olive oil (optional)
Which flour is best for making pita bread?
Any type of flour can be used to make this bread. You can choose to use 100% All purpose flour or 100% whole wheat flour or a mix of both the flours to make this pita bread.
My kids like pita breads made with 100% all purpose flour and me and my husband like the one made with a part of flour as whole wheat flour
Here in this pita bread recipe,i have used a mix of both all purpose flour and whole wheat flour.
The choice of flour is totally upto your preference.
Why i used both kind of flour in this pita bread recipe.
Different flours have different properties and we need to make use of both of the flour to make the best homemade pita bread.
I have added less than 1/3 rd part of flour as whole wheat flour.
Benefits of using whole wheat flour in this pita bread recipe.
- A dough made with whole wheat flour will ferment faster than one made of white flour/all purpose flour. The reason for this is simple: whole wheat flour contains more nutrients for the yeast to feed on than white flour.
- Adding whole wheat flour will give a superior texture and nutty flavor to the dough which adds taste to the pita bread and makes our job of rolling the pita bread,much easier..
- Adding whole wheat flour simply make our homemade pita bread more healthy and nutritious.
A white flour is made up almost entirely of the endosperm which is comprised of starches and proteins. These proteins and starches allow a baker to create a dough with a lot of strength that is able to trap the gas produced by the yeast and this in turn gives the dough volume.
The bran flakes and germ in whole wheat flour act like tiny little razor blades that shred these strands, inhibiting gluten development. The more whole wheat flour you use the more bran and germ there is in the dough and the more the gluten gets shredded. This is why as you increase whole wheat flour you usually must expect a decrease in bread volume.
The drawback of baking with only the endosperm is that you lose out on all the vitamins, minerals, fats and fibre that are contained in the germ and bran. These areas are where all the health benefits of wheat reside. This is where whole wheat flour comes in. It is essentially the entire kernel of wheat ground up into flour form. It is packed with nutrition and flavor.
So in this pita bread recipe,we get the healthy goodness of whole wheat flour and the structural stability from using the white flour.
Step by step Instructions
Step 1. Form the Pita Dough
To make the dough,
- We need to activate the yeast; if you are using active dried yeast.If you are using instant yeast,you can add the yeast directly into the flour and mix.
- Mix together all the ingredients in a bowl.
- Mix the water ,sugar and yeast together, and let sit for about five minutes until the yeast get activated.Yeast loves a sweet and warm environment to bloom up.So i have used warm water and a tablespoon of sugar in this recipe to activate the dried yeast.
- Add 2 3/4 cups of the flour , salt, and olive oil . Stir until a shaggy mass of dough is formed.
Step 2. Knead the Dough
- Sprinkle a little of the extra flour onto your clean work surface and turn out the dough. Knead the dough for about 6-8 minutes, until the dough is smooth and elastic. Add more flour as needed to keep the dough from sticking to your hands or the work surface, but try to be sparing. It’s better to use too little flour than too much.
- If you get tired, stop and let the dough rest for a few minutes before finishing kneading.
You can use a stand mixer to knead the dough for you or you can knead the dough with hands.
If you are using a stand mixer, straight away knead the dough for 8 mins with a dough hook attachment and proceed with the next step.
I love kneading the dough by hands as it helps me to understand the real feel of the dough.Kneading a bread dough with our hands can be one of the most enjoyable steps of bread making.
Why kneading the dough is so important?
The reason kneading is an important part of bread making is to create structure and strength in the dough, leaving it silky and soft with a little cushiony feel.
After the dough ingredients are mixed, the proteins are in a random pattern and knotted together. When the dough is kneaded, the proteins begin to line up in such a way that strands of gluten develop and create a structure that allows for the trapping of gases and the dough to rise.
How to knead a bread dough by hands?
- Begin kneading the dough, pushing it down and then outward, only using the heels of your hands.
- Fold the dough in half toward you and press down. Then use the heels of your hands again to push down and outward, lengthening and stretching the strands of gluten and dough fibers
- Continue to knead, folding and turning the dough, until it is smooth and supple.
A good bread dough will be very sticky to handle in the beginning but in about five minutes of kneading,it won’t stick to your hands.We may get tempted to add more flour in the beginning but don’t do that 🙂
If your dough continues to be sticky but you feel like you have added enough flour, let the dough sit for 5 minutes, which allows the water to absorb the flour; this will make the dough easier to handle.
You will notice that the dough is becoming less sticky while you continue to knead, as the flour slowly absorbs the whole liquid and the gluten develops.
How do you know the dough is well kneaded?
Our final dough should very soft and smooth and elastic enough to withstand all the stretching and puffing later.
When you press the finger onto the dough,you feel the softness of the dough, but when you try to remove the finger from the dough you should feel some resistance.
The usual window pane test (as we did for the Quick Dinner Rolls Recipe)may fail in this pita bread recipe as we used a part of flour as whole wheat flour.
Step 3. Let the Dough Rise
- Clean the bowl you used to mix the dough and film it with a little olive oil. Set the dough in the bowl and turn it until it’s coated with oil. Cover with a clean dishcloth or plastic wrap and let the dough rise until it’s doubled in bulk, 1-2 hours.
- At this point, you can refrigerate the pita dough until it is needed. You can also bake one or two pitas at a time, saving the rest of the dough in the fridge. The dough will keep refrigerated for about a week.
Step 4. Divide the Pitas
- Gently deflate the dough and turn it out onto a lightly floured work surface. Divide the dough into equal pieces and gently flatten each piece into a thick disk. Sprinkle the pieces with a little more flour and then cover them with a kitchen towel or plastic wrap wrap until you’re ready to bake them.
Step 5. Shape the Pitas
- Using a floured rolling pin, roll one of the pieces into a circle 6 inches wide and about a quarter inch thick. Lift and turn the dough frequently as you roll to make sure the dough isn’t sticking to your counter. Sprinkle with a little extra flour if its starting to stick.
- If the dough starts to spring back, set it aside to rest for a few minutes, then continue rolling. Repeat with the other pieces of dough.
- Cover the dough pieces and shaped pita breads with a damp kitchen towel to prevent any chance of drying.
- Let the final shaped dough(dough disks) rest for 20-30 minutes or until they rise and puff slightly and gain their shape.
Step 6.Bake the Pita bread
We can bake the pita breads either in the oven or on the stove top
How to bake pita bread in the oven?
- Bake pita bread in the Oven: Before shaping the pitas, heat the oven to 450°. If you have a baking stone, put it in the lower rack of oven to heat. If you don’t have a baking stone, place an oven safe large baking sheet on the lower rack to heat (five minutes prior to baking).
- 3-4 pita breads can be fitted ,if you use half-sheet pans. Since we are going to bake one baking sheet at a time, we will need to roll and place the other pita discs on a baking paper/sheet .Cover the dough discs so that they don’t dry out.
- Once the oven reaches 450 Fahrenheit, place the baking sheet on the lowest rack and wait for another 5 minutes.(if you are using a baking stone,then we need to place it in the lowest rack of oven when we start preheating the oven).So we are ready to bake when our baking tray or the baking stone is hot.
- When ready to bake, gently lift a pita disc, with your fingers or a large spatula, and flip it onto the hot baking stone (if your stone is large enough you can bake more than one at a time).
- Flip the dough so that the side that was resting on the counter is now facing up. You want the the side that has been exposed to air (the dry side) to be down on the baking stone and the side that is more doughy and moist to be facing up – this helps the pita puff up. If you bake one or two and they aren’t puffing, spritz the top of the pita round with a light mist of water before baking.
Baking Temperature and Duration
- Bake at 450 F for 3-4 minutes. The bread should all puff up in the initial 3-4 minutes of baking. If not, bake for another minute. If at 5 minutes the bread still doesn’t puff up, your oven is probably not hot enough and you may want to increase the temperature to 500 Fahrenheit for the next batch.
- When the pitas are all puffed up, transfer the baking sheet to the middle rack or a higher rack (a little more closer to the heating coils) and bake for another 1-2 minutes, or until the bread turns golden brown.If we don’t take the pitas to the upper rack,then the pita’s won’t get browned and the longer they stay in the bottom rack,the pitas get harder.
- Remove the baked bread and wrap with a kitchen towel to keep them soft. Repeat the baking steps with the rest of the dough.
How to bake pita bread on the stove top?
- Warm a cast iron skillet over medium-high heat until a few bead of water sizzle immediately on contact. Drizzle a little oil in the pan and wipe off the excess.
- Lay a rolled-out pita on the skillet and bake for 30 seconds, until you see bubbles starting to form. Flip and cook for 1-2 minutes on the other side, until large toasted spots appear on the underside. Flip again and cook another 1-2 minutes to toast the other side. The pita should start to puff up during this time; if it doesn’t or if only small pockets form, try pressing the surface of the pita gently . Keep cooked pitas covered with a clean dishtowel while cooking any remaining pitas.
So now home made pita bread is ready:)
How do Pita bread puff up when baked?
It’s all about structure, moisture, and heat. When a thin disk of pita dough is placed on a hot surface in the oven, two things start to happen.
First, the intense heat starts to dry and set the dough on the top and bottom. At the same time, it begins to turn moisture in the center of the pita to a blast of steam.
When enough steam is generated, it builds pressure, pushing the pita out from the center and inflating it. Because the exterior has already started to set, though, it’s strong enough to resist rupturing, keeping that steam bubble trapped within.
So moisture inside the dough is the key!
How to store pita bread?
- Storing the Pitas: Pitas are best when eaten immediately after cooking.
- Leftover pitas will keep in an airtight bag for several days and can be eaten as they are or warmed in a toaster oven.
- Baked pitas can also be frozen with wax paper between the layers for up to three months.
Pita bread Recipe:Additional Notes
• Storing the Dough: Once it has risen, the pita dough can be kept refrigerated until it is needed. You can also bake one or two pitas at a time, saving the rest of the dough in the fridge. The dough will keep refrigerated for about a week.
• Pitas That Won’t Puff: Sometimes you get pitas that won’t puff. The problem is usually that the oven or the skillet aren’t hot enough. Make sure you pre-heated the skillet thoroughly before cooking. Pitas are delicious even if when they have not puffed up and can be used wraps or torn into pieces for dipping in hummus.
Simple tips to make best pita bread
- Knead the pita bread dough,until it is very soft and smooth.The more softer the dough,the more softer our pita bread will be.
- Be careful about not adding excess flour while kneading the dough
- The oven/skillet should be properly preheated.
Enjoy making the best pita breads at home 🙂

Pita Bread Recipe
Ingredients
- 1 Cup warm water (not hot or boiling)
- Half Tsp active dry yeast or instant yeast
- 2 Cups all-purpose flour
- 3/4 Cup whole wheat flour
- 1 Tsp salt
- 1 Tbsp sugar
- 1-2 Tsp olive oil (optional)
Instructions
- Form the Pita Dough: Mix the water ,sugar and yeast together, and let sit for about five minutes until the yeast get activated. Add 2 3/4 cups of the flour , salt, and olive oil . Stir until a shaggy dough is formed.
- Knead the Dough: Sprinkle a little of the extra flour onto your clean work surface and turn out the dough. Knead the dough for about 6-8 minutes, until the dough is smooth and elastic. Add more flour as needed to keep the dough from sticking to your hands or the work surface, but try to be sparing. It's better to use too little flour than too much. If you get tired, stop and let the dough rest for a few minutes before finishing kneading.
- Let the Dough Rise: Clean the bowl you used to mix the dough and film it with a little olive oil. Set the dough in the bowl and turn it until it's coated with oil. Cover with a clean dishcloth or plastic wrap and let the dough rise until it's doubled in bulk, 1-2 hours.At this point, you can refrigerate the pita dough until it is needed. You can also bake one or two pitas at a time, saving the rest of the dough in the fridge. The dough will keep refrigerated for about a week.
- Divide the Pitas: Gently deflate the dough and turn it out onto a lightly floured work surface. Divide the dough into equal pieces and gently flatten each piece into a thick disk. Sprinkle the pieces with a little more flour and then cover them with a kitchen towel or plastic wrap wrap until you're ready to bake them
- Shape the Pitas: Using a floured rolling pin, roll one of the pieces into a circle 6 inches wide and about a quarter inch thick. Lift and turn the dough frequently as you roll to make sure the dough isn't sticking to your counter. Sprinkle with a little extra flour if its starting to stick. If the dough starts to spring back, set it aside to rest for a few minutes, then continue rolling. Repeat with the other pieces of dough. Let the final shaped dough(dough disks) rest for 20-30 minutes or until they rise and puff slightly and gain their shape.
- Bake Pita bread.Bake pitas in the Oven: While shaping the pitas, heat the oven to 450°. If you have a baking stone, put it in the oven to heat. If you don't have a baking stone, place a large baking sheet on the middle rack to heat.Place the rolled-out pitas directly on the baking stone or baking sheets (as many as will fit), and bake for about 3-4 minutes. I've found it easiest to carry the pita flat on the palm of my hand and then flip it over onto the baking stone. The pita will start to puff up after a minute or two and when it has fully ballooned,Take it on to a higher rack(closer to the heating coils) and then bake for 1-2 minutes until they brown. Cover baked pitas with a clean dishtowel while cooking any remaining pitas.To Bake Pitas on the Stovetop: Warm a cast iron skillet over medium-high heat until a few bead of water sizzle immediately on contact. Drizzle a little oil in the pan and wipe off the excess.Lay a rolled-out pita on the skillet and bake for 30 seconds, until you see bubbles starting to form. Flip and cook for 1-2 minutes on the other side, until large toasted spots appear on the underside. Flip again and cook another 1-2 minutes to toast the other side. The pita should start to puff up during this time; if it doesn't or if only small pockets form, try pressing the surface of the pita gently . Keep cooked pitas covered with a clean dishtowel while cooking any remaining pitas.
- Enjoy the best homemade pita breads!
Kayanga Sauya
Sunday 13th of October 2024
Wow I didn't know I can make it without oven and I missed it so much. Now I tried it and see how amazing it turned out OMG. Thanks
Bincy Chris
Sunday 20th of October 2024
My pleasure. So happy to hear you made this pita bread and it turned out really well.
Um mansoora
Wednesday 5th of April 2023
In qatar,which brand of whole wheat flour are you using ? And also in your whole wheat bread video ,which brand of whole wheat did u use. From nuaija qatar. Thanks
Bincy Chris
Wednesday 5th of April 2023
I have used QFM whole wheat flour in whole wheat bread video; it has more gluten and is ideal for making bread.Honestly I don't remember which brand is used for making Pita bread.I think it is Mantra Organic whole wheat flour.
Andy
Friday 19th of February 2021
Absolutely amazing recipe. Tried it several times and its perfect every time. Thank you for such a superb recipe.
Bincy Chris
Saturday 20th of February 2021
Hi Andy,I am so happy to hear you made this pita bread several times and they turned out really well.Thank you so much for sharing your feedback and for rating this recipe.
WHOLE WHEAT DINNER ROLLS RECIPE | MerryBoosters
Friday 28th of August 2020
[…] Softest Pita Bread Recipe […]
Easy Rosemary Focaccia Bread Recipe | MerryBoosters
Monday 10th of August 2020
[…] Softest Pita Bread Recipe […]