This Danish Custard Pastry Recipe will help you make Delicious Pastries which are flaky outside and fluffy inside and is filled with creamy custard in the center; without the hassle of traditional techniques.
If you’ve ever wanted to make bakery-style Danish Custard Pastry at home, but felt intimidated by the long laminating process, chilling steps, and endless folding—this recipe is for you!


Unlike classic Danish pastry which usually requires:
- Laminating dough with multiple butter folds
- Overnight proofing
- Hours of chill time
—this version keeps things fast and accessible.
With just 1 minute of light kneading, no complicated lamination, and no waiting overnight, you can prepare fresh, golden Danish pastries in just a few hours. Yes, you can make the dough and bake on the same day!
Whether you’re an enthusiastic home baker or just starting out, this recipe delivers beautiful results with minimal effort!


This Danish Pastry Recipe is adapted from the original, Super Easy Croissant Recipe, which will make wonderful flaky croissants at home.
Amazon Associate link disclosure: We’re part of the Amazon Services LLC Associates Program, which means we earn a small commission when you click and shop through our links—at no extra cost to you. As always, I only recommend things we truly use and love!
Why You’ll Love This Danish Custard Pastry Recipe
- No laminating required – No rolling and folding the dough multiple times!
- No multiple proofing – Only one proofing step before baking.
- Quick kneading – Just one minute of gentle kneading to bring the dough together.
- Make and bake on the same day – No need for overnight chilling.
- Perfect texture – Flaky, Buttery, light, on the outside, fluffy inside filled with creamy custard and sweet and sour fruit jam in the centre.
This method simplifies the entire Danish Pastry-making process while keeping the flavor and texture absolutely delicious.
Ingredients for making Danish Custard Pastry
You’ll only need basic ingredients that you probably already have at home.
For Pastry Sheet
- All-purpose flour: 400 g or 3 cups + 1.5 tbsp
- Milk (room temperature): 260 ml or 1 cup + 1.5 tbsp
- Butter: 180 g – 200 g
- Sugar: 3 tablespoons (45 g)
- Salt: 1/2 teaspoon or 3 g
- Active dry yeast: 1 teaspoon or 3 g
For Vanilla Custard Cream
- Milk: 240 ml or 1 cup
- Sugar: 50 g or 1/4 cup
- Egg: 1 gg + 1 egg yolk
- Corn Starch/ Plain Flour: 10g or 1 tbsp
- Salt :1/8th tsp or 1 pinch
- Vanilla Extract:2.5 ml or 1/2 tsp
- Butter: 15 g or 1 tbsp
For the egg wash
- 1 egg lightly beaten
How to make Danish Pastry
You can make it in 4 simple steps
- Prepare the pastry sheet
- Shape the Danish Pastry
- Proof the Danish Pastry
- Bake the Danish Pastry
Step 1: Prepare the Pastry Sheet
This is the most important part of the recipe. The pastry sheet is what gives this loaf its rich, layered, croissant-like texture.
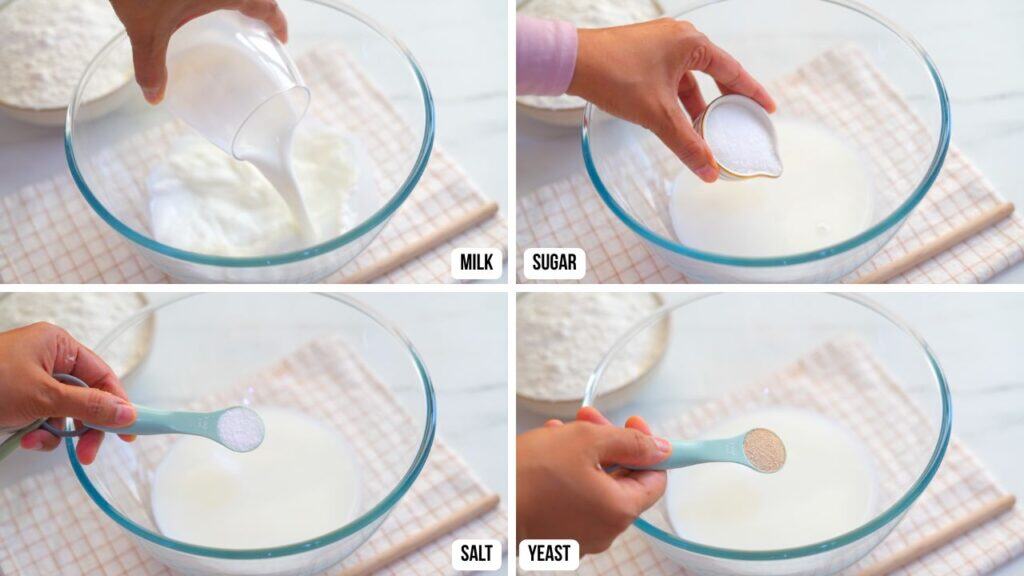
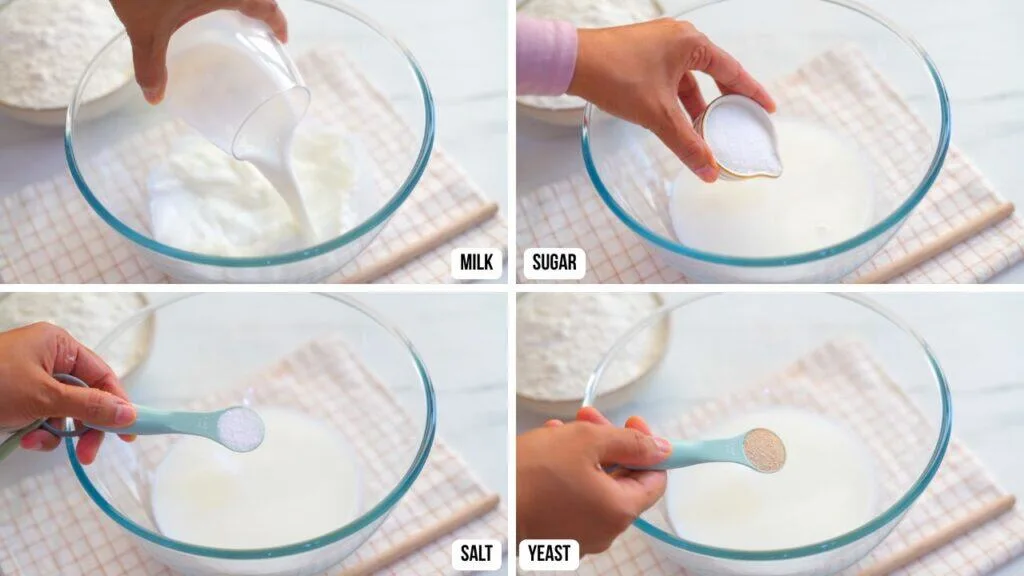
1. Make the Dough
In a large bowl, pour in the room temperature milk. Add sugar, salt, and yeast, and stir well until everything dissolves.
Next, add the flour and mix until it comes together into a shaggy dough.
Now, knead gently for about 1 minute, just until you get a smooth, soft dough without lumps or dry spots. You don’t need to over-knead or test for the windowpane stage — this dough is meant to be easy!
This dough isn’t very sticky, so you’ll find it quite manageable.
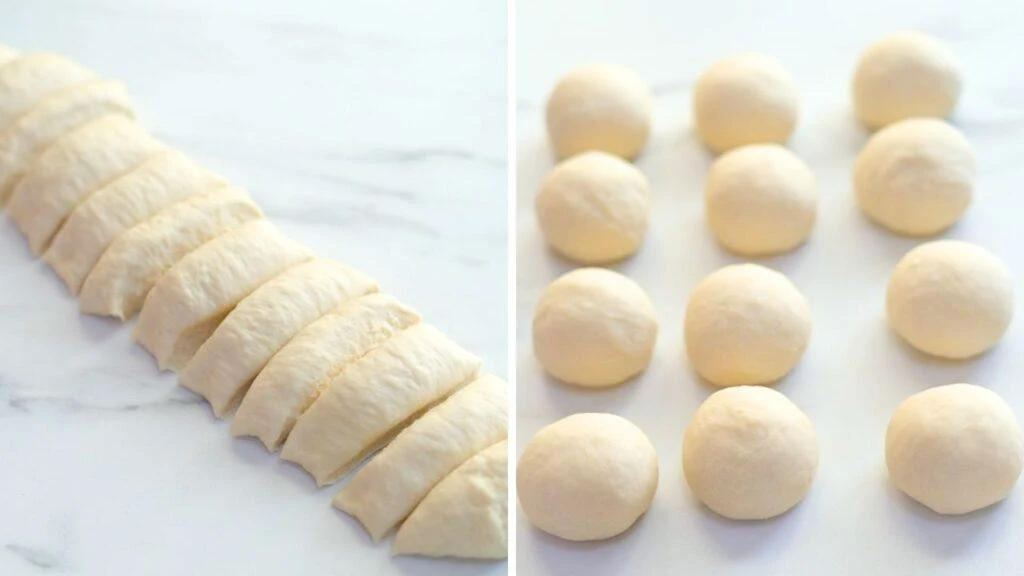
Roll and form it into a log shape.


2. Divide and Shape the Dough Balls
Divide it into 12 equal pieces. Roll each piece into a smooth ball.

Cover the dough balls with a damp kitchen towel and let them rest for around 15 minutes.
This short resting time relaxes the gluten, making it easier to roll them out later without the dough shrinking back.
3. Flatten and Layer with Butter
After the resting time, take one dough ball and roll it out into a disc about 16–18 cm in diameter and about 2 mm thick.
Spread about 1 tablespoon of butter evenly on the surface of the disc.
Then place it on a plastic film or parchment sheet.

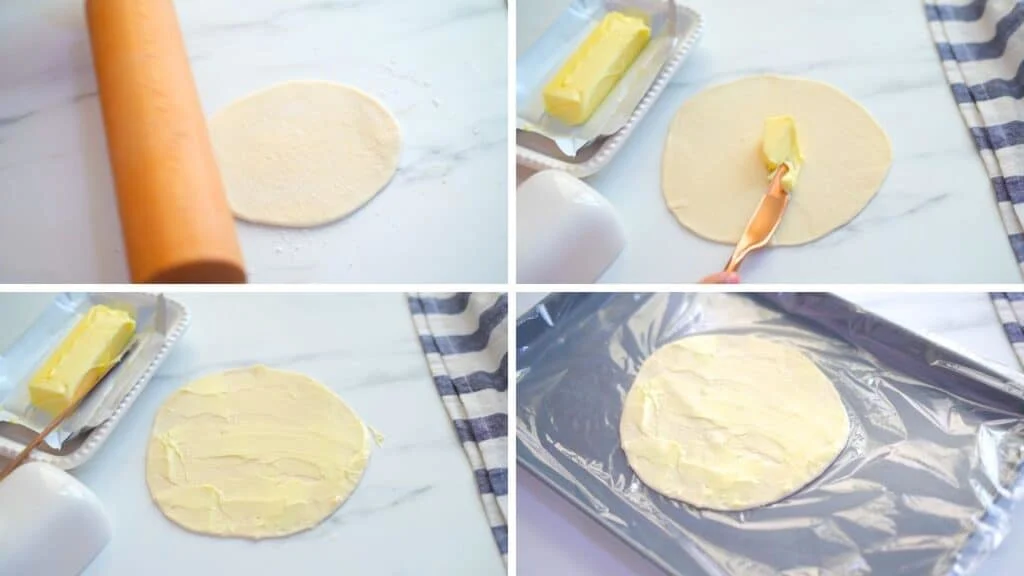
Repeat the process for the remaining dough balls, stacking each buttered disc on top of the previous one.
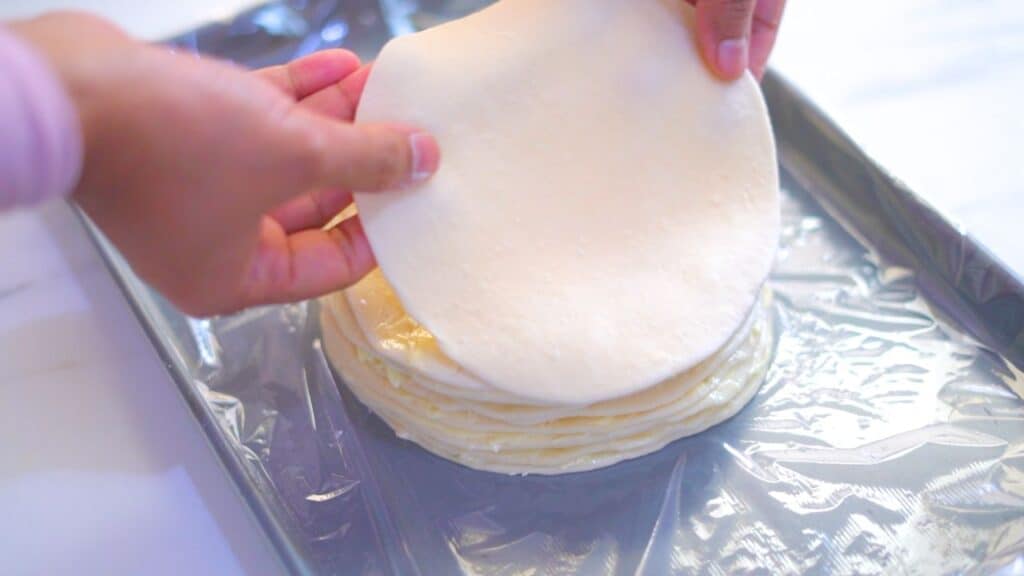
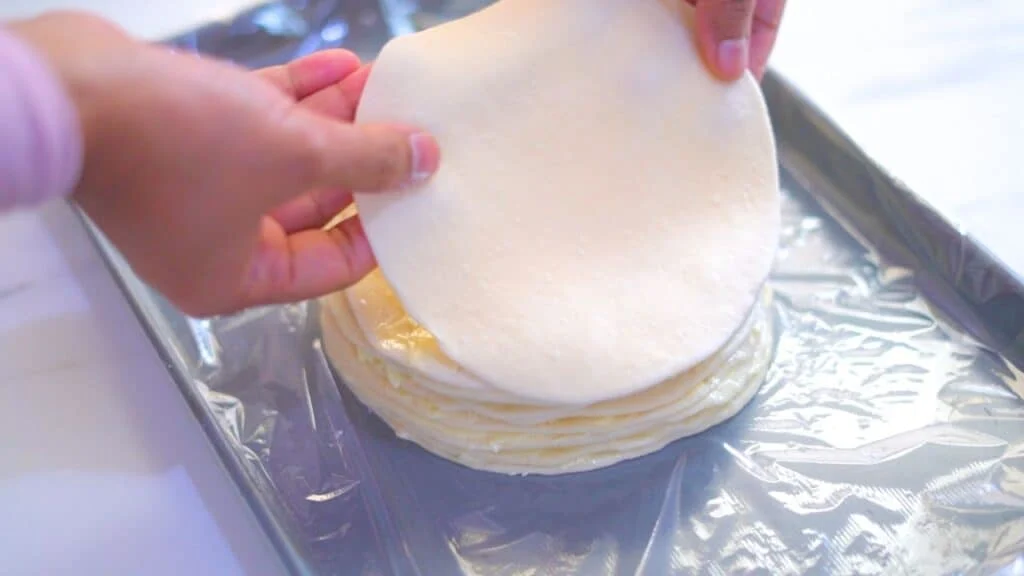
Once all discs are stacked and buttered, cover the pile with cling film.

I watched the clock to see how long it would take me to make this pastry stack. And the layering process took only 34 minutes.
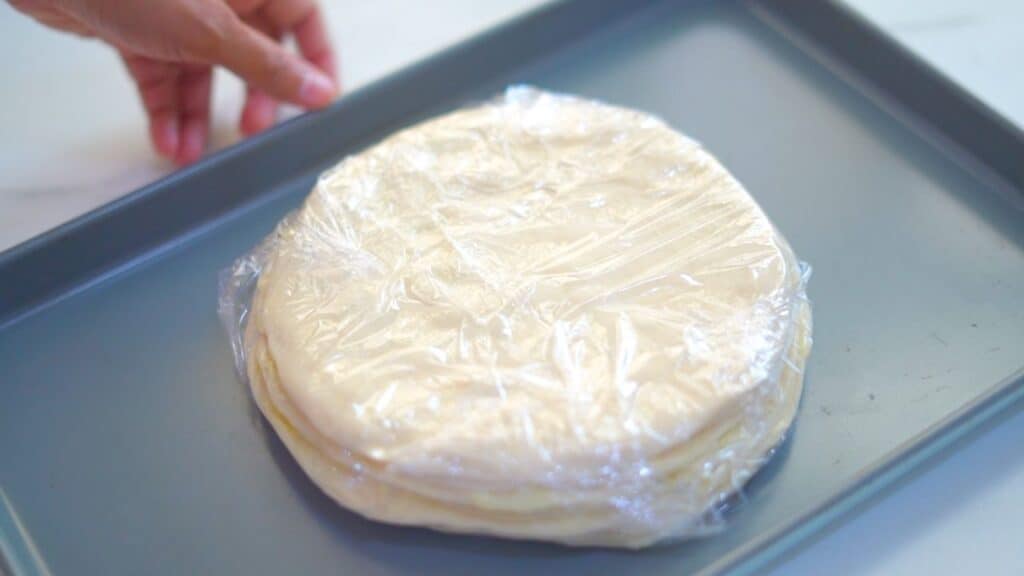
4. Freeze the Dough Stack
Since the butter will be soft, it’s important to firm it up before shaping.
Place the stacked dough in the freezer for 30–35 minutes until the butter becomes slightly firm and pliable.
This step ensures that when you roll out the dough later, the butter stays inside as neat layers instead of melting out.
Step 2: Shape the Danish Pastry
After the stacked dough has chilled and the butter is firm, take it out from the freezer.
Roll the stack into a rectangular sheet about 1/4 cm thick (12 x 16 inch rectangle). Trim off the edges to form straight ends.


This Danish Custard Pastry recipe is sufficient to make 12 medium sized delicious pastries.
Using a knife or pizza cutter, cut the dough into squares of 4 inch size.
Now, fold corners slightly(as in video) towards the centre.
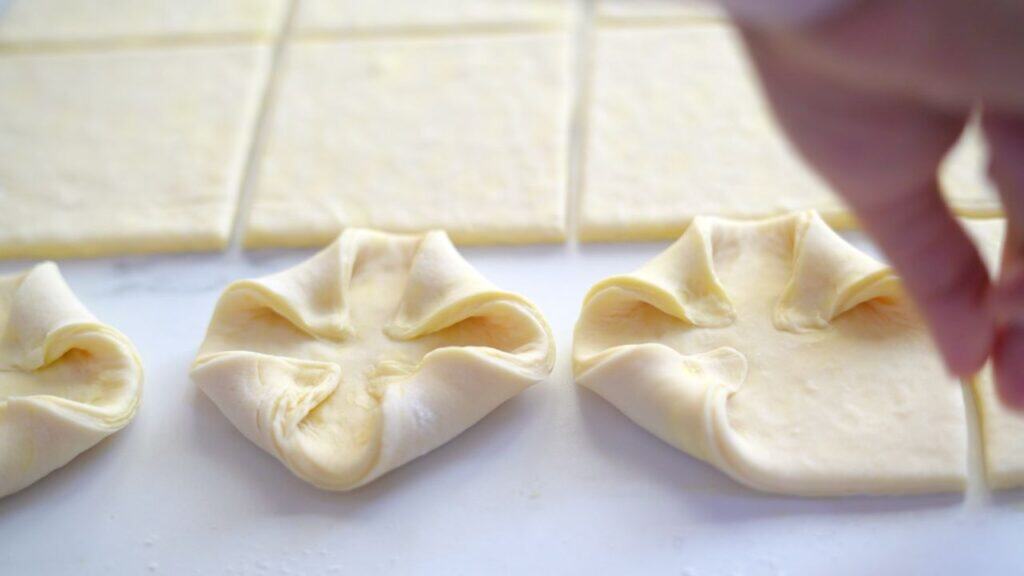
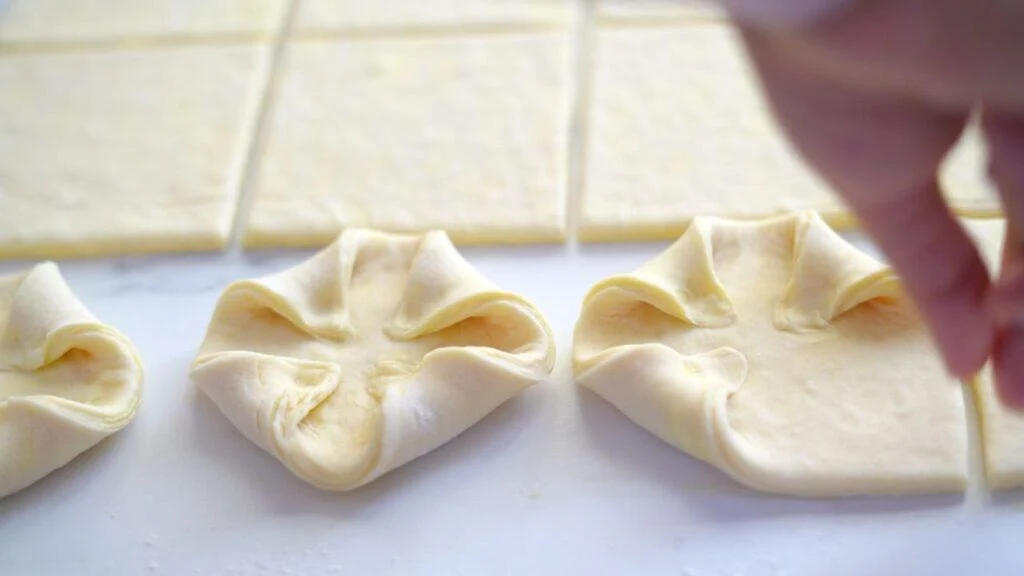
Place them on to the baking tray. When you are done with all of them, cover the tray with cling film and let them rise a little.

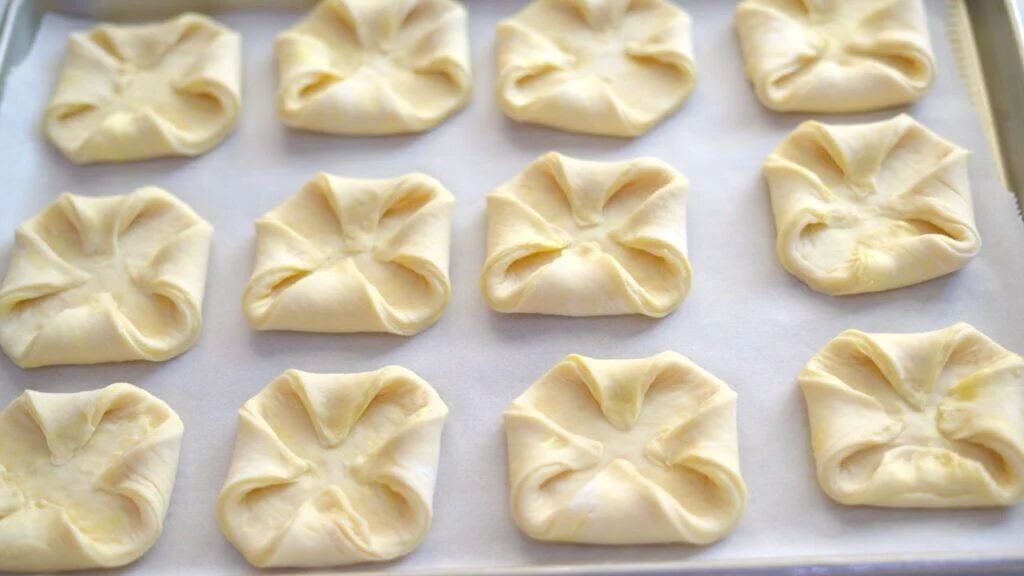
Step 3: Proof the Dough
Cover the shaped Pastries with a plastic wrap and let it proof for around 1 hour, or until it rise a little and looks puffy. We don’t want them proof well and get a bread-like texture.
The time can vary depending on your room temperature,(in warm temperature it will rise fast and in colder environment it may take slightly longer) so keep an eye on the dough sheet rather than the clock.
Step 4: Bake the Danish Custard Pastry
Once the Pastry square has risen, brush the top with egg wash (lightly beat one egg ). This helps create that beautiful golden-brown shine after baking.


Prick the center of each pastry square with a fork to prevent it from puffing up while baking.
Fill the center of each pastry with custard cream and then with some fruit jam or fresh berries or fruits(optional).


Bake the Danish Pastry in a preheated oven at 375°F (190°C) for about 35 minutes.
You’ll know it’s done when the top is deep golden brown.
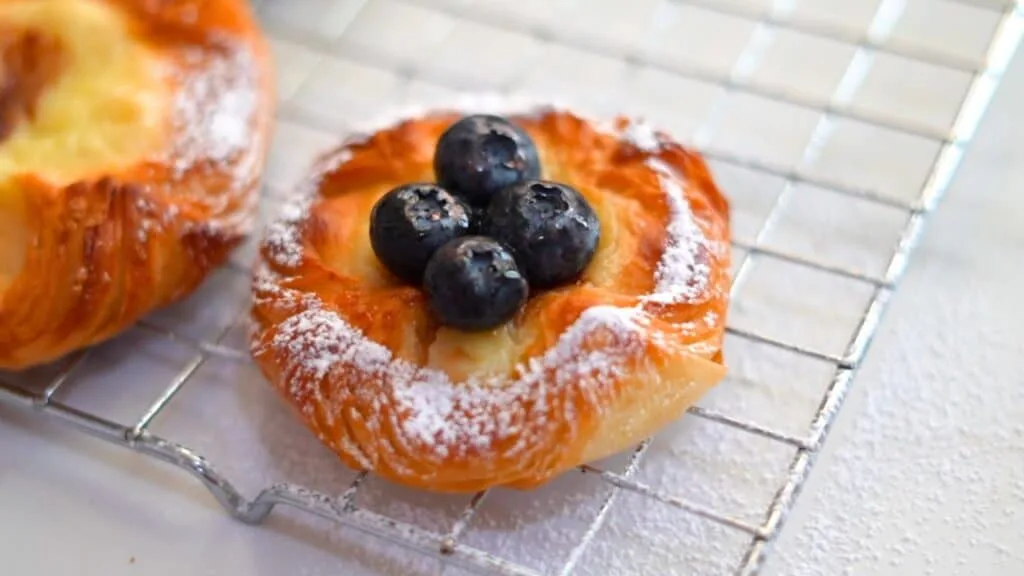
After baking, remove the pastries from the oven and transfer it to a wire rack to cool completely.
They have beautifully flaky crust and they are soft and fluffy inside and if filled with creamy vanilla custard with sweet and sour strawberry jam in the center.
These Danish Custard pastries are best to serve while they are just cooled down.


How to make Vanilla Custard Cream
Into a small bowl, add the sugar, salt, corn starch, egg and egg yolk.
Mix and combine until you get a smooth, lump-free paste.
Pour in a little hot milk slowly to lighten the mixture while stirring continuously to avoid scrambling the eggs.
Then pour this mixture back into the saucepan with the remaining milk and cook over medium heat.
Keep whisking until the custard starts to thicken and large bubbles form.
Remove from heat and add vanilla extract and butter.
Whisk again until you get a smooth and glossy cream.
Let it cool before using.
I have adapted this custard cream pastry recipe from our Classic French Vanilla Custard Cream Recipe.
Enjoy Homemade Danish Custard Pastry
This Homemade Danish Pastry Recipe is proof that you don’t need to be a professional baker to make bakery-quality pastry at home.
With minimal kneading, no laminating, and no overnight waiting, you can enjoy all the rich, buttery goodness of Danish Pastry — ready in just a few hours.
So next time you crave a Flaky, buttery Pastry but don’t want to spend an entire day folding and chilling dough, try this simplified Danish Custard Pastry Recipe. You’ll be amazed by how easy and delicious it is!
Whether you’re making them for Sunday brunch, Christmas morning, or just a cozy treat with tea—this recipe is a keeper. Once you try it, you’ll never go back to store-bought pastries again.

Step By Step Video: How to make Danish Pastry
Serving Ideas
- Brush with simple syrup after baking for a bakery-style shine.
- Sprinkle powdered sugar on top.
- Add fruit toppings like berries or peaches.
- Drizzle with vanilla icing.
- Add almond flakes for crunch.
How to Store Danish Custard Pastry
Room Temperature
- Keep in airtight container for up to 24 hours.
Refrigerated
- Store up to 3 days in the fridge.
Freezer
- Freeze baked pastries for up to 2 months.
- Wrap individually to prevent freezer burn.
How to Reheat
| Method | Time | Notes |
|---|---|---|
| Oven (recommended) | 8–10 min @ 160°C | Restores crisp layers |
| Air Fryer | 5–6 min | Quick & easy |
| Microwave | 15–20 sec | Soft texture, not crisp |


Tips for Success
- Don’t overproof – pastries should only puff slightly.
- Keep butter cool but spreadable.
- Use a sharp knife for clean cuts.
- Avoid overfilling custard to prevent leakage.
You can, but milk gives better softness and flavor.
Yes—use milk wash instead for a matte finish.
You didn’t rest the dough enough. Next time, rest 15 minutes.
Yes! After stacking discs, freeze up to 2 weeks. Thaw 15 minutes before rolling.


Danish Custard Pastry Recipe (Spandauer)
Ingredients
Pastry Sheet
- 400 g All-purpose flour or 3 cups + 1.5 tbsp
- 260 ml Milk (room temperature) or 1 cup + 1.5 tbsp
- 180 g Butter 180-200 g
- 45 g Sugar 3 tablespoons
- 3 g Salt 1/2 teaspoon
- 3 g Instant yeast 1 tsp
Vanilla Custard Cream
- 240 ml Milk or 1 cup
- 50 g Sugar or 1/4 cup
- 2 Egg 1 egg + 1 egg yolk
- 10 g Corn Starch/ Plain Flour or 1 tbsp
- .75 g Salt 1/8th tsp or 1 pinch
- 2.5 ml Vanilla Extract or 1/2 tsp
- 15 g Butter or 1 tbsp
Egg wash
- 1 Egg Lightly beaten
Instructions
Prepare the Pastry Sheet
- Make the DoughIn a large bowl, pour in the room temperature milk. Add sugar, salt, and yeast, and stir well until everything dissolves.Next, add the flour and mix until it comes together into a shaggy dough.Now, knead gently for about 1 minute, just until you get a smooth, soft dough without lumps or dry spots. You don’t need to over-knead or test for the windowpane stage — this dough is meant to be easy!This dough isn’t very sticky, so you’ll find it quite manageable.Roll and form it into a log shape.
- Divide and Shape the Dough BallsDivide it into 12 equal pieces. Roll each piece into a smooth ball.Cover the dough balls with a damp kitchen towel and let them rest for around 15 minutes.
- Flatten and Layer with ButterAfter the resting time, take one dough ball and roll it out into a disc about 16–18 cm in diameter and about 2 mm thick.Spread about 1 tablespoon of butter evenly on the surface of the disc.Then place it on a plastic film or parchment sheet.Repeat the process for the remaining dough balls, stacking each buttered disc on top of the previous one.Once all discs are stacked and buttered, cover the pile with cling film.
- Freeze the Dough StackSince the butter will be soft, it’s important to firm it up before shaping.Place the stacked dough in the freezer for 30–35 minutes until the butter becomes slightly firm and pliable.This step ensures that when you roll out the dough later, the butter stays inside as neat layers instead of melting out.
Shape the Danish Pastry
- After the stacked dough has chilled and the butter is firm, take it out from the freezer.Roll the stack into a rectangular sheet about 1/4 cm thick (12 x 16 inch rectangle). Trim off the edges to form straight ends.This Danish Custard Pastry recipe is sufficient to make 12 medium sized delicious pastries.Using a knife or pizza cutter, cut the dough into squares of 4 inch size.Now, fold corners slightly(as in video) towards the centre.Place them on to the baking tray. When you are done with all of them, cover the tray with cling film and let them rise a little.
Proof the Dough
- Cover the shaped Pastries with a plastic wrap and let it proof for around 1 hour, or until it rise a little and looks puffy. We don’t want them proof well and get a bread-like texture.The time can vary depending on your room temperature,(in warm temperature it will rise fast and in colder environment it may take slightly longer) so keep an eye on the dough sheet rather than the clock.
Bake the Danish Custard Pastry
- Once the Pastry square has risen, brush the top with egg wash (lightly beat one egg ). This helps create that beautiful golden-brown shine after baking.Prick the center of each pastry square with a fork to prevent it from puffing up while baking.Fill the center of each pastry with custard cream and then with some fruit jam or fresh berries or fruits(optional).
- Bake the Pastry in a preheated oven at 375°F (190°C) for about 35 minutes.You’ll know it’s done when the top is deep golden brown.After baking, remove the pastries from the oven and transfer it to a wire rack to cool completely.These Danish Custard pastries are best to serve while they are just cooled down.
How to make Vanilla Custard Cream
- Into a small bowl, add the sugar, salt, corn starch, egg and egg yolk.Mix and combine until you get a smooth, lump-free paste. Pour in a little hot milk slowly to lighten the mixture while stirring continuously to avoid scrambling the eggs. Then pour this mixture back into the saucepan with the remaining milk and cook over medium heat. Keep whisking until the custard starts to thicken and large bubbles form. Remove from heat and add vanilla extract and butter. Whisk again until you get a smooth and glossy cream. Let it cool before using.
Video
Notes
- Don’t overproof – pastries should only puff slightly.
- Keep butter cool but spreadable.
- Use a sharp knife for clean cuts.
- Avoid overfilling custard to prevent leakage.