
Easy Homemade Biscuits without Buttermilk (30 minute Biscuit)
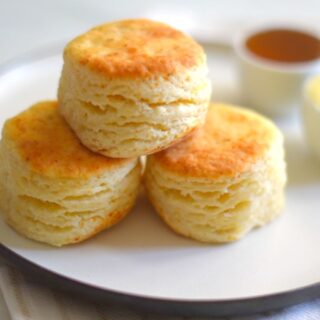
This Super Easy Homemade Biscuits without buttermilk, will help you make the best biscuits that are soft and fluffy and tastes delicious!
These quick and easy homemade biscuits are full of flaky layers and perfect for slathering with butter and honey.
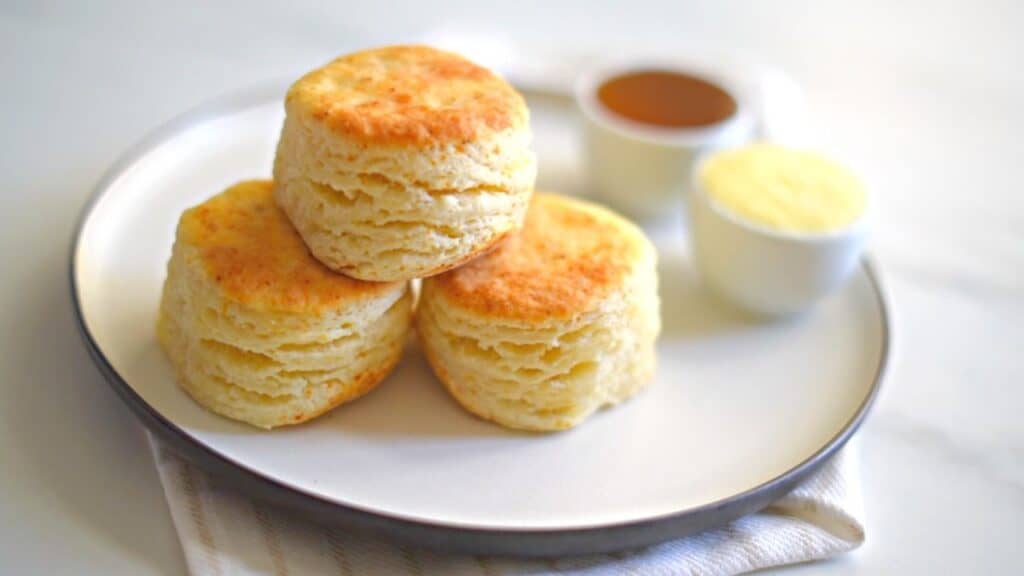
What you will love about this Easy Homemade Biscuits Recipe without buttermilk
- These homemade biscuits have flaky layers and at the same time soft and fluffy texture.
- To make this Easy Biscuits, you will need only six basic ingredients!
- You can make this fluffy homemade biscuits in less than 30 minutes!
- This quick biscuits dough can be made in 5 minutes!
- You don't need to do any prior preparations to make this flaky biscuits.
- No resting, cooling or freezing time and so you can save a lot of your time!
Ingredients needed for making Quick and Easy Homemade Biscuits
- All-purpose flour : 270 g or 2 cups loosely packed
- Salt : 3 g or ½ teaspoon
- Unsalted butter :85 g or 6 tbsp
- Sugar: 12.5 g or 1 tbsp
- Baking powder :8 g or 2 tsp
- Milk :180 ml or ¾ cup
How to make Fluffy Homemade Biscuits without buttermilk
You can make this Quick and Easy 30 minute Biscuits with no buttermilk in Four Simple Steps!
1.Prepare the Biscuits dough
Into a bowl, add in the flour, sugar,salt and baking powder.
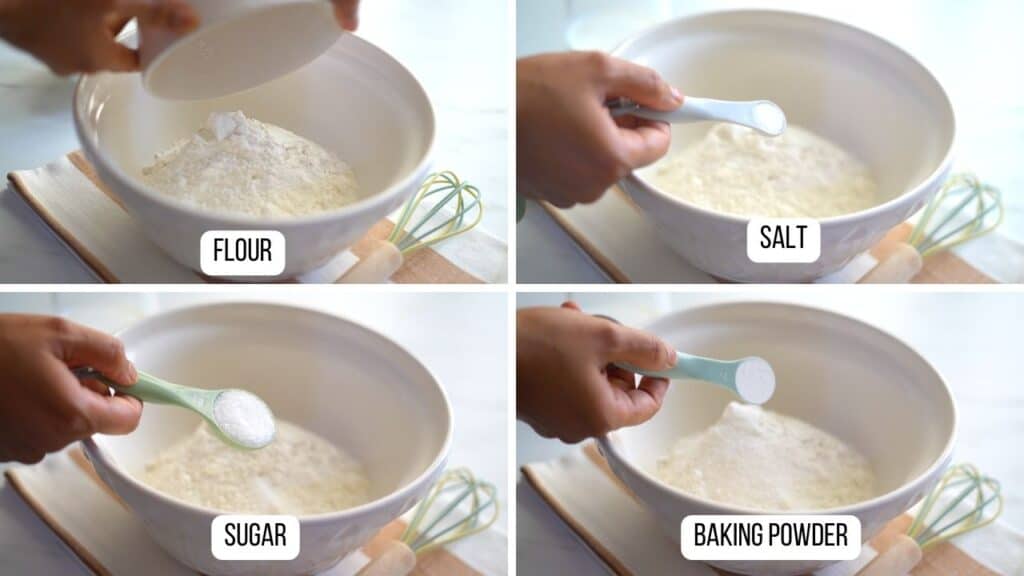
Stir and combine everything together using a whisk, until all our ingredients get evenly distributed in the flour.
Now add the butter into the flour.
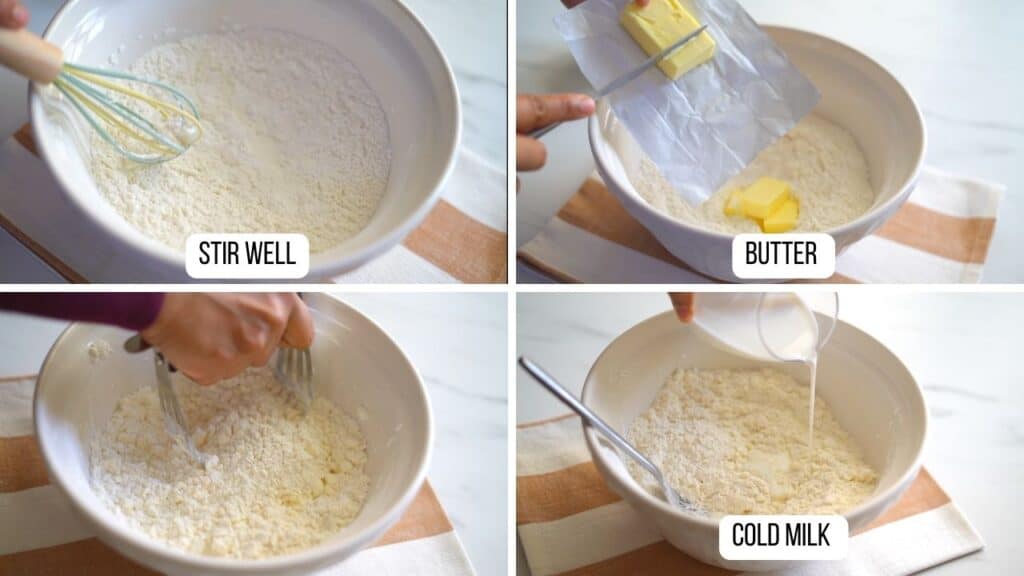
I took the butter out from refrigerator and used it.We don't want it very cold like how we make Apple turnovers dough.
As an experiment,I have tried using room temperature butter, in this same homemade biscuits recipe.
Both times the biscuits turned out great.
Toss the butter in flour.
And now we need to get small pea sized butter pieces homogeneously distributed in the flour.
I am using a pastry cutter to do this; which makes the process so much easier.
We can also do this with the help of two forks.
Or you can grate frozen butter with a box grater and then stirring it into the flour mixture.
Incorporate the butter into the flour and stop when you can see, small pea sized pieces of butter is evenly distributed in the flour.
Add cold milk, in three or four batches into the flour mixture and, using a fork, gently toss and stir together until large lumps form and all of the flour has been moistened.
The biscuits dough should be doughy and not crumbly as our flaky pastry dough.
2.Build the flaky layers
Transfer the dough on to a lightly floured work surface.
Using hands, squish the dough from sides and form a dough ball.
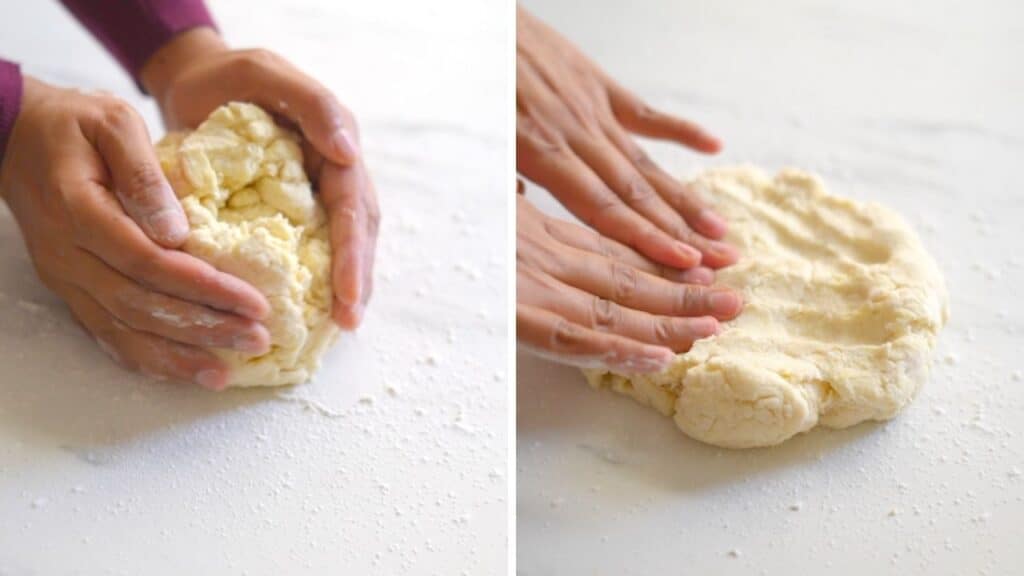
Again squish and pat from top to form a small rough square.
We need to be as gentle as we can while handling the dough.
I am not using a rolling pin to do this step because when we do this with hands it gives a rough finish and lighter texture to our biscuits.
We don't want to squish it in such a way that there is no airspace and it turn in to a dense sheet.The dough may not look perfect in the beginning ,and that's okay.
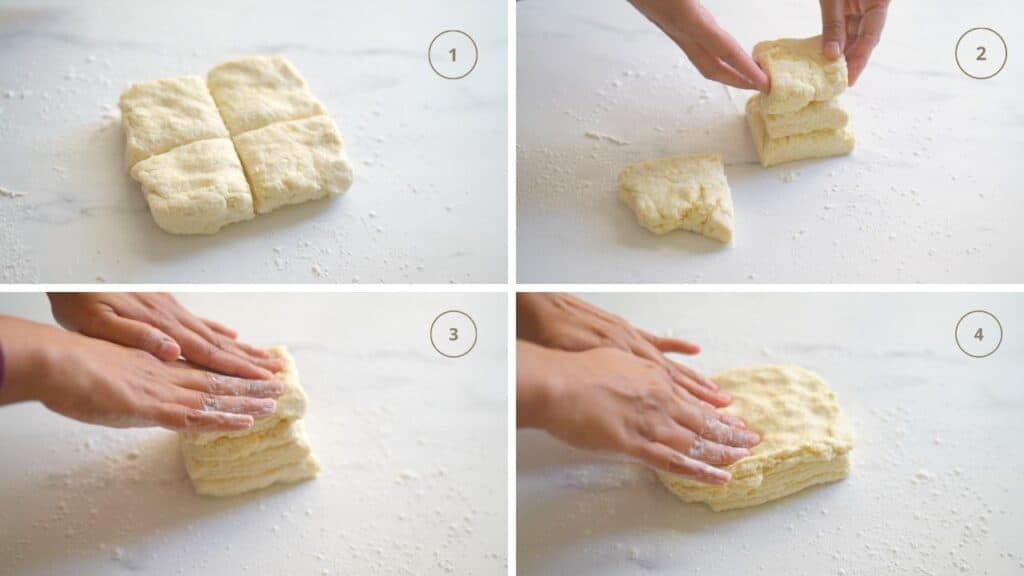
Now using a bench scraper, cut the dough into 4 equal parts.
Stack them one over the other.
Squish and pat again to form a rough square.
Again cut into 4 parts and stack them one over the other and then form a flat sheet of approximately 1 inch thick.
3.Cut the biscuits
Use Biscuit cutter or a wide mouth glass jar to cut the biscuits.
I used a small 2 ¼ inch round cookie cutter.In this way, we can make around 8 biscuits.
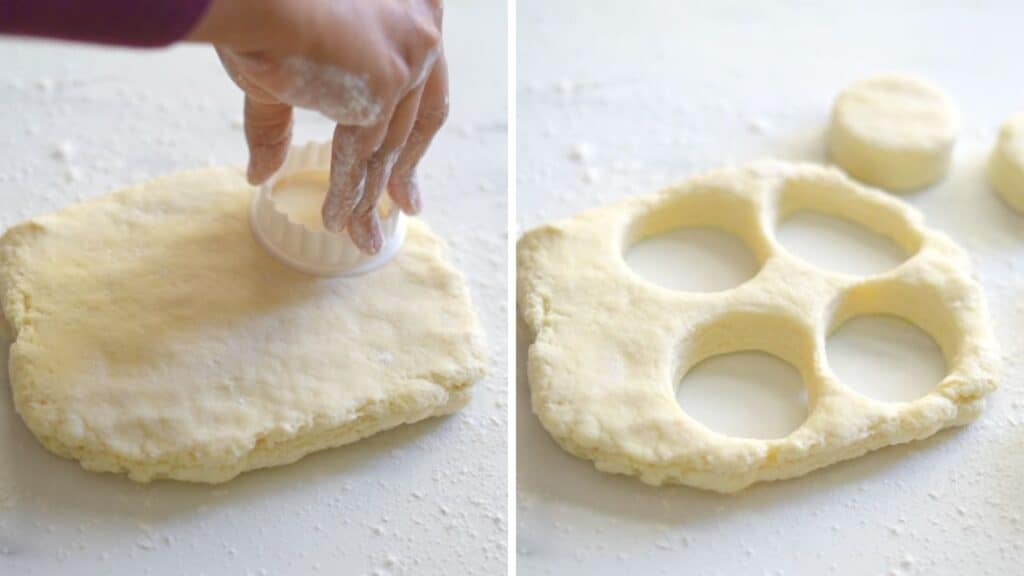
We can stack the remaining pastry dough ,squish and pat again to form dough sheet.
Place the cut biscuits on to a cast iron skillet.
It's not necessary to grease the cast iron pan with butter.
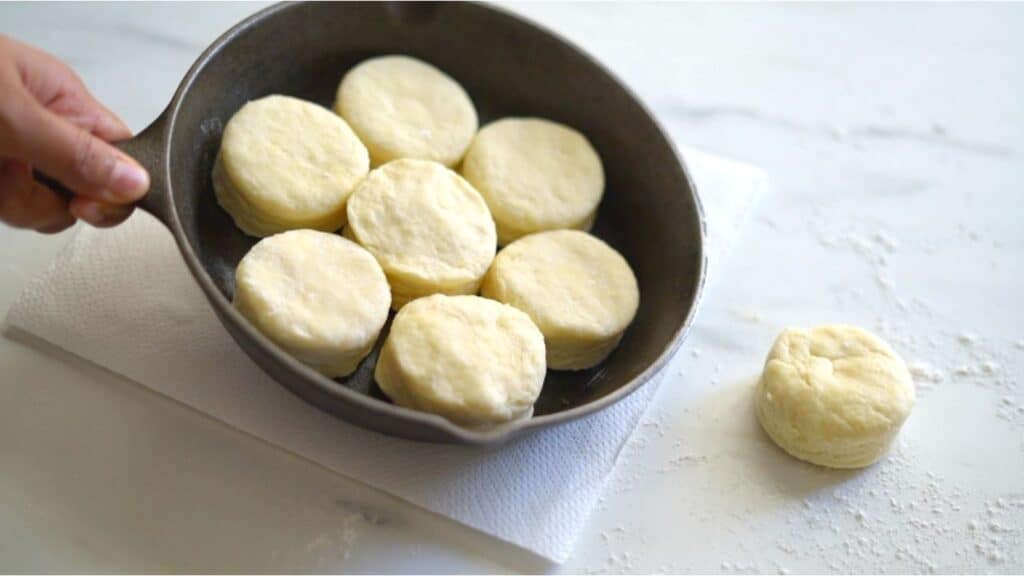
We can also use a regular baking tray.It is better to use smaller tray as we can arrange them closer.When we arrange them closer, they can rise straight and tall while baking.
4.Bake the biscuits
Place the cast iron skillet on to 450 degrees F or 230 C Preheated oven and bake for around 14 minutes or until they turn golden brown on top.
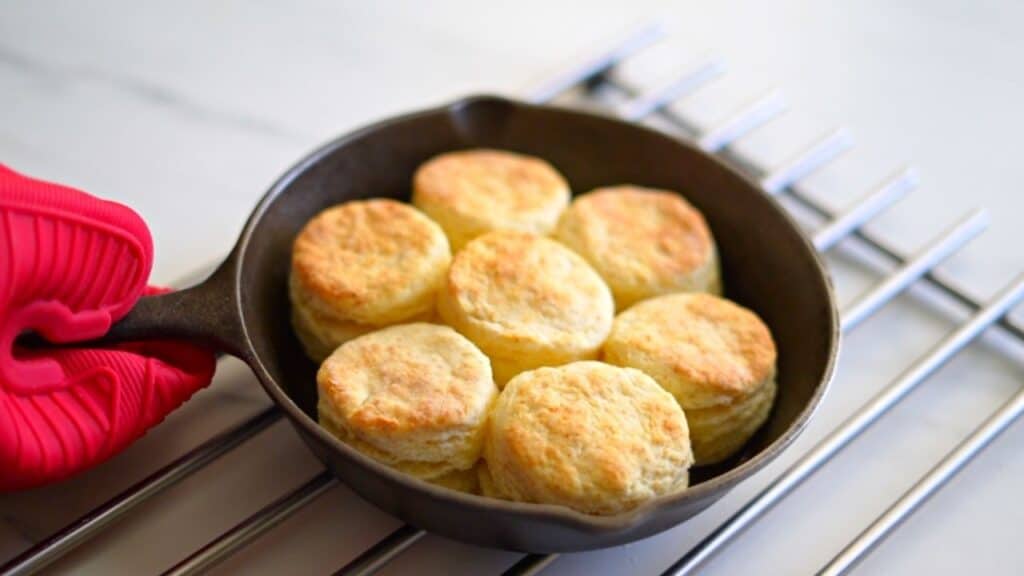
If you are using a regular baking tray, we need slightly lesser baking temperature.
So place the baking tray on to 425 degrees F or 220 C Preheated oven and bake for around 16 minutes or until they turn golden brown on top.
When the biscuits are completely baked, take them out from the oven.
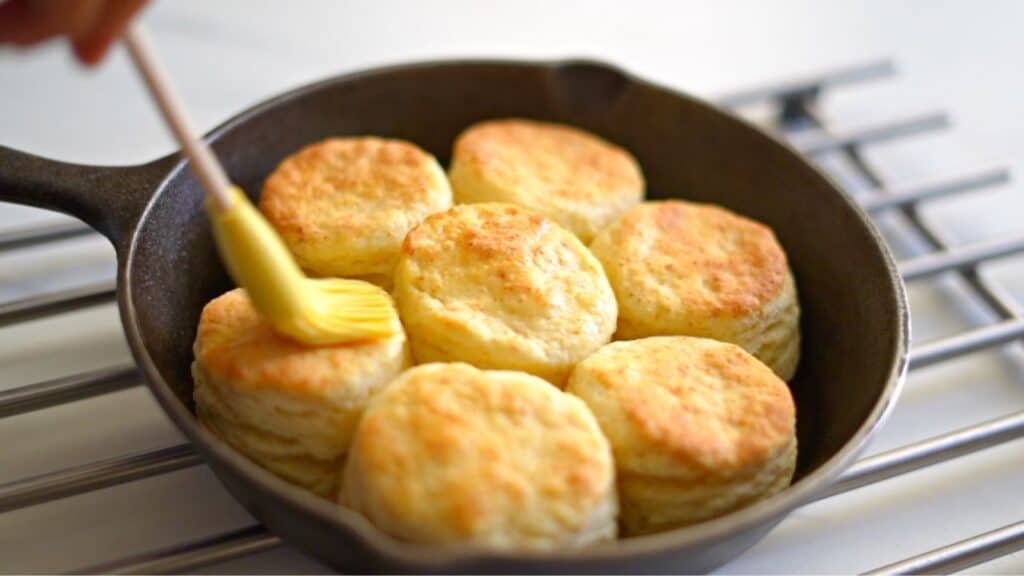
Apply the baked biscuits with some butter on top, so that they turn even more softer.
Do you need to keep the baking tray in refrigerator before baking?
No you don't need to keep the baking tray in refrigerator before baking the biscuits.
Unlike making a flaky puff pastry dough, this easy biscuits recipe uses 2 teaspoons of baking powder.
So you can place the baking tray directly into the oven without any fear of butter melting and resulting in a pool of butter.
The leavening agent will come to action the moment our biscuits get heated up in the oven.
How to serve Homemade Biscuits
Biscuits are perfect for ,dipping, dunking and smothering, so there are plenty of delicious ways to serve them!
You can serve plain fresh and warm biscuits with spreads like honey butter, peanut butter, nutella, cream cheese, or fruit jam.
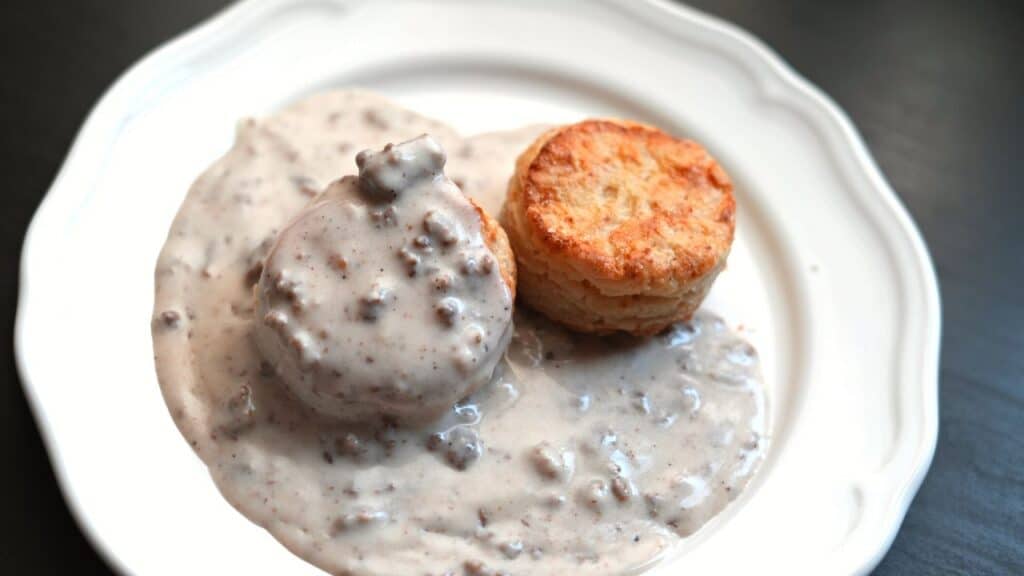
Homemade biscuits can be served with side of sausage gravy, stew ,meatballs, corn pudding and fried chicken.
For breakfast, we can make sandwich with some cheese, scrambled eggs and ham or bacon.
Can You use Buttermilk in this easy homemade biscuits recipe
Yes you can use buttermilk instead of milk.
If you plan to use buttermilk instead of milk in this simple biscuits recipe, add an extra ½ teaspoon of baking soda.
Since buttermilk is thicker than regular milk, you may need slightly more buttermilk to get the dough to the right consistency. You will find an extra tangi flavor when you add buttermilk instead of milk.
Why do you need to arrange the biscuits next to each other while they bake
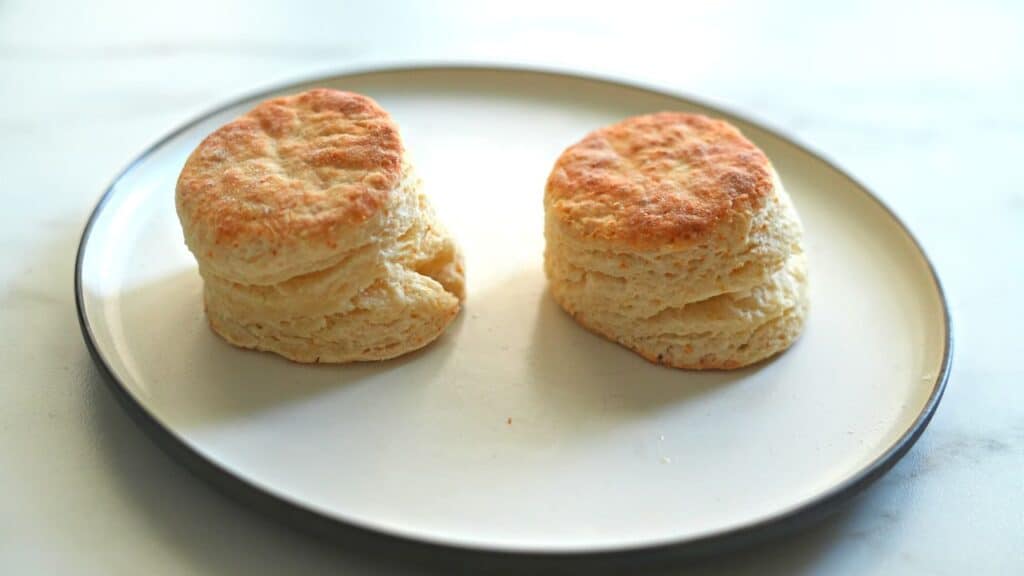
The purpose of biscuits touching each other while baking is just to help them rise straight and tall.They will cling a little bit while baking.So the support of the biscuit near will prevent any side ward bending.
Not a big problem ,but we can prevent this just by placing them closer.
When I tried baking biscuits using a regular baking tray, as there was more space, I arranged them separated.
The Biscuits cannot rise upwards and slant while rising.
Can You make flaky Pastry modifying this southern fluffy biscuits recipe
Yes you can! It is interesting to see how these very similar recipes make very different baked goods with a slight differences in the amount of ingredients and difference in the baking temperature and texture of butter.
Just by,
- reducing the amount of baking powder and milk, and
- by keeping the butter very cold and
- Keeping the biscuits thinner and
- the biscuits cold before taking into the oven,
- Baking a little longer
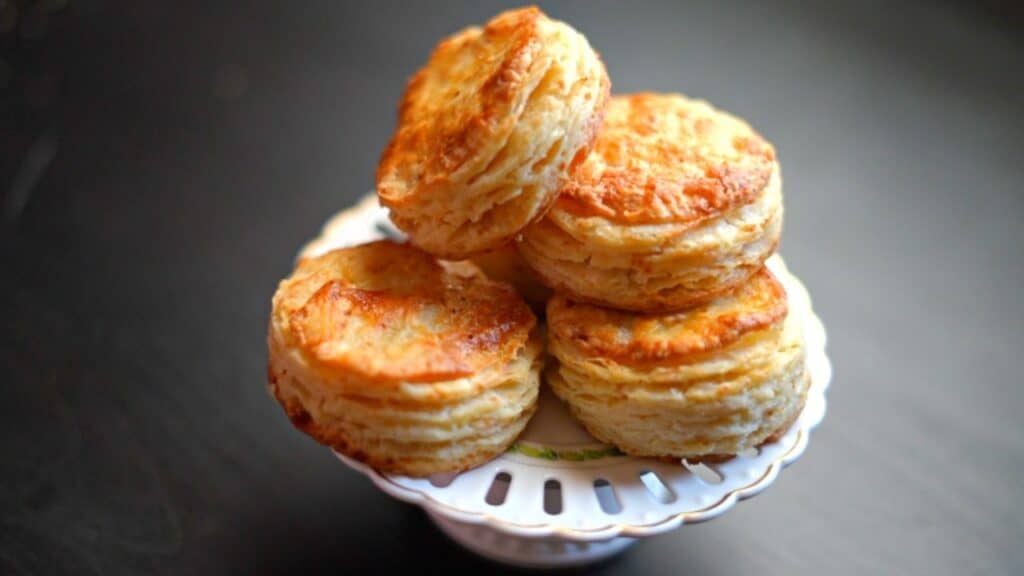
You can turn these biscuits into flaky pastry or flaky biscuits pastry.
You can watch the video on how to make easy flaky pastry here
Step by step VIDEO :Super Easy Homemade Biscuits without buttermilk
Easy Homemade Biscuits without buttermilk
Ingredients
- 270 g All-purpose flour or 2 cups loosely packed
- 3 g Salt or ½ teaspoon
- 85 g Unsalted butter or 6 tbsp
- 12.5 g Sugar or 1 tbsp
- 8 g Baking powder or 2 tsp
- 180 ml Milk or ¾ cup
Instructions
Prepare the Biscuits dough
- Into a bowl, add in the flour, sugar,salt and baking powder.
- Stir and combine everything together using a whisk, until all our ingredients get evenly distributed in the flour.Now add the butter into the flour.I took the butter straight from the fridge and used it.
- Toss the butter in flour.
- And now we need to get small pea sized butter pieces homogeneously distributed in the flour.I am using a pastry cutter to do this; which makes the process so much easier.We can also use forks to do this. Stop when you can see, the butter is evenly distributed in the flour. Add cold milk, little by little into the flour mixture and, using a fork, gently toss and stir together until large lumps form and all of the flour has been moistened.
Build the flaky layers
- Transfer the dough on to a lightly floured work surface.Using hands, squish the dough from sides and form a dough ball.
- Again squish and pat from top to form a small rough square.We need to be as gentle as we can while handling the dough.I am not using a rolling pin to do this step because when we do this with hands it gives a rough finish and lighter texture to our biscuits.
- Now using a bench scraper, cut the dough into 4 equal parts.Stack them one over the other.Squish and pat again to form a rough square.Again cut into 4 parts and stack them one over the other and then form a flat sheet of approximately 1 inch thick.
Cut the biscuits
- Use Biscuit cutter or a wide mouth glass jar to cut the biscuits.I used a small 2 ¼ inch round cookie cutter.In this way, we can make 8 biscuits.
- We can stack the remaining pastry dough ,squish and pat again to form dough sheet.Place the cut biscuits on to a cast iron skillet.It’s not necessary to grease the cast iron pan with butter.
- We can also use a regular baking tray.It is better to use smaller tray as we can arrange them closer.When we arrange them closer, they can rise straight and tall while baking.
Bake the biscuits
- Place the cast iron skillet on to 450 degrees F or 230 C Preheated oven and bake for around 14 minutes or until they turn golden brown on top.
- If you are using a regular baking tray, we need slightly lesser baking temperature.So place the baking tray on to 425 degrees F or 220 C Preheated oven and bake for around 16 minutes or until they turn golden brown on top.When the biscuits are completely baked, take them out from the oven.
- Apply the baked biscuits with some butter on top, so that they turn even more softer.

04/06/23; 12-Noon..
I made the 30-minute biscuits and they turned out fantastic 👏. I watched the video over and over while visiting in Florida. The wait, was well worthwhile. Just like the instructions, turned out great. Thank you for your help!
Sincerely,
LarryD
Hi Larry, I am so happy to hear you made this biscuits and they turned out really well.Thank you so much for taking your time to write back me and for rating this recipe.
I made these for my grandsons and they disappeared within minutes. Delicious and very easy to make,
Lovely!Hi Janine, I am so happy to hear you made this biscuits for your grandsons and they enjoyed.Thank you for taking your time to share your feedback with us.
Wow these were AMAZING!! Just perfect, and I made some special ones I cut out of the remnants of dough with a bone shaped cookie cutter for the dogs. We all thought we'd died and gone to heaven. 🙂 Thanks so much for the buttermilk free recipe. I never have that on hand!
Awesome!Hi Tammy,So happy to hear you all enjoyed.Thank you so much for taking your time to write back me and for rating this recipe.
Thank you for using metric measures. I live in Melbourne Australia. Enjoy good USA food and the use of metric measurements makes the recipe much easier. I wish all USA recipes would have this feature.
I am a young baker and I love all your recipes because I am a baker you are awesome
This is a quick and easy recipe that I will use when I don't have buttermilk. Great baking tips as well.
What an easy and straightforward recipe. I was happy to find a recipe for biscuits without buttermilk since I didn’t have any on hand! These are great.
Thank you.I am so glad you liked the recipe.
Hi Bincy,
Thanks to you for the lovely recipes. I follow your recipes which are easy, well explained and always give excellent resulta.
Today I am baking the biscuits/scones. Am sure they will turn out wonderful.
My pleasure.
Hi Sriprakash, I am so happy to hear you enjoy my recipes.Hope you made this biscuits and they turned out really well.
My son asked for biscuits to accommodate our dinner. I found your recipe and they turned out fantastic! Easy ingredients and instructions. The family said they tasted better than the store bought kind. I’m so glad I found your recipe. ❤️
Over the years I have searched for that perfect “no buttermilk biscuit recipe” and this is it y’all! I have made this recipe twice and each time they turned out great and delicious!
Thanks so much, I can’t wait to try out more of your recipes!
These are phenomenal!!! So easy and turned out perfect the first try!
Hi Sabrina, I am so happy to hear you enjoyed.
These biscuits turned out amazing! I love how simple and fast they are to make. Thank you for sharing
I'm so glad you enjoyed them and that you found the recipe quick and easy to make.Thank you for sharing your feedback with us.
Well, I wasn't expecting much as I am not a "good" biscuit maker. Well, with the thorough instructions & video, I finally made not just a good biscuit, but a great biscuit! It was easy to follow (& make) with ingredients I had on hand. I was just looking for something to fill the starch void at dinner but ended up with a recipe I'll make over & over. I will definitely check out your other recipes after trying this one.
Hi Sabrina,
I’m so glad to hear that! It means a lot that the recipe helped you feel more confident—and that you ended up with a "great" biscuit! Hope you enjoy exploring the other recipes just as much!
I just made these today. I used whole wheat flour and they turned out great!
Hi Sharon, I am so happy to hear you made this biscuits and they turned out really well.
Amazing recipe! Biscuits came out so fluffy and melt right in your mouth!
Hi Shaina, I am so happy to hear you enjoyed the biscuits.
My first time making biscuits because I never have buttermilk on hand.I just made a half batch. I got 4 biscuits and they were easy and delicious! Thank you for posting this!
That's Wonderful! Hi Janie, I am so glad you enjoyed the biscuits.
great recipe! But the bake time for me is 40 minutes at 220C
thanks for sharing!!!
Today was the first time I made biscuits. Your recipe was simple, I had all the ingredients on hand and they were delicious! Sending you sunshine from Hawai’i(:
That makes my day! So glad the biscuits turned out delicious. Sending sunshine right back to Hawai’i
These were amazing! My boys and I made the recipe, and they were gone in one sitting. So simple, and I will definitely not be using frozen biscuits anymore!!!
Hi Rebekah,
That’s wonderful to hear! 😊
Nothing beats homemade, especially when it’s a hit with the kids. I’m so glad you all enjoyed it, and thank you for sharing your experience!
Made in a muffin tin bc it was my only clean tray 🥲
Only had to add a minute to the baking time and they turned out AMAZING for some breakfast sliders
Thank you for this recipe
Love that you made it work with what you had, and I’m so happy they turned out great. Thanks a ton for trying the recipe and for sharing your feedback with us.