This Rustic Bread Recipe will help you make the best homemade artisan bread which has an amazing flavor and texture.
In this crusty white bread recipe I tried to make the process simple and my intention is to help you make the best bread with the least effort as possible.
We make use of adding a preferment in this artisan bread recipe which brings wonderful flavor to our bread.
The method does not need more work from our side but it needs more “time” to do their own work.So the main ingredient that we need for making this crusty white bread or this basic artisan bread is “Time“.
If you are busy and you want to make rustic bread from straight dough in more easy way, we have excellent recipes that makes great bread too.
You can check this Rustic Artisan Bread made from straight dough.In the step by step video,I have shown how to make no knead bread in a Dutch oven and how to make crusty bread even without a dutch oven.
One of the most favorite bread recipes in our blog is the Easy No knead Artisan Ciabatta Bread,which is also made from straight dough.Though the ciabatta bread recipe did not use any preferment like biga or poolish, you can achieve great open crumb texture due to the brilliant shaping that we use while making the bread.
We also have No knead cranberry walnut bread recipe which has a crunchy crust and delicious soft crumb inside; which also uses easy straight dough method.
What you will love about this Rustic Bread Recipe
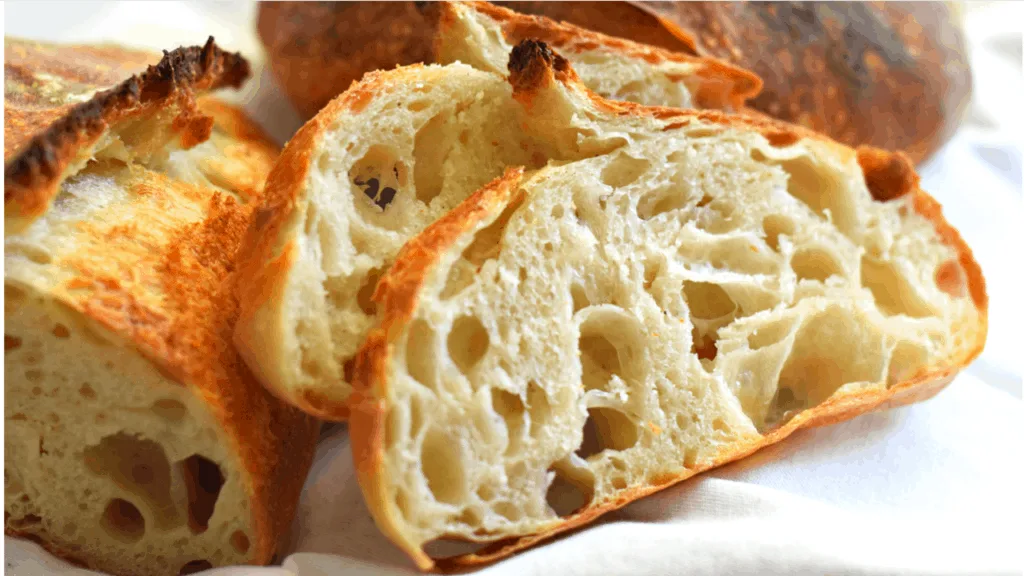
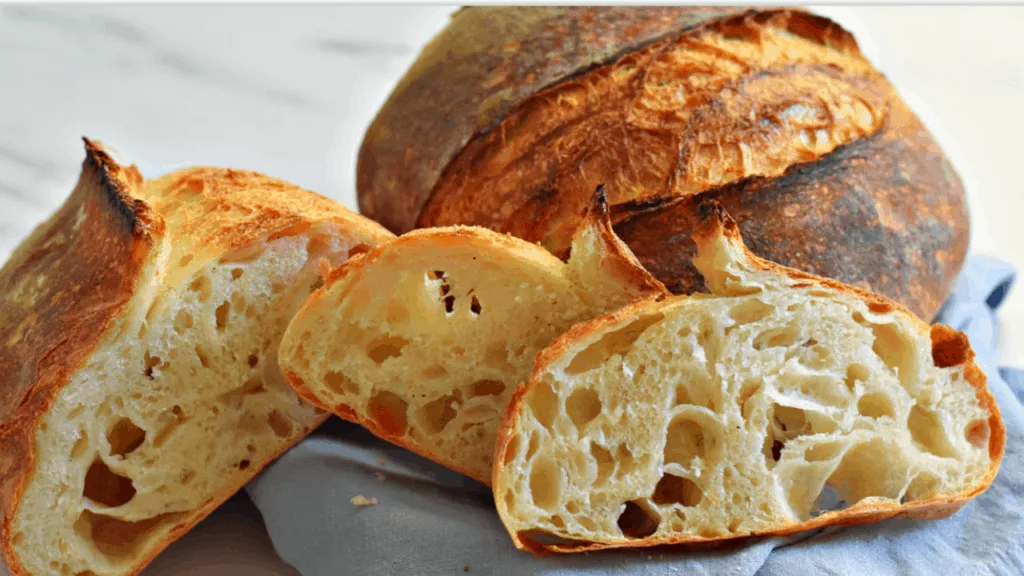
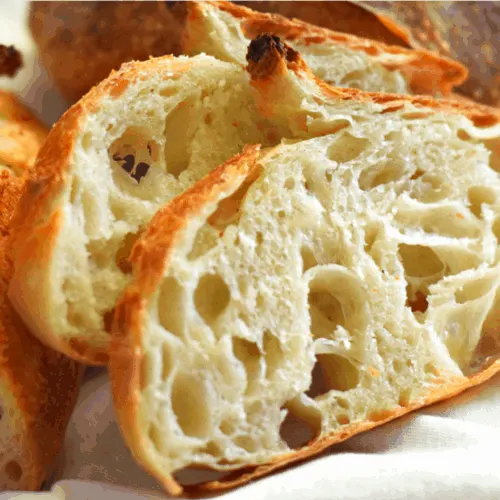
- The taste and texture of this artisan bread is so incredible:it has a unique flavor and, soft and chewy open crumb, that you will love.
- It is super easy to make this Artisan Rustic Bread;you don’t need to do heavy kneading
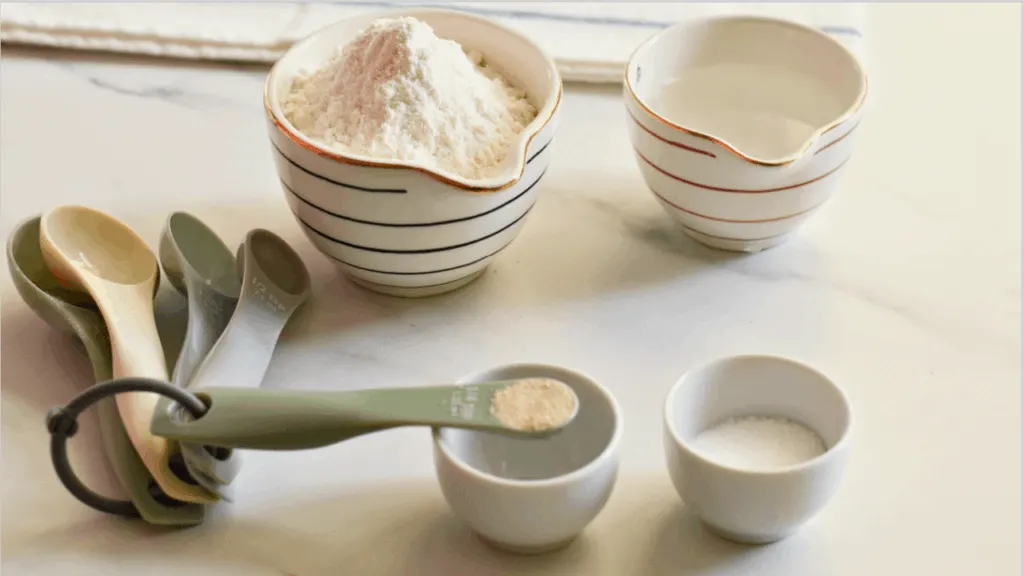
- You will need only four basic ingredients to make this amazing crusty white bread
- The real hands on time for making this Homemade Artisan Bread is less than 15 minutes

What is Rustic Bread
The term Rustic Bread is a very relative term.
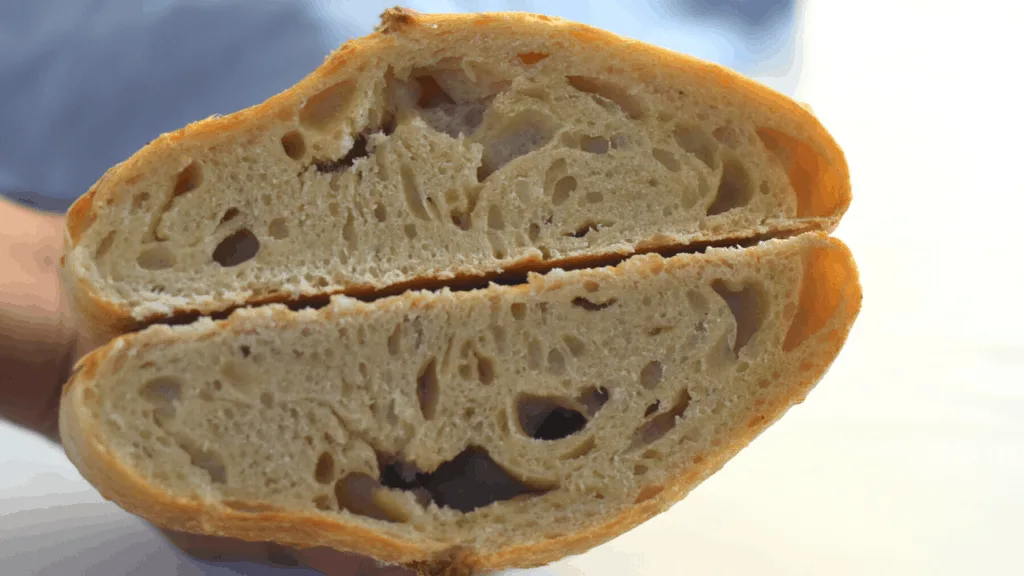
For me, a rustic bread is a bread that has a heavy crust, an open texture, and a delicious flavor.
It is made with fewest ingredients ;Flour ,water, salt and a leavening agent a starter, either a wild yeast starter, such as sourdough, or a “biga” or “poolish”
To get delicious flavor to a rustic bread or a crusty bread usually it requires a long fermentation.
For that we add a starter to our bread dough.
What is a starter in Bread Baking
A starter is usually a simple mixture of wheat flour, water, and a leavening agent (typically yeast or some sourdough culture). After mixing, it is allowed to ferment before it’s added to the final dough.
Pre-ferments or starters are important to have the best tasting bread.
They can be called starters, biga, poolish, or preferments. They only differ from each other by water content.
What is the difference between poolish and biga
Biga and poolish are types of pre-ferments used in Italian and French baking respectively.
Poolish, the wetter one, where flour and water are added in almost 1:1 ratio.
Biga is more of a thick preferment as it uses less amount of water, somewhere between 70-80 percent.
Why we need to use biga or poolish in a bread recipe
There are two main reasons why I love making bread with a starter or preferment.
- The flavor and texture of a bread make with a starter like biga or poolish is so incredible and it’s almost impossible to achieve with other leavening methods.
- Bread made with starters like poolish and biga also tends to keep better, compared to bread made from straight doughs.
What is the demerit of this method
The disadvantage of adding a preferment to a bread recipe is that it can be time-consuming to make.
It also requires some advanced planning as you have to plan ahead of time in order for it to be ready when you need it.

Rustic Bread :Ingredients
For making the Starter or Preferment
- Flour :320 g
- Water :224 ml
- 2 Pinches of instant yeast which is around .1 g
For the Bread Dough
- Flour :80g
- Water :56 ml
- Salt :7g
- Yeast:1/4 tsp or .8g

How to make this Homemade Artisan Bread with Biga
To make this Rustic Bread, first we need to prepare our starter or biga.
I like to prepare it towards the evening(around 5 PM) so that we can start making the real bread dough in the morning (around 9 AM).
1.Prepare the Biga
Into a bowl add in the water and 2 pinches of yeast.
It is hard to weigh it and most easiest way of expressing this amount will be slightly less than 1/12 tsp
Stir and dissolve it in water.
Now add the flour and combine together to form a dough.
Make sure there are no dry patches left behind.
Cover the bowl with a cling film and let it sit and ferment overnight.
We can use the biga or starter that’s been fermented anywhere between 10-16 hours(for the best results)
What Will happen If I use a biga that has fermented for 24 hours
While testing the Recipe,I have tried making bread using the preferment that has fermented for upto 24 hours at room temperature(28C)
The bread was flat and didn’t get oven spring .The bread has a close crumb texture.
Even when I used “24 hour” biga,I could not notice a sour taste or acidity in the baked bread.(The weather is hot here where I live and the inside temperature is set to 28 C)

Can I use Bread flour and All purpose flour interchangeably in this rustic bread recipe
Yes you can different types of flour(But the water absorbing power of different flours may differ ;I have noticed difference in behavior even when we use same type of flour but different brands)
So, understand the flour and we may need to adjust the hydration a little (+/_ 1bsp)
I tested this recipe using bread flour and all purpose flour.
Usually I make bread using all purpose flour as it is more conveniently available for most of us.
But this time, for testing this Rustic Bread Recipe I thought of trying it with both kinds of flour.
What I noticed is that all purpose flour absorbed more water and I found the measurements just perfect when working with all purpose flour.
I noticed a difference in how the dough behaved while doing the overnight fermentation.
The bread flour which contain more proteins fermented faster than all purpose flour.
And as a result,15 hour fermented “bread flour and “all purpose flour” ,looked a little different.
15 hour fermented Bread flour turned more liquid and the “all purpose flour” retained the structure more.
So what I inferred is that bread flour will get ripened fast and so if you are using bread flour instead of all purpose flour,either
- work one two hours before than that is needed in case of all purpose flour.
- or add 1 tablespoon extra bread flour than all purpose flour while preparing the biga.
And I also found it’s its better go by understanding the dough than by time.
What is the best time to use preferment like biga or poolish
I find the best time to use biga is when the starter is dome shaped or when the rise is at its peak; and just before the dough starts to collapse or before bubbles start to form.I found it around 12-15 hours is the best time to use the starter.
I have only worked with two different types of flour (All purpose flour from QFM and Enriched,Unbleached unbromated Bread flour from Gold Medal ) while testing this rustic bread recipe .I think flour from different brands may perform slightly differently which is not a big issue in this Rustic bread recipe made with biga.
2.Prepare the Bread Dough
In a small bowl ,add the water ,yeast ,salt and flour.Mix and combine to form a shaggy mass of dough.
Now incorporate this dough with the preferment.
Make sure its combined well enough that there are no lumps left and it’s a homogenous dough.
If you want to use a stand mixer you can use it at this point, which will make the process much easier.
Now cover the dough and let it sit and rise.
3.First Proofing (2 hours)
During this Proofing time we need to strengthen the dough.
For that we will do 1 round of “stretch and fold” in 45 minutes and then another “layering of dough sheet” in another 45 minutes
After 45 minutes of proofing, let’s do stretching and folding the dough to strengthen the gluten in the dough.
Just pull and stretch the dough and then fold it onto itself.Repeat the same on all four sides.
Cover it and leave it to rise for another 45 minutes.
Flip the dough on to a wet surface and stretch the dough to form a rectangular sheet of dough.
Fold the dough from bottom and top 1/3 rd and then again fold it as shown in video.
By now our dough has got a good texture.
Transfer this dough onto a well greased container.
Now cover the dough and let it rise for another 30 minutes.

How to test if our dough has enough gluten strength
Bread dough needs to be elastic, and it’s a good idea to test the dough for gluten strength before you go ahead with the bread baking process.
To do this, take a small piece of the dough and stretch it until it breaks. If the strand is about an inch long and can stretch without breaking, then your bread dough has sufficient gluten strength.
(If not, just repeat one more stretch and fold and wait for another 30-45 Minutes)
Now Spray some water on the counter top and let’s stretch the dough into a thin sheet.
Fold the dough sheet as in the video to give the dough some more strength.
At this point,I am placing it on another clean rectangular bowl ,greased with some oil.
Cover and let the dough sit and rise for another Half an hour which completes our bulk proofing.
4.Shape the dough
Our bread dough has risen slightly and it is ready for shaping.
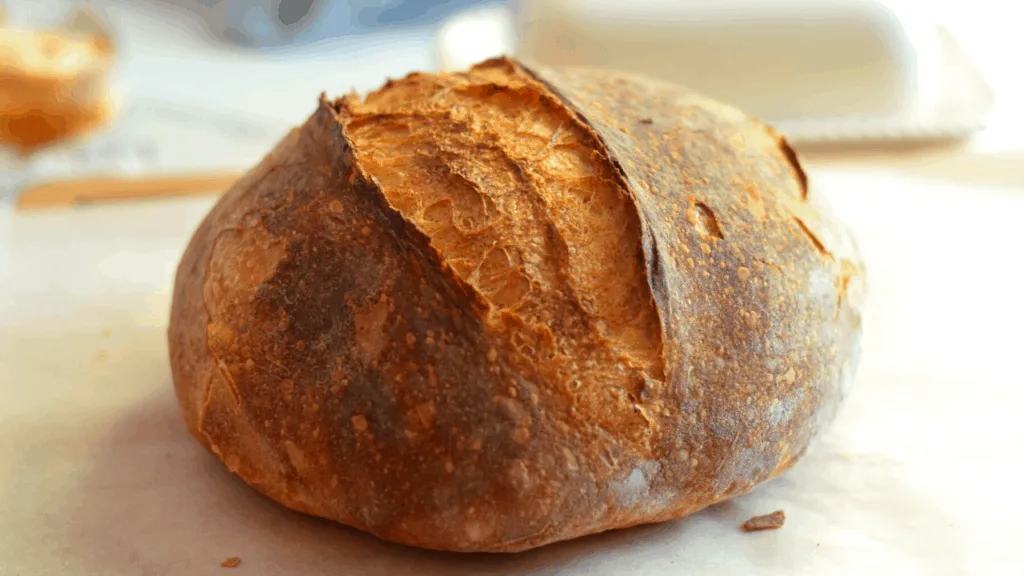
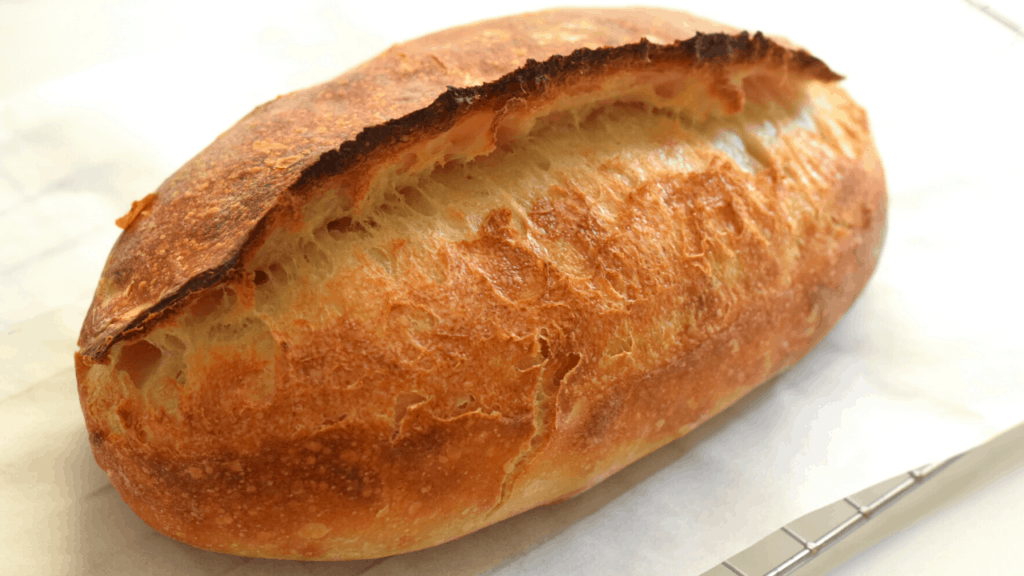
Transfer the dough on to a well floured work surface and then shape it into a boule ” (round )or (oblong)

Place the shaped dough on to a bannetton or onto a rectangular cake pan or a round bowl, lined with a well dusted(best to use gluten free flour like rice flour so that it will not stick to the dough) kitchen towel.
Let the shaped bread dough sit and rise for 50 minutes in a warm environment and 50-60 minutes in a cold environment.
After the final proofing, flip the dough on to a parchment paper.
Dust off any excess flour on top.
Score the bread with a sharp knife or blade or with a lame.
Place this into the preheated oven dish or dutch oven.(We can use any oven proof dish with a proper lid.)
Close the oven dish with it’s preheated lid.
What is scoring a bread means
Scoring is slashing the shaped bread dough with a sharp knife or razor blade to allow it to expand during baking.
Why do we need to score the bread
The purpose of scoring is primarly to control the direction in which the bread will expand during “oven spring”
By scoring a bread,we are intentionally creating a weak spot on the surface of the loaf preventing the loaf from bursting at any other weak spots created during shaping.
Thus scoring the bread dough will help the bread to expand beautifully and helps the bread to not to crack open at undesirable spots.
When should you score the bread.
Scoring is generally performed just before loading the loaves in the oven
How to score bread effectively
- Use a very sharp knife or razor blade or bread lame to quickly score the surface of the loaf.
- I found smearing some oil on the knife will prevent the dough from sticking into the knife
- Use a firm,smooth and rapid motion while scoring bread.Make deep and slightly angled slash(The depth of the cut should be shallow-about 1/4inch)
Why does my bread collapse when I slash it
If the bread dough is over proofed(if the second proofing took longer time than the recipe states),then the bread can collapse.
HOW TO FIX THIS:
- Next time when you proof,reduce the proofing time(10-15 minutes).
- Shape the dough,once again and watch the rising.The dough will get doubled in size in around 40 minutes.And then slash it with a sharp knife.

5.Bake the No knead Rustic Bread
Transfer the dough on to a well preheated dutch oven(250C)( I recommend an oven thermometer to make sure your oven is hot enough) and close the pot with an oven safe lid.
We can use a Dutch oven which is best to use for making this type of artisan rustic breads.
Take care not to burn yourself during this step as the dutch oven or oven dish is very hot.
Baking temperature and duration
Bake the bread inside the hot dutch oven(480F or 250 C) for 18 minutes with the lid on.
After 18 minutes of baking,remove the lid and Reduce the oven temperature to 230CF.
And then bake for another 8-12 minutes without the lid (450 F or 230C) ,until the top of the bread is nice and deep golden brown.
The more you bake at this point,the more crispy the crust become.
This extra baking will give that outer crust of the bread to get a more crisp and caramelized golden brown color and a nutty flavor.
When baking these last few minutes, heat is directly acting only on the surface of the bread.So reducing the temperature by 20 C will help, not to overburn the crust and at the same time will make it more crunchy.
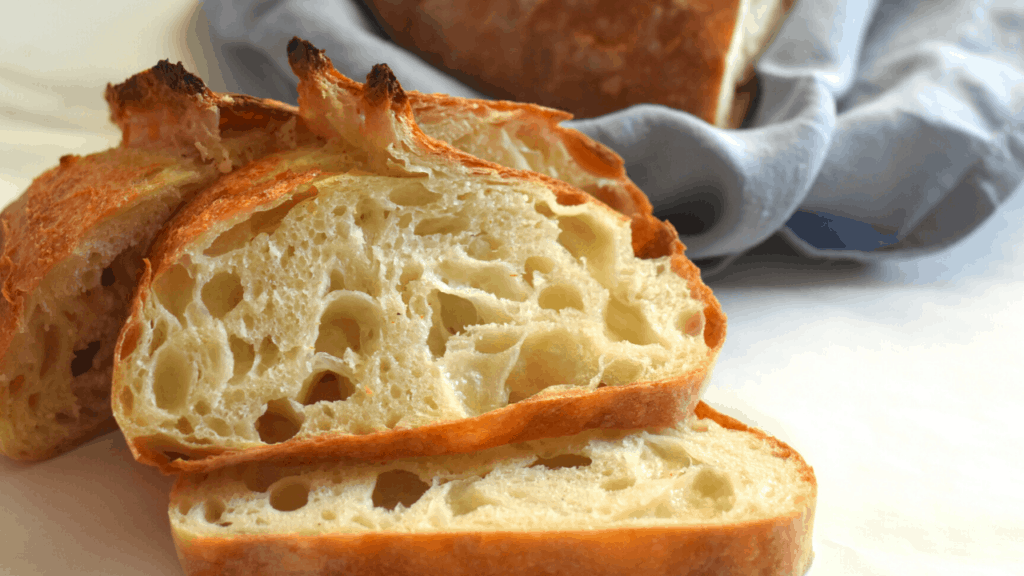
You will be rewarded with a Bread, with a thin, crunchy brown crust and airy, soft and tender crumb inside. The bread is slightly chewy,so flavorful and perfect open crumb texture.
The bread is best when eaten fresh,when they are cooled but still slightly warm.
It is chewy,so flavorful and has the perfect airy, soft texture.
This rustic bread recipe is one of my family favorite breads.
As we use 80 % preferment or biga in this rustic bread recipe, and as it is slowly fermented, the bread has got amazing flavor.We can have it even with some plain butter or Olive oil.
Watch The Video to See How To make Rustic Bread with Open Crumb
Why do we need to use a closed pot like Dutch Oven to make Crusty Bread
During the initial stages of baking, steam is released from the dough itself into the sealed container, which keeps the dough moist; this allows the bread to develop a crispy, shiny crust and attain maximal volume.
It also provides even distribution of high heat during baking.
How long can I store this rustic bread or dutch oven bread at room temperature.
Leftover bread can be stored in an airtight container at room temperature for up to 3 days.
It can also be tightly wrapped in plastic wrap and foil and frozen for up to 3 months.

Rustic Bread Recipe with Biga :The Best Homemade Artisan Bread Recipe
Ingredients
For making the Starter or Preferment
- 320 g Flour
- 224 ml Water
- .1 g 2 Pinches of instant yeast 1/12 th tsp we can use the same amount of active dry yeast as well
For the Bread Dough
- 80 g Flour
- 56 ml Water
- 7 g Salt
- .8 g Yeast 1/4 tsp(insatnt or active dry yeast)
Instructions
Prepare the Biga
- Into a bowl add in the water and 2 pinches of yeast.It is hard to weigh it and most easiest way of expressing this amount will be slightly less than 1/12 tspStir and dissolve it in water.Now add the flour and combine together to form a dough.Make sure there are no dry patches left behind.Cover the bowl with a cling film and let it sit and ferment overnight.We can use the biga or starter that’s been fermented anywhere between 10-16 hours(for the best results)
Prepare the Bread Dough
- In a small bowl ,add the water ,yeast ,salt and flour.Mix and combine to form a shaggy mass of dough.Now incorporate this dough with the preferment.Make sure its combined well enough that there are no lumps left and it’s a homogenous dough.If you want to use a stand mixer you can use it at this point, which will make the process much easier.Now cover the dough and let it sit and rise.
First Proofing (2 hours)
- During this Proofing time we need to strengthen the dough.For that we will do 1 round of “stretch and fold” in 45 minutes and then another “layering of dough sheet” in another 45 minutesAfter 45 minutes of proofing, let’s do stretching and folding the dough to strengthen the gluten in the dough.Just pull and stretch the dough and then fold it onto itself.Repeat the same on all four sides.Leave it to rise for another 45 minutes.Then again flip the dough on to a wet surface and stretch the dough to form a rectangular sheet of dough.Fold the dough from bottom and top 1/3 rd and then again fold it as shown in video.By now our dough has got a good texture.Transfer this dough onto a well greased containerNow cover the dough and let it rise for another 30 minutes.
Shape the dough
- Our bread dough has risen slightly and it is ready for shaping.Transfer the dough on to a well floured work surface and then shape it into a boule ” (round )or batard” (oblong)Place the shaped dough on to a bannettone or onto a rectangular loaf pan or a round bowl, lined with a well dusted(best to use gluten free flour like rice flour so that it will not stick to the dough) kitchen towel.Let the shaped bread dough sit and rise for 50 minutes in a warm environment and 50-60 minutes in a cold environment.After the final proofing, flip the dough on to a parchment paper.Dust off any excess flour on top.Score the bread with a sharp knife or blade or with a lame.Place this into the preheated oven dish or dutch oven.(We can use any oven proof dish with a proper lid.)Close the oven dish with it’s preheated lid.
Bake the No knead Rustic Bread
- Baking temperature and durationTransfer the dough on to a well preheated dutch oven(250C)( I recommend an oven thermometer to make sure your oven is hot enough) and close the pot with an oven safe lid.We can use a Dutch oven which is best to use for making this type of artisan rustic breads.Take care not to burn yourself during this step as the dutch oven or oven dish is very hot.Bake the bread inside the hot dutch oven(480F or 250 C) for 18 minutes with the lid on.After 18 minutes of baking,remove the lid and Reduce the oven temperature to 230CF.And then bake for another 8-12 minutes without the lid (450 F or 230C) ,until the top of the bread is nice and deep golden brown.The more you bake at this point,the more crispy the crust become.This extra baking will give that outer crust of the bread to get a more crisp and caramelized golden brown color and a nutty flavor.
- The bread is best when eaten fresh,when they are cooled but still slightly warm.It is chewy,so flavorful and has the perfect airy, soft texture.Enjoy!
Jeanene
Friday 15th of May 2026
Is there a way to keep the biga alive, like a sourdough starter or does it need to be made fresh?
Bincy Chris
Saturday 16th of May 2026
Biga is usually made fresh each time rather than maintained like a sourdough starter. There’s no need to keep it alive because it is made with commercial yeast, not wild yeast like a sourdough starter.
Once it has fermented, you can store it in the refrigerator for a couple of days and use it when you're ready to bake. Since it’s very quick to mix together, it is better to prepare a fresh batch whenever you need it. 😊
Mary D.
Friday 24th of April 2026
Made this bread today, and it looks professional and taste delicious. I had never made a biga before and followed your recipe. I did fold 4x 45min rise. and baked in a clay baking Vessel with lid.
Bincy Chris
Saturday 25th of April 2026
Thank you so much for trying the recipe and sharing your experience! 😊 I’m really happy to hear it turned out so well and that you liked the flavor.
Stacy
Saturday 21st of March 2026
This is perfect for someone 'scared' to try a starter from scratch. Tastes SO good! Perfect crunch on the outside and soft on the inside. Will definitely make this a weekly staple in our house. Just used it to make grilled cheese and 🤌
Bincy Chris
Tuesday 24th of March 2026
So happy you loved it!! 😊 That crispy outside + soft inside combo is exactly what makes it so special. Love that it’s becoming a weekly staple in your house — that’s the ultimate win 🙌
Sara Nicholson
Friday 27th of February 2026
Love you calming voice, I’m waiting to put mine in the oven. Looks great so far
Bincy Chris
Sunday 1st of March 2026
Thank you Sara. Hope you enjoy the bread.
Nadia
Tuesday 29th of April 2025
Great recipe. Thank you. Can you make the same recipe with strong bread flour? Do you need to adjust the water quantity? By how much? Thanks
Bincy Chris
Tuesday 29th of April 2025
Yes, you can definitely use strong bread flour, and there's no need to adjust the amount of water right away. Just keep in mind that the water absorption capacity of flour may vary depending on the brand, and for some brands, you may need to reduce the amount of water by one or two tablespoons.