
A step-by-step tutorial for making No Knead Bread. This quick and easy bread recipe has just five ingredients and makes the best homemade artisan bread without kneading!
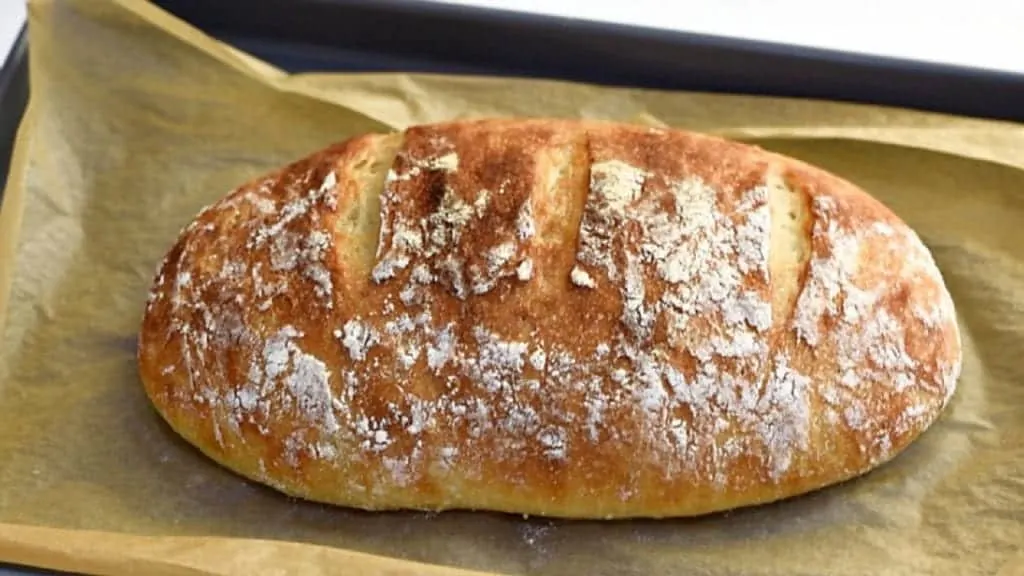
No knead bread that’s ready in just a few hours – no need to let it rise overnight. Crispy crust on the outside and soft, airy bread on the inside!
What,I love about this No Knead Dutch Oven Bread
- The Bread is incredible with that great crumb, lightness, delectable flavor and crackling crust.
- The recipe is so easy that anybody can bake wonderful bread.
- The bread recipe can easily improvised by adding flavors of our choice..rosemary, thyme..etc
Why I consider this as the easiest no knead bread recipe
- This No Knead Bread Recipe doesn’t require any kneading.It’s so Easy to make.No kneading,No mess,less waiting time than many other no knead bread recipes.
- The Ingredients to make this no knead bread are Simple and Easily Available
- We don’t require any special tools for making this bread.
- This bread dough can be made in less than 5 minutes.
A lot of no knead bread recipes require the dough to rest overnight to rise. Those recipes are great too but sometimes you want bread the same day, isn’t it? Yeast still needs time to do its thing, but this recipe cuts the time down to make this in less than four hours (including baking time).
Why bake bread in a Dutch Oven
A dutch oven can mimic the environment,very similar to a professional bakery.
A moisture sealed chamber with intense heat.
The dutch oven, due to its heavy cast iron build up,offers a very stable and consistent temperature which is necessary for effective baking.
The sealed interior traps steam inside the pot itself,which is beneficial component in baking bread.
Why dutch oven breads have that crispy crackly crust

Dutch oven breads have crispy crackly crust because of the steam entrapped with in the high heat cast iron pot.
The preferred trick to getting the perfect crust at home is to bake your bread in a Dutch oven.
A closed Dutch oven will trap the water that evaporates from the dough and convert it to steam under the lid.
The steam keeps the crust soft longer, so it can continue to expand during the early stages of baking. The result is a lofty loaf that looks like it came from the bakery down the street!
Steam also helps produce a really crisp crust. When the surface of the dough reaches 180°F, the starches in the slowly forming crust start absorbing moisture. They eventually become so saturated that they burst and liquefy.
As the bread continues to cook, this starch gel turns into a brittle and glossy shell. The more moisture there is on the surface of the dough, the more abundant the starch gel, and the crisper and more crackly the eventual crust.
Why Dutch Oven Breads have soft and tender crumb
Between 302°F and 401°F, the crust browns even more thanks to a process called the Maillard reaction in which sugars and amino acids react with each other.
Since steam prevents the surface temperature from getting this high too early on in the baking process, the inside of the loaf has time to cook through without risk of the crust becoming too dark.

Ingredients for making No knead Bread
- Flour :3 cups (390g) (loosely packed)
- Salt :1 1/4 tsp
- Yeast :3/4 tsp (instant or active dry yeast)
- Water :1 1/4 cup (240+60 ml=300ml)
- sugar :2 tsp
Step by step instructions on how to make this EASY no knead bread
1.Prepare the no knead bread dough
Into a bowl,add in the dry ingredients,Flour, Salt, Sugar and Yeast.
Give it a good stir to make sure yeast ,salt and sugar is evenly distributed in the flour.
Add in the water (not cold nor hot,preferably warm).Most suitable water temperature should be around 95-100F.
Mix everything together until you get a shaggy mass of dough.Make sure the whole flour is hydrated properly(especially the bits at the bottom)
Cover the dough with a plastic film.
2.First proofing
Let the dough sit and rise for two hours in a warm environment.
3.Shaping the dough
After the dough has risen,shape it into a tensive ball.
Transfer the dough on to a floured work surface.
I dusted the top of the dough with some more flour.
With the help of a bench scraper, pull the sides of the dough from the surface,stretched a little and then fold on top of itself and repeat the same until we get a dough ball with some tension on top.
Dust the top with flour and then it will be easy for you to transfer this on to another bowl lined with a parchment paper.
While doing the shaping,i had in mind,two intentions.
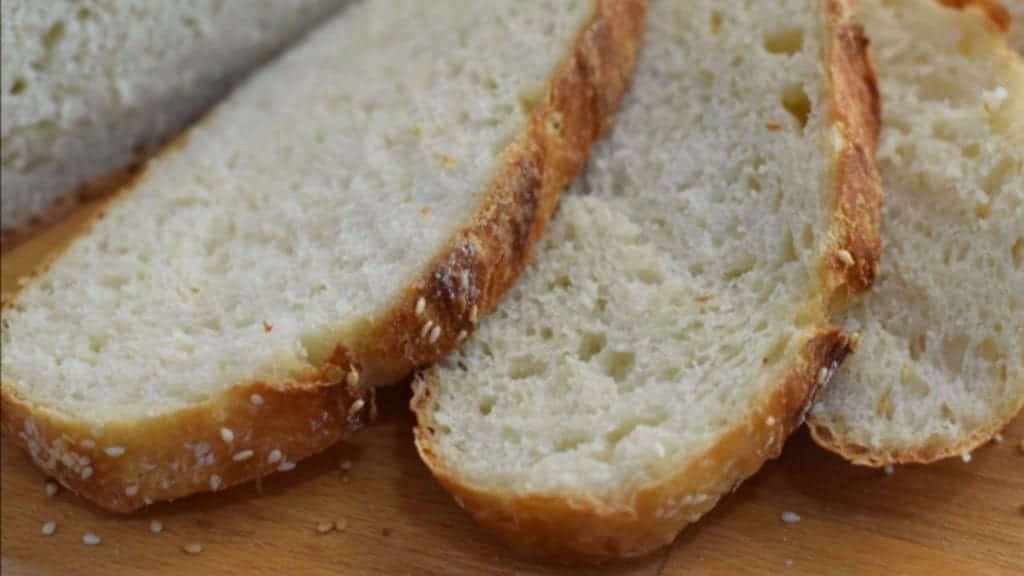
- Try not to degas the dough completely(so that there will be airbubbles of different size(small and big) in the bread.
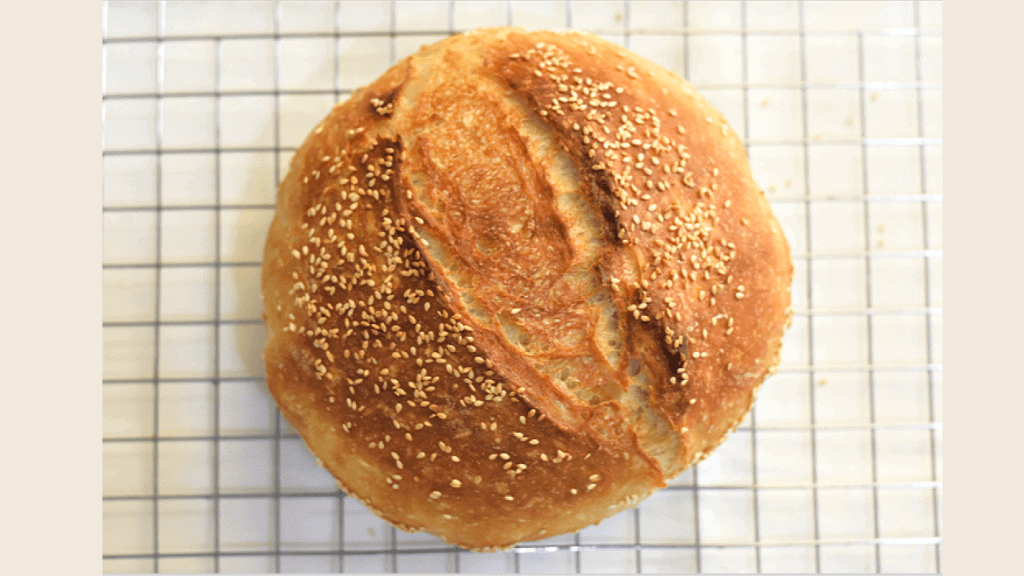
- Try to shape the dough into a tensive ball of dough.(so that the dough will break open when baked at very high temperature and so we will get that rustic appearance on top of the bread.
4.Second proofing
Cover it with a plastic film and let the shaped dough rise for the second time.
It may take 35-40 minutes.Wait for until the dough get doubled in size.
Make sure you to grease the plastic film with some oil;otherwise the dough can stick to the plastic film and we may need to shape them again and wait for the rise.
This is the time for us to preheat the oven to 450F.Place the Dutch oven into the oven and start preheating.It may take around 40-45 minutes to get the oven to 450F.
So after the second rise(after 35-40 minutes),the dough is now ready to get into the oven.
At this point,you can score the bread(optional) using a sharp knife to help the dough expand well in the oven and to get a classic artisan look to the bread.
What is scoring a bread means
Scoring is slashing the shaped bread dough with a sharp knife or razor blade to allow it to expand during baking.
Why do we need to score the bread
The purpose of scoring is primarly to control the direction in which the bread will expand during “oven spring”
By scoring a bread,we are intentionally creating a weak spot on the surface of the loaf preventing the loaf from bursting at any other weak spots created during shaping.
Thus scoring the bread dough will help the bread to expand beautifully and helps the bread to not to crack open at undesirable spots.
I actually love the rustic look of those unscored breads too 🙂

When should you score the bread.
Scoring is generally performed just before loading the loaves in the oven
How to score bread effectively
- Use a very sharp knife or razor blade or bread lame to quickly score the surface of the loaf.
- I found smearing some oil on the knife will prevent the dough from sticking into the knife
- Use a firm,smooth and rapid motion while scoring bread.Make deep and slightly angled slash(The depth of the cut should be shallow-about 1/4inch)
Why does my bread collapse when i slash it
If the bread dough is over proofed(if the second proofing took longer time than the recipe states),then the bread can collapse.
HOW TO FIX THIS:
- Next time when you proof,reduce the proofing time(10-15 minutes).
- Shape the dough,once again and watch the rising.The dough will get doubled in size in around 35 minutes.And then slash it with a sharp knife.
5.Bake the bread
So Transfer the dough on to a well preheated dutch oven( I recommend an oven thermometer to make sure your oven is hot enough) and close the pot with an oven safe lid.
Take care not to burn yourself during this step as the dutch oven is very hot.
Baking temperature and duration
Bake the bread inside the hot dutch oven(450 F) for 30 minutes with the lid on.
After 30 minutes of baking,remove the lid and Reduce the oven temperature to 400F.
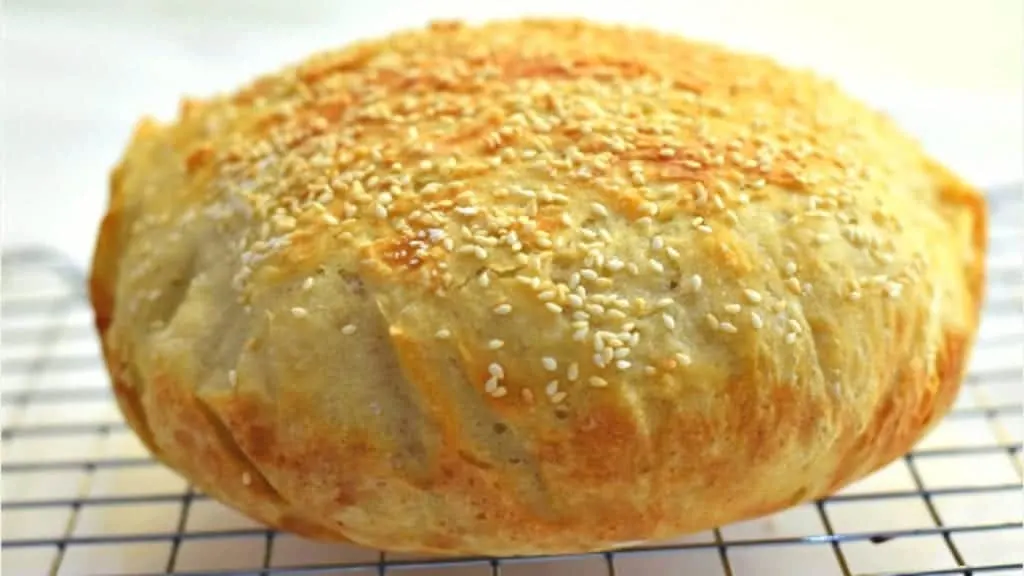
And then bake for another 8-12 minutes without the lid (400F) ,until the top of the bread is nice and golden brown.
The more you bake at this point,the more crispy the crust become.
This extra baking will give that outer crust of the bread to get a more crisp and caramelized golden brown color and a nutty flavor.
When baking these last few minutes, heat is directly acting only on the surface of the bread.So reducing the temperature by 50 F will help not to overburn the crust and at the same time will make it more crunchy.
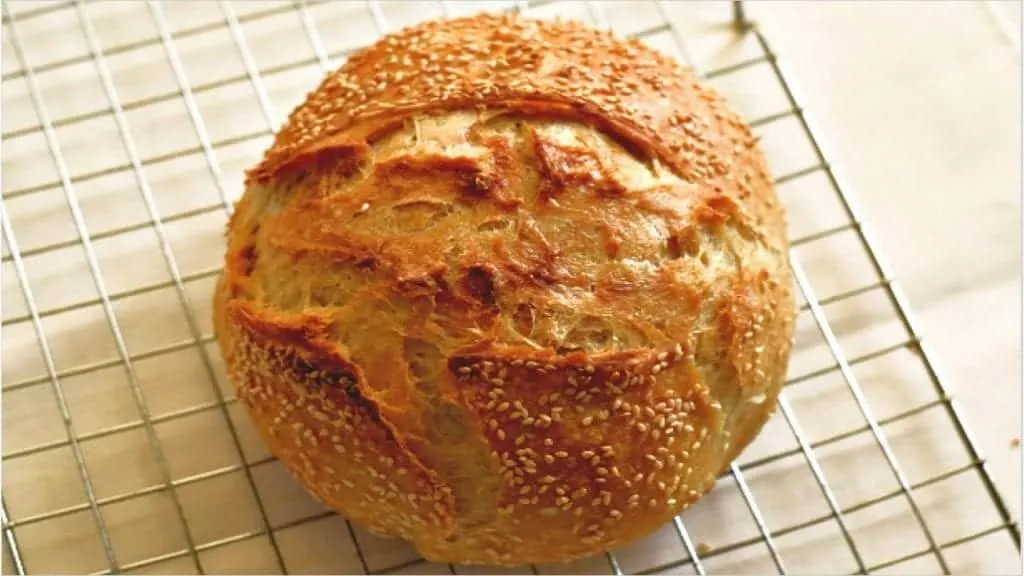
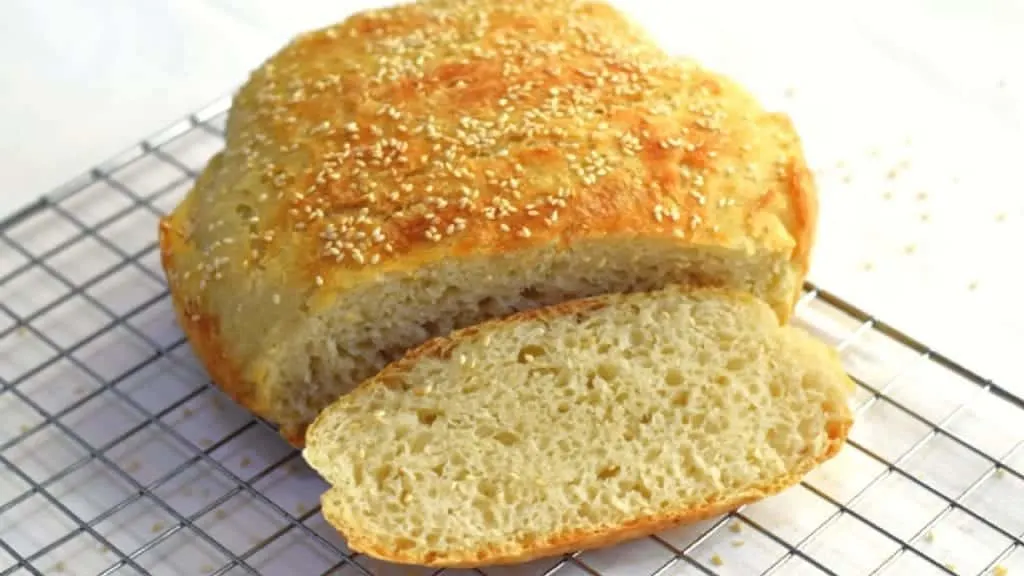
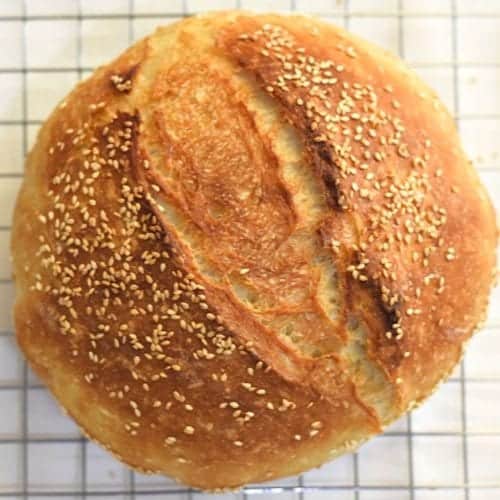
You will be rewarded with a Bread, with a thin, crunchy brown crust and airy, soft and tender crumb inside. The bread is slightly chewy, flavorful and perfect texture.
The bread is best when eaten fresh,when they are cooled but still slightly warm.
It is chewy,so flavorful and has the perfect airy, soft texture.
How can you Bake No Knead Crusty Bread even if you don’t have a dutch oven
If you don’t have a Dutch oven with you, No Problem!You still can bake super crusty bread;you can bake it on a regular baking sheet, following these steps:

- Make the dough as directed, allow to rise first proofing (2 hours).
- Shape the dough and place it on a baking sheet.
- Allow them to rise second time (30-40 minutes).If the weather is warm, the dough will rise in about 30 minutes or if it is cold,then it may require 40 minutes)
- When you preheat your oven,put a sheet pan on the bottom rack,to get nice and hot.
- To create steam inside the oven,
- (1)When you put your bread in the oven, Add one cup of water to a shallow baking dish and set it on the lower rack of your oven. The water will create steam which will help keep the bread crusty on the outside as it bakes.or You can place an oven dish with hot water on the lowest rack of oven while baking.
- (2)Using a spray bottle,spritz the sides of the oven with water a few times and close the door.Wait about 30 seconds and spritz the sides again.Wait another 30 seconds and do it one final time and then bake.
- Place the baking sheet with the bread dough on the middle oven rack and bake for about 25-30 minutes.
The result is a very delicious, crusty bread with soft and airy crumb!
Another thing i love about this method is that ,you can shape the dough any way you like(Round,oval or log shaped). Slashing the top of the bread will help the bread to break open in a definite shape which make the bread more pretty.
Creating steam inside the oven will help us to get that crispy crusted bread. Here is how i made Crusty French Baguettes – with step by step video.
No knead bread in 5 simple steps :Step by step video instructions
Frequently asked Questions regarding No Knead Bread
Why my no knead bread came out flat.

If your bread came out like this,the probable reasons are
- The dough tension:You want to make sure you shape the loaf into a relatively tight round in order to get a high rise.
- If the dough is Overproofed,it may collapse due to a weakened gluten structure and excessive gas production
- Oven not hot enough : Breads require adequate heat to rise properly. If your oven is too low, the bread will not rise enough, producing a heavy and unappealing loaf.
Though the flat breads are not very appealing in their look,they tastes as delicious as a normal bread.

How long can I store the dutch oven bread at room temperature.
Leftover bread can be stored at room temperature for up to 3 days. It can also be tightly wrapped in plastic wrap and foil and frozen for up to 3 months.
Can you freeze no knead bread dough
Yes,You can also freeze the bread dough.
After the first proofing,wrap the dough ball in plastic wrap and place in a freezer-friendly container. Freeze for up to 3 months.
When ready to bake, allow the dough to come to room temperature for 2-3 hours on the counter, or thaw overnight in the refrigerator.
Then Shape the dough,and let it rise for the second time for upto 45 minutes.
And then transfer it onto the preheated dutch oven and bake at 450 F for 30 minutes with lid on.Then bake for another 10 minutes without the lid,to get that beautiful golden brown crackly crust.
Can you refrigerate the no knead bread dough
After the first proofing,you can keep the dough in refrigerator for upto 4 days.
When you want to make the bread, take the dough out,bring it to room temperature,and then shape the dough,proof them(35 minutes) and then bake the bread.
My dough didn’t double in size. What went wrong?
If the dough doesn’t double in size after the rising time, it means the yeast is old and it didn’t get activated. Start over with a fresh batch of yeast. Also, make sure you measure out the flour properly.
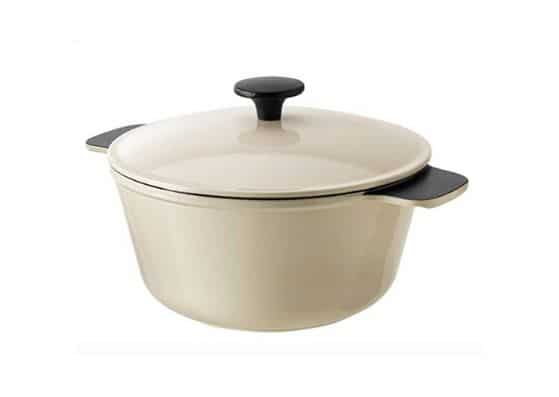
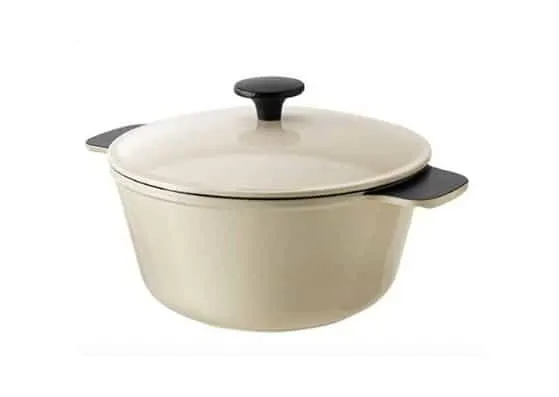
My Dutch oven : Ikea Senior Casserole With Lid
I love my Dutch oven.I was a bit confused when i bought this two years before.(This cast iron pot is less expensive than many other cast iron Dutch ovens.)But so far,I am so impressed by its performance and efficiency.
My main objective about having a Dutch oven was to make beautiful crusty no knead bread .This Dutch oven has enough height for the bread to rise and the lid works in such a way to create high steam inside the pot to make crusty breads.The knob on the lid is oven safe.
What I love about this dutch oven
- Made from cast iron, which spreads heat evenly through the pan and retains the heat for a long time.This makes it ideal, for example, for slower cooking such as roasts and casseroles.
- Steam collects on the inside of the lid and drips down from the knobs. In this way the food bastes itself, which gives a succulent and tasty result.
- Suitable for all types of cooktops, including induction cooktops.
- The pan doesn’t have to be oiled and is easy to maintain thanks to the matt enameled interior.
- Shiny enamelled exterior makes the pan easy to clean.
- Oven safe :Can also be used in the oven since it is made entirely of metal (including the knob of lid).
- Using the lid brings the contents of the pot to a boil faster, so that you can save time, energy and money while lowering your environmental impact.
Check out other No Knead Bread Recipes.
Super soft No Knead Bread :step by step instructions
How to make CRUSTY No Knead FRENCH BAGUETTES at home :Step by step instructions
How to make EASY No Knead SOFT AND FLUFFY Dinner rolls
SUPER DELICIOUS HONEY OATMEAL BREAD:Easy No Knead method
Absolutely Easy No Knead FOCACCIA BREAD

Faster No Knead Bread
Ingredients
- 390 g Bread flour/All purpose flour 3 cups(loosely packed)
- 2 tsp Sugar optional
- 1 1/4 tsp Salt
- 3/4 tsp Yeast Instant yeast/Active dried yeast
- 300 ml Water 1 1/4 cup(240 ml+60 ml)
Instructions
Prepare the bread dough
- Into a bowl add the flour,sugar,salt and yeast.
- Give it a good mix to make sure all the ingredients are evenly distributed in the flour.
- Add some lukewarm water and mix everything together to form a shaggy mass of dough.
First proofing
- Cover the dough with a plastic film and let them sit and rise in a warm environment for about 2 hours.
Shape the dough
- After 2 hours,transfer the proofed dough on to a floured work surface.As the dough is very sticky,dust the dough with some flour whenever needed.With the help of a bench scraper or with hands,pull and stretch the dough and flod it on to itself to form a tensive dough ball.
- Transfer this on to a parchment lined bowl.
Second proofing
- Cover the bowl with a greased plastic film.Let the dough sit and rise for 35 minutes or until the dough get doubled in size.
Bake the bread
- Tranfer the dough into a preheated dutch oven.
- Bake at 450F for 30 minutes.Reduce the oven temperature to 400F and bake for another 8-12 minutes.At this point the more you bake the more crispier the crust of the bread will be.
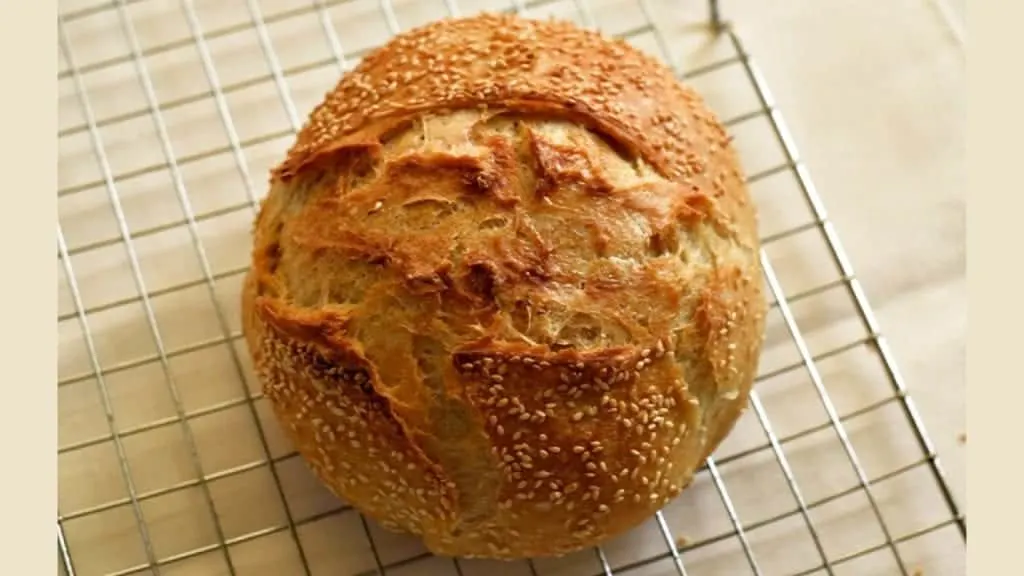
- You will be rewarded with a bread which is golden brown with crunchy crust on top and soft and tender delicious crumb inside.Enjoy!
If you are making bread on a regular baking tray
- Prepare the dough as in step1
- Proof the dough as in step 2
- Shape the dough as in step 3Transfer the shaped dough onto a baking tray for the second proofing(35 minutes).
- Bake the bread:As STEAM is the keyfactor for making crusty bread,We need to create a steamy environment while baking.Place a pan with hot water in the lowest rack of oven while baking and spraying with water inside the oven during the initial five minutes of baking will help to create this steamy environment inside the oven.
- You will get a crispy crunchy crusted bread with soft and delicious crumb inside.Enjoy Baking No knead bread!
No knead Bread Calories
- Total calories in this No knead bread :1454 kcal
- Calories in one slice (if bread is sliced into 12 slices) :121 kcal
Jaita
Sunday 6th of November 2022
I followed the recipe to the T for without Dutch oven and it turned out fabulous! Thank you 🙏🥰
Bincy Chris
Sunday 13th of November 2022
Awesome!Hi Jaita,I am so happy to hear you made this bread without a dutch oven and it turned out really well.Thank you so much for taking your time to write back me.
Agnes
Wednesday 26th of May 2021
I just baked your bread recipe in my dutch oven and it was the best so far in all the videos I have tried on utube. I did lessen the water by 1/4 cup as I already achieved the shaggy dough appearance. My county is already very hot and humid. We usually reach 35 degrees in a normal summer day. In looking forward to trying this method with other herbs, nuts and fruits. Thank so much for sharing your video. Looking forward to seeing more!
Bincy Chris
Thursday 27th of May 2021
Hi Agnes,I am so happy to hear you made this Dutch oven bread and it turned out really well.I hope you will also love this cranberry walnut bread : https://merryboosters.com/no-knead-bread-dutch-oven-bread/ Thank you so much for taking your time to write me and for rating this recipe.
Agnes
Monday 24th of May 2021
I’m excited to try this no knead bread. Your video instructions was very clear and seems easy enough for me to follow. I just have one question. What size was the Dutch oven you used in this recipe? Was it 5 quarts or less? Thanks for sharing your bread making style/secret!
Phillip
Thursday 11th of March 2021
Hello Dr. Bincy Chris,
Thank you for the recipe and instructions for the no knead bread. What adjustments would need to be made for 100% whole wheat no knead bread?
Bincy Chris
Saturday 13th of March 2021
Hi Philip,Whole wheat flour absorb slightly more water than plain flour; so you may add 1-2 tbsp extra water if using 100% whole wheat flour.But as whole wheat flour contain more bran particles,if we use 100% whole wheat flour, there are more chances that out bread may turn dense; and so I recommend adding part of flour (25-50%) as plain four as well. All the best for making wonderful bread.
Dustin Pero
Monday 10th of August 2020
I am glad to be one of several visitants on this outstanding web site (:, thankyou for posting.
Bincy Chris
Monday 10th of August 2020
You are most welcome:)