
Artisan Ciabatta Bread
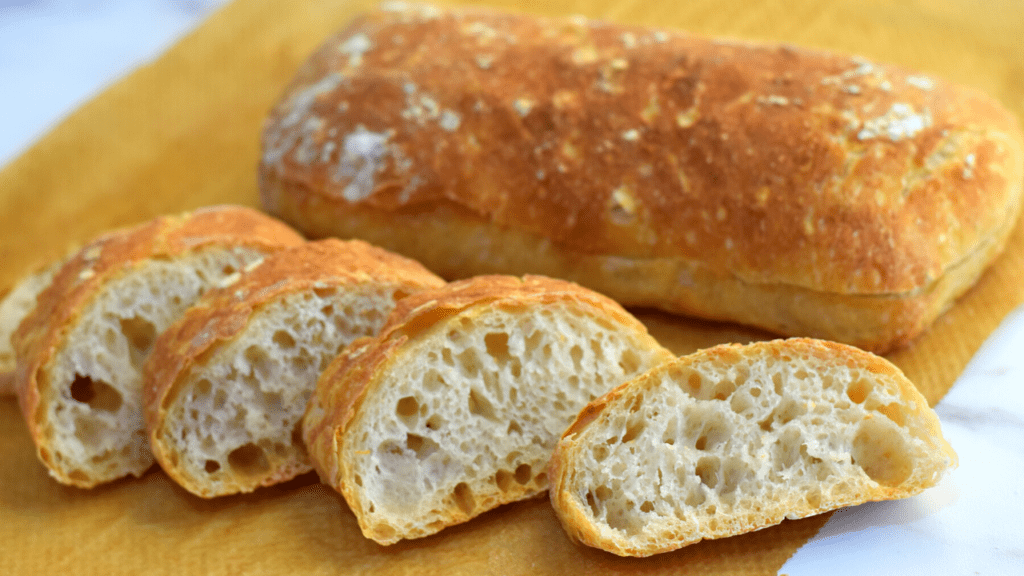
Ciabatta bread is an Italian rustic looking bread, made from a sticky wet dough which gives it its unique porous texture and unique flavor.
The soft, chewy texture and the big airy holes make ciabatta perfect for dunking into soups or swiping up sauce from a dinner plate. It also makes for a delicious sandwich bread filled with layers of cured meats, cheeses, and balsamic vinegar.
What makes ciabatta different from other bread recipes
Ciabatta is made from a lean yeast dough meaning that there is not fat present in the dough. This creates a very chewy bread with a slightly crispy crust.
Ciabatta is made from a very wet dough which gives it its unique moist texture and one-of-a-kind flavor.
What is special about this ciabatta bread recipe?
Usually we use "biga" or "poolish" in making ciabatta bread.But in this recipe we are skipping that step.I have tried making ciabatta using poolish and without using it.I haven't seen any serous difference in the taste and flavor in both.
I always like to simplify recipes and I hope you will love this ciabatta bread recipe as,
- It is easy to make; there is no hard kneading
- Requires only four basic ingredients
- It doesn't require any previous preparation as we dont use biga or poolish
- This is one of the fastest method of making ciabatta bread
- We dont need any special equipments to make this ciabatta bread even any proofing canvas or couche.
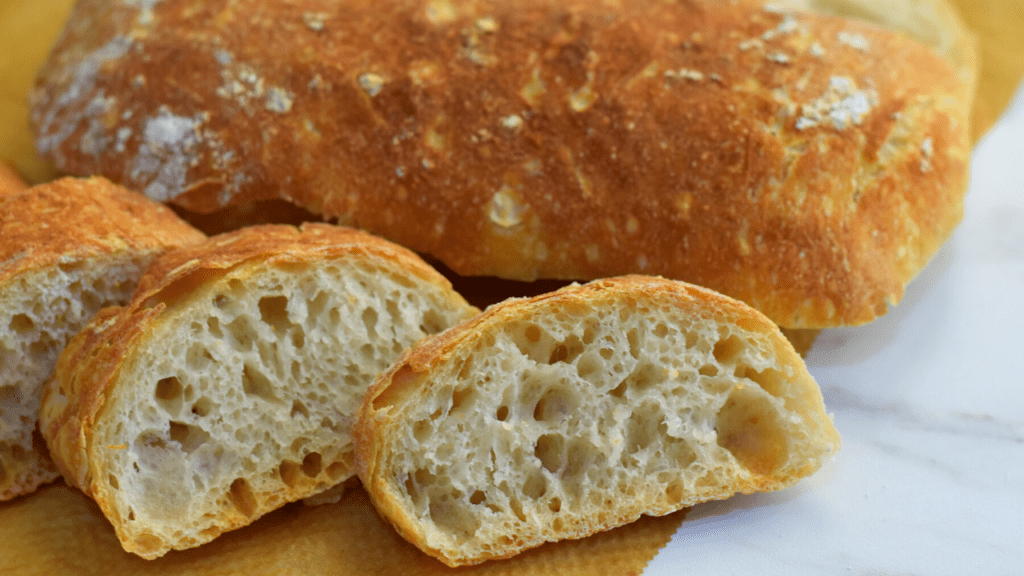
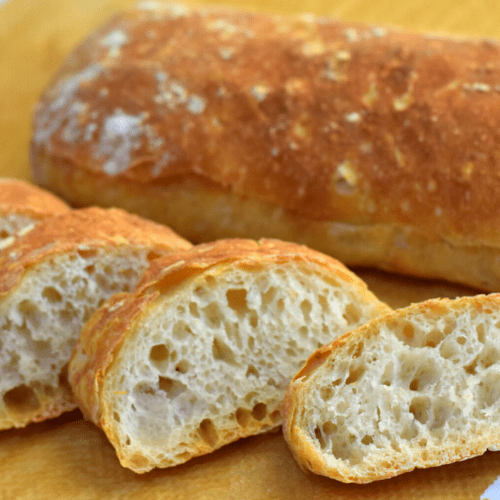
- The resulting ciabatta bread is so incredibly soft in the middle filled with large porous structure and with a crispy crunchy crust.
- All these factors make this artisan ciabatta bread recipe one of the best recipes for making homemade ciabatta.
WHAT IS THE DIFFERENCE BETWEEN CIABATTA AND FOCACCIA?
Ciabatta and focaccia are both Italian style breads but they are different in their makeup.
Shape:
The main difference is that ciabatta is a bread that is formed into loaves while Focaccia is a flatbread.
Dough content
Ciabatta also typically does not contain any fat which creates a very chewy texture while focaccia typically has oil in its dough which creates a softer texture.
Ingredients for making ciabatta bread
- 350 g Flour pain flour or bread flour
- 280 g Water
- 1 tsp yeast
- 1 tsp salt
HOW TO MAKE ARTISAN CIABATTA BREAD
As with any bread recipe, there is not one way to approach it rather many different techniques that could be used. This technique produces authentic ciabatta bread that are soft, pillowy, and chewy.
STEP 1:PREPARE THE DOUGH
Pour the water into a bowl.Add the yeast, salt and dissolve it in water.Then add the flour into this.Combine everything together using the rear end of wooden spoon.Its easy to do this way and also it helps to have less mess while mixing.
If you have a stand mixer ,then you can use it form the dough.
Use the dough hook attachment and knead the dough for 6-7 minutes until they form a dough.
In this Ciabatta bread recipe I have not used stand mixer.
Its so easy and relaxing to make ciabatta, this way and the result is quite amazing.
After we make the dough,Cover the bowl with a plastic film and keep it in a warm environment.
STEP 2:PROOFING AND FOLDING
Like any other bread recipes,We need to proof the dough.
To give more structure to the bread dough we usually knead the dough.But as this is a high hydration dough, it is difficult to knead the dough by hand.
So we are doing a magic which will transform the dough to a well structured dough.
We will stretch and fold the dough in every half an hour.
HOW TO DEAL WITH STICKY CIABATTA DOUGH.
Ciabatta dough is an extremely wet (high hydration) dough. To give you an idea, most bread recipes sit around 60% hydration while this ciabatta recipe is at almost 80% hydration. Because of this, the dough is not kneaded the same way other yeast dough is. Rather, it is allowed to slowly ferment with a series of brief stretch and folds.
Apply some water on hands will make it so much easier to work with the dough.
What is the purpose of this stretching and folding
The stretch and fold method serves two main purposes:
- it layers the gluten to build structure in the dough,
- it redistributes the heat within the dough
How to do the stretch and fold kneading
The dough will bulk ferment for 2 hours, with 3 rounds of brief stretch and folds between each 30 minutes. To stretch and fold, lightly damp your fingers (this will help the dough not to stick) and pull up on the side of the dough and fold it back down on itself. Turn the bowl 90 degrees and repeat. Do this until you have stretched and folded all 4 sides of the dough. Turn the dough over, cover, and allow it to ferment for 30 more minutes until the next round.
STEP 3:DIVIDE AND SHAPE THE DOUGH
After 2 hours of proofing along with the stretching and folding, the dough will get doubled in size.Transfer the dough on to a floured work surface.
Now pull the dough from underneath to form a rectangular sheet.
Roll the dough, just as we roll a jelly roll to form a log.
Pinch the edge to seal.
Now divide the dough into three equal parts.
Place each piece on a well floured work surface.
We need to take care to leave enough space in between the dough as they will rise and expand .Dust the top with some more flour and then cover it with a plastic film.
STEP 4 :SECOND PROOFING
Cover them with a plastic film and let the shaped dough rest for 45 minutes on the counter top.
After 45 minutes of proofing, take the proofed dough and then gently stretch the dough to form long rectangle or to the shape ciabatta bread.
Using a bench scraper would be of great help during this time.
Transfer the dough on to parchment paper.
Now they are ready to go into the oven
STEP 5:BAKE THE BREAD
Slide the parchment paper onto the preheated baking stone or onto the preheated inverted baking tray.
And spray with some water immediately .
Close the oven door.
Bake at 450F for first 10 minutes and then reduce the temperature to 400 F and bake for another 12-15 minutes.
It may seem the bread is done at 20 minutes of baking but we need to wait for another 5 minutes..to get that right flavor and crispy crust.
Two important things to remember while baking Artisan ciabatta bread.
- High Oven Temperature
- Presence of Steam inside the oven
are most important to get crispy crackly crust for ciabatta bread.
The bread may seem baked at around 20 minutes of baking.But to get the real rustic look and taste, we need to bake for 5 more minutes.
Watch the video to see how easy it is to make Artisan ciabatta bread
HOW LONG DOES CIABATTA BREAD LAST AT ROOM TEMPERATURE
Properly stored, ciabatta bread will last for about 2 to 3 days at normal room temperature.
To maximize the shelf life of homemade ciabatta bread, cool thoroughly before storing and place in plastic storage bag or breadbox, or wrap in foil and store at room temperature.
Its better not to store them in fridge as the bread will dry out and become stale faster than at room temperature.
CAN CIABATTA BREAD BE FROZEN?
Yes, they can be frozen.
To freeze ciabatta bread,Wrap tightly with aluminum foil or plastic freezer wrap, or place in heavy-duty freezer bag and freeze.Properly stored, it will maintain best quality for about a month.
FIVE DELICIOUS WAYS ARTISAN CIABATTA BREAD IS SERVED WITH
Serve it with soup:
As ciabatta bread has a porous crumb, they can soak up liquid without falling apart; making it perfect for dipping into soup.We can use any soups ...I like to dip them in potato broccoli soup.Delicious!
Serve it with extra-virgin olive oil and balsamic vinegar:
Thick slices of ciabatta bread with some extra virgin olive oil and balsamic vinegar.The most popular way to have some ciabatta bread.This is the way my husband love to have ciabatta bread.
Make sandwich:
Slice the ciabatta bread horizontally and fill it with any combination of ham, turkey,salami..some red peppers, olive .. and cheese
With Stews:
Ciabatta bread goes pretty well with any meat stews or vegetable stews.The bread slices make a perfect sponge for soaking up that extra creamy stew.
As Toast:
Brush slices with melted butter or olive oil and if you want to add some flavor ,you can add some finely minced garlic,and to add some heat you can sprinkle some chili flakes. Toast in the oven until the edges are golden.We can also toast them on a preheated pan.toast for 1-2 minutes on both sides or until golden brown.
Artisan ciabatta Bread :Printable Recipe
Artisan Ciabatta Bread
Ingredients
- 350 g Flour pain flour or bread flour
- 280 g Water
- 1 teaspoon yeast
- 1 teaspoon salt
Instructions
Prepare the dough
- Pour water in to a bowl.MIx in the yeast and salt into the water.Add in the flour.Mix everything together.Cover the bowl and let the dough rest in a warm place.
Proofing + stretching and folding
- In this step as our dough rises,we need to stretch and fold the dough.This will help in the devolopment of gluten strands as we are not kneading the dough.
- After half an hour,lets stretch the dough and fold it back on it itself.turn the bowl at right angle and repeat on all four sides.Repeat this once again.
- In another half an hour,repeat the same process.
- And we need to do this a total of three times
- So After 2 hours,Transfer the dough onto a floured work surface.Shape it into a rectangle.Roll it just as we roll a jelly roll and pinch the edges to seal it.
Divide and shape the dough
- Divide the dough into three equal parts.
- Transfer the dough on to well floured work surface.Dust will some more flour on top;to prevent the chance of dough sticking to the cling film.
- Cover the shaped dough with a pastic film.
Second Proofing
- Let the dough sit and rise for 45 minutes.
Final shaping
- Take each dough, stretch and shape it into the a long rectangle.Transfer the dough onto a baking sheet.
Bake the bread
- Bake at 450 F preheated oven for 10 minutes and then reduce the temperature to 400 f and bake for another 12-15 minutes.Spray with some water.Do not open the oven during baking.
- Enjoy Freshly baked crispy crusted soft and spongy Artisan ciabatta bread.

In ciabata bread do you use active dry yeast
I have used instant yeast. we can use active dry yeast as well.
Is the amount of water 280 ml? Or how many cups, I really appreciate if you can tell me because I will like to try it today
Hi Monica,Yes,It is 280 ml.But its difficult to say accurately in cups as cup measurements may vary and we need the dough to be 80 % hydration.If the cup,you are using is 236 ml,then we need to take approximately 1 cup +3 tbsp.Hope this helps.
Thank you ,that helped me a lot because the ingredients says 280g 😉
Water mls and grams are actually equal to each other...
I love this recipe, so good and so easy. I am wondering what the calories are, any idea?
Hi Barbi,I am so glad you found the recipe easy.When we make three ciabatta bread, one loaf will be around 425 Calories.
Never made bread before. This was easy and, by far, the best bread I've ever tasted!! Thank you!
Hi Suzie,I am so happy to hear you made your first ciabatta bread and turned out really well.So pleased to know my recipe helped.Thank you so much for taking your time to write back me.
I don’t have a pizza stone. What can use ?
Thanks for your wonderful videos.
We can use an inverted baking tray instead.Place this inside the pan while preheating the oven.
Did you preheat the inverted pan inside the oven while the oven was preheating?
Thank you for a beautiful video and easy recipe!I am always confused by the salt/yeast combining instructions. Some bakers warn to not mix salt in with the yeast as it will kill the yeast, but others, and in your lovely video, instruct to mix it right in and doesn’t seem to be a problem. Any thoughts from you or your readers?
Thank you,Glad you found the recipe easy.In my experience, I have not encountered a problem mixing salt and yeast together.May be it will be a problem when huge amount of salt is added to yeast which usually don't happen while making bread.
Hi Bincy,
What do you mean exactly by bread flour? Is whole wheat flour also good?
What is the temperature of the water?
Bread flour is a high-protein flour that typically contains between 12 and 14% protein and is designed for baking yeasted breads. The high protein content means that bread flour has more gluten in it, which makes the dough more elastic and light and results in a chewy and airy texture when baked.
We can also use whole wheat flour, but as it contain more bran particles, it cannot rise well while baking and so the bread will be slightly denser than the one made with plain flour or all purpose flour or bread flour.But whole wheat flour is the healthiest of flour as it contain more fibers and nutrients.
Temperature of liquid should be optimum to activate the yeast..which is around 95F-100F
In the video I have used all purpose flour to make ciabatta.
000 flour on the shelf of your supermarket 110'f water(tepid)
I love all your Recipes. Thank you for explaining them so well. If I am using dry active yeast for this bread, will the yeast measurment still be 1 tsp.
Glad you liked our recipes.You can use 1 1/4 tsp active dry yeast in this recipe which is the equivalent amount.
Since I am in the US, your gram weights do not apply here. Can you tell me how many cups of flour and water please? Thanks you for our wonderful recipe!
Hi Nancy,while making bread, we don't need to be very precise on the measurements..but the point is that we should know the consistency of our final bread dough.If its too tough we can add more liquid and if its too wet, we can add more flour.But as this is a no knead bread, we are not able to feel the dough; and so if we use cup measurements we may not be able figure out if our dough is right consistency..So I don't prefer using cup measurements in this bread recipe(as cup measurements may vary).Anyhow the equivalent measurements are Flour 350g (2 and 3/4 Cups loosely packed which is approximately 357g) Water 280 ml(1 cup+3 tbsp is approximately 279 ml) ;Considering 1 cup as 236 ml.Hope this helps.
Hi Bincy,
I made the Artisinal Ciabatta today, following your recipe to a tee. I weighed the major ingredients, i.e., the flour and water -- with 80% hydration. The bread turned out perfect!!! Soft and bouncy on the inside with the most crispy, yet thin crust. I will try your other recipes, too. Thank you so much for sharing your recipes.
Michelle
Hi Michelle,I am so happy to hear you made these ciabatta bread and they turned out really well.Thank you so much for taking your time to write back me and to rate the recipe.
After I mix the ingredients for the ciabatta, can I let the dough ferment over night at room temperature?
Hi Mary,If you are planning to let the dough ferment overnight, then it is better to keep the dough in fridge.Like how we did in our ciabatta rolls recipe:https://merryboosters.com/easy-ciabatta-rolls-recipe/
this was amazing! i watched your tutorial online and this turned out really well. I don't have a standing mixer but really wanted a ciabatta bread. this was perfect!
thank you!
Hi Divya,I am so happy to hear you made these ciabatta bread and they turned out really well.Thank you so much for taking your time to write back me and to rate the recipe.
Hi Bincy,this is my most requested bread,almost every day now,as my grandkids are visiting
Awesome!I am so happy to hear your family loves this bread.Thank you so much for taking your time to write me.
We made 3 and they were gone within a day! They were amazing. Then we made as buns so we didn't eat so much and the recipe is so fantastic.
Hi Heather Jack,I am so happy to hear you made these ciabatta bread and your family enjoyed them.Thank you so much for taking your time to write back me and to rate the recipe.
Well I made your recipe and was very happy with the results. My shaping wasn't the best but I don't think it's critical with ciabatta. Very good texture and flavor. It's on the repeat list.
Saw the comment about grams not used here. I suggest to anyone that enjoys baking to get a scale and use grams. It helped me so much. A decent digital scale is not that expensive. You might be surprised how much you use it for other things. The scales also do pounds ounces.
Hi Bincy, thank you for the amazing recipe!! I was wondering, if i would like to add olives, should I add them during the rolling stage, before the final proofing? Thank you so much!
Yes you can add olives during rolling them just before the final shaping.
I never made bread before until now. This recipe was very easy to follow and my bread came out amazing! Thank you so much for sharing this recipe!
I am so delighted to hear you made your first bread and it turned out really well.I am so glad you found the recipe easy.Thank you so much for taking your time to write back me and to rate this recipe.
it came out beautiful and crispy crust within 15 minutes it lost its crispiness
do you know why?
The crust will absorb available moisture from the atmosphere as well as ,the moisture escapes from within the bread and it can soften the crust.The best thing we can do to prevent this is to make a very strong shell of crust for our bread by baking until they are really crisp.I experimentally tried baking for 10-15 more minutes at 400 F(than the recipe tells) and they turned out really well.We need to keep an eye on them to prevent over browning and if you find the baking temperature is high, you can further reduce the temperature to 375 and bake for 5 more minutes.
or After the bread is done, turn off the oven, crack the oven door open a little, and leave the bread in the oven for 5 - 10 extra minutes(or more).Drying out the bread after it is completely baked is the key to get crispy crust that stays longer.
Hi Bincy,
Thank you for sharing this recipe! It looks absolutely amazing. Can I ask, if I would like to leave the dough in the fridge overnight, when in the recipe would be the best time to do it?
Hi Wendy,Thank you.If you want to keep the dough to use later,you can keep it covered in refrigerator, just after the two hours of proofing.You can keep the dough in fridge for upto 4 days.When you want to bake the bread,Take the dough out, bring it to room temperature(it may take 15 minutes) and transfer the dough on to a floured work surface,then shape them ,proof them(second proofing) and then bake.
This was amazingly easy and made an amazingly great tasting product. The wet fingers really helped. My grandson even told me I could sell it!
🙂 Awesome!!I am so delighted to hear about your ciabatta bread..So glad you found it easy to make. Thank you so much for taking your time to write back me and to rate this recipe.
I am big fun of Italian cuisine. Regarding the ciabbata I have tried many recipes. But could not reach the desired product. This weekend come across w/ your`s. Tried today... Finally I have reached what I was looking for.. I`m grateful
Hi Efe,I am so happy to hear your ciabatta bread turned out really well.So glad my recipe helped.Thank you so much for taking your time to write back me and to rate this recipe.
Thanks I loved that the bread came out well with the holes. I braked it in a Dutch oven so didn’t get the brown crust right away and had to keep it longer and open to get the colour. So 10min on 232c then 10min on 200c and then another 10 min uncovered for the brown colour. It was still nice and soft on the inside after it cooled and had big holes as the dough had risen well! Thanks for the recipe!!
Hi Gayle,I am so happy to hear you made this ciabatta bread and they turned out really well.Thank you for sharing the way you made.
Hi Bincy, we love this bread! Could this recipe be used to bake one large round bread, and if so how would I adjust the baking time and temperature? Thank you 🙂
Hi Kathy,Yes we can Bake one large bread.Place the baking sheet with the proofed bread dough on the middle oven rack and Bake at 450 F preheated oven for about 25-30 minutes.
Love this bread so much Bincy! I'm going to try making it into 9 or 12
rolls. How would I adjust the baking temp and timing? Thank you 🙂
Dear Bincy, Thank you for your video on the ciabatta bread with very detailed instructions. I definitely feel I now have mastered baking ciabatta bread after trying several recipes. My husband is super pleased as it is his favorite kind of bread.Thank you for your explanation on converting grams to cups. It was so helpful to me.From now on this recipe will be my one and only (just like my husband is). Thank you again and stay well. Anne
Hi Anne,I am so happy to hear you made this ciabatta bread and your husband enjoyed them.Glad to know our recipe helped.Thank you so much for taking your time to write me and to rate this recipe.
This recipe turned out really well! I had never come across that method of gently stretching and folding before. The final product was just as crispy outside and chewy inside as a restaurant loaf! I froze some loaves, they thawed well, and made french bread pizzas with them. My husband said they tasted better than "real" pizza. I put more sauce on than I would for a regular pizza, and the bread handled it well without falling apart. Thank you!
Hi Jenny,I am so happy to hear you made this ciabatta bread and they turned out really well.So glad your family enjoyed.Thank you so much for taking your time to write back me and for rating this recipe.
I can only find semolina flour in the stores. Could it be used with your recipe?
Oh,Sorry that I don't have experience using semolina flour in making bread..So I am not sure about it.