This Overnight Focaccia Recipe will help you make Delicious, Fluffy, Open Crumb Focaccia.
In this Easy Focaccia Recipe, you don’t need to knead the dough. We get the benefits of kneading by doing three sets of stretch and folds which is super easy.
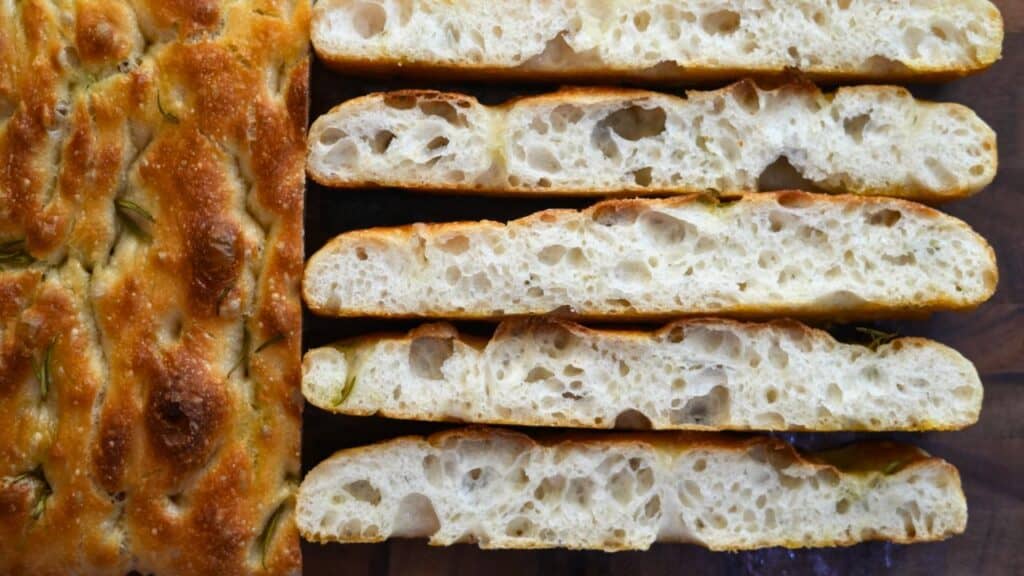
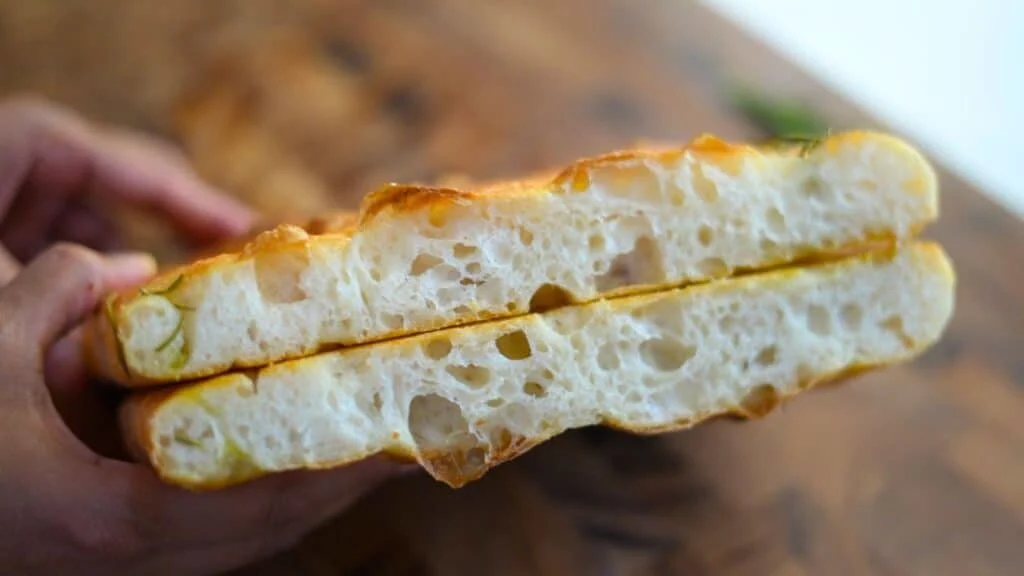
As we do long cold proofing it has deep flavor and beautiful texture with open holes, soft and moist crumb and golden crispy crust.
With its soft, chewy texture and large airy holes, this overnight focaccia is ideal for dipping into soups or mopping up sauce from your plate.
It also doubles as a delicious sandwich bread, perfect for layering with cured meats, cheeses, and vegetables.

Why You will love this No Knead, Overnight Focaccia Recipe
- It is easy to make; there is no hard kneading
- Requires only four basic ingredients to make the Focaccia dough
- We don’t need any special equipments or any special skills to make this Overnight Focaccia.
- The resulting Focaccia is so incredibly soft and moist in the middle, filled with large porous crumb and with a crispy crunchy crust.
All these factors make this Overnight Focaccia Recipe, one of the best recipes for making homemade Focaccia.
What’s focaccia
Focaccia is a soft, fluffy flatbread with a crispy crust, generously enriched with olive oil and often topped with herbs, vegetables, or other flavorful ingredients. Those little dimples on top? That’s what gives focaccia its classic look.
You can enjoy focaccia pretty much anytime—pair it with your morning coffee, have it as a midday snack, or serve it as a tasty appetizer. It’s super versatile!
What’s the Secret to the Best Overnight Focaccia?
The key to making truly delicious, bakery-style focaccia lies in a few critical techniques:
- High-Hydration Dough
A wetter dough (around 80% hydration) creates that signature open crumb with large airy holes and a soft, chewy texture. - Overnight Cold Retardation
Resting the dough in the refrigerator overnight deepens the flavor and improves its structure. - Long Proofing Time
Allowing the dough to ferment slowly gives it better rise, flavor, and texture. - Baking at High Heat with Convection Mode
A hot oven, preferably with convection, ensures a crisp golden crust while keeping the inside pillowy and tender.
Each of these steps works together to transform a simple dough into a beautifully textured and flavorful focaccia.
Ingredients needed for Overnight Focaccia Recipe

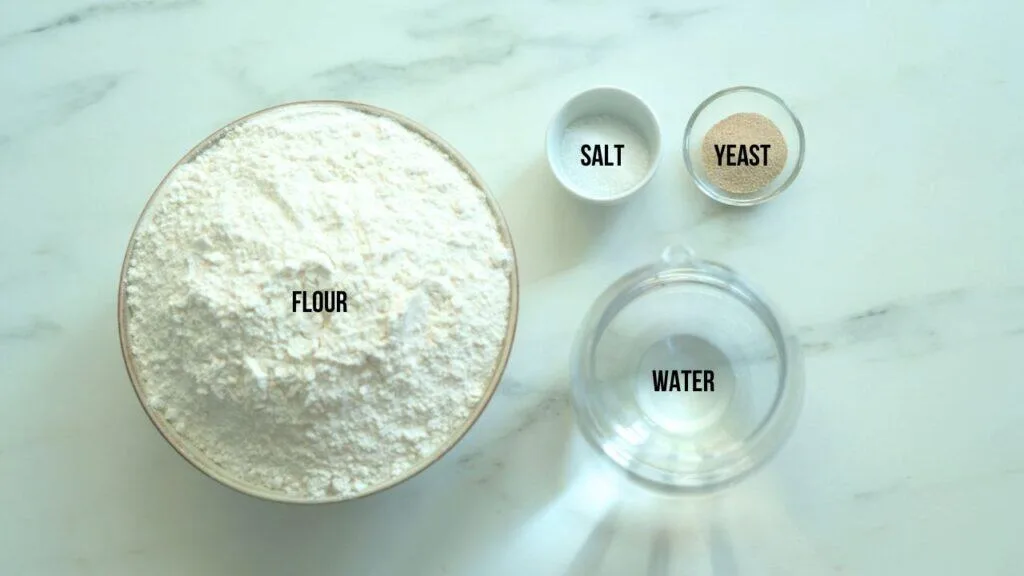
For the Focaccia Dough
- Flour: 500 g or approximately 4 cups – 2 tbsp (loosely packed)
- Water: 400 ml or 1 and 3/4 cups – 1 tbsp
- Salt: 10 g or 1.5 tsp
- Yeast: 3 g or 1 tsp
For Topping
- Olive oil: 30-45 ml or 2-3 tbsp
- Rosemary: 1-2 sprigs
How to make this Overnight Focaccia
As with any bread recipe, there isn’t just one way to approach it — there are many different techniques that can be used. The method below produces authentic focaccia bread with a crispy crust, large airy holes, and a soft, pillowy, chewy crumb.
Step 1: Prepare the Focaccia Dough
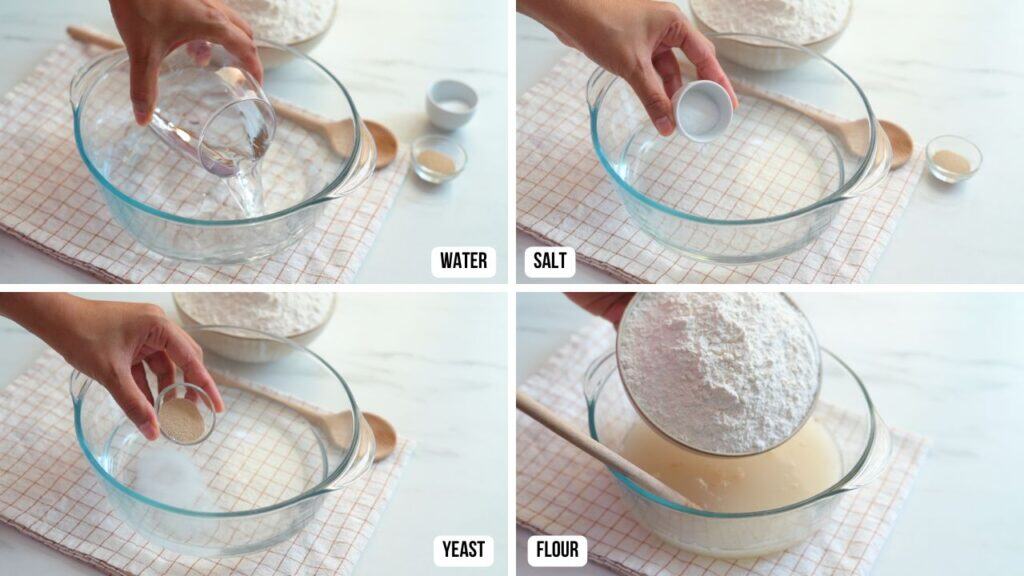
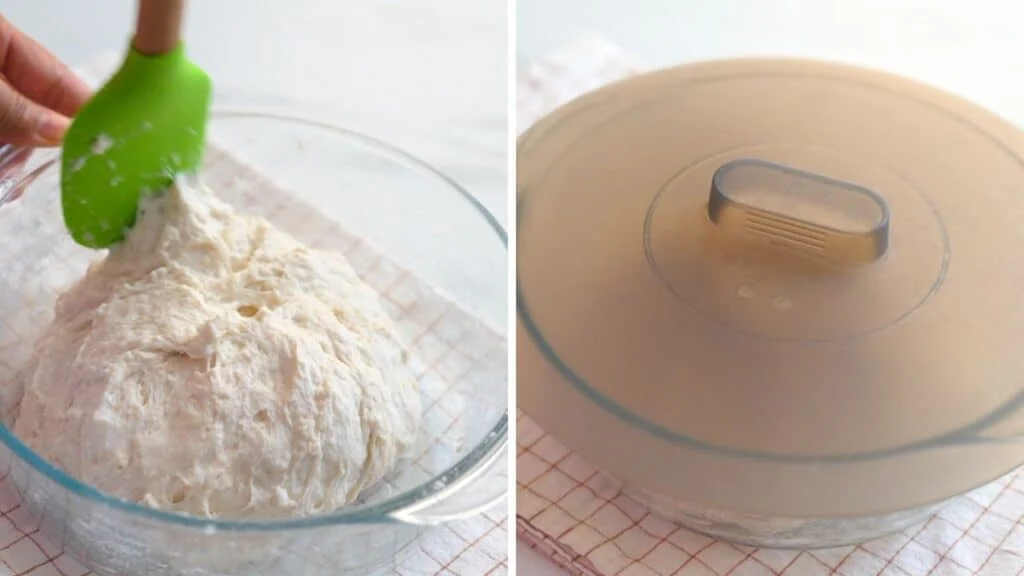
Pour the water into a bowl. Add the yeast and salt, and stir to dissolve them. Then add the flour. Mix everything together using the handle end of a wooden spoon — it’s easier this way and helps reduce mess during mixing.

If you have a stand mixer, you can use it to form the dough.
Attach the dough hook and knead the dough for 6–7 minutes until it comes together into a smooth, elastic dough.
In this focaccia bread recipe, I haven’t used a stand mixer.
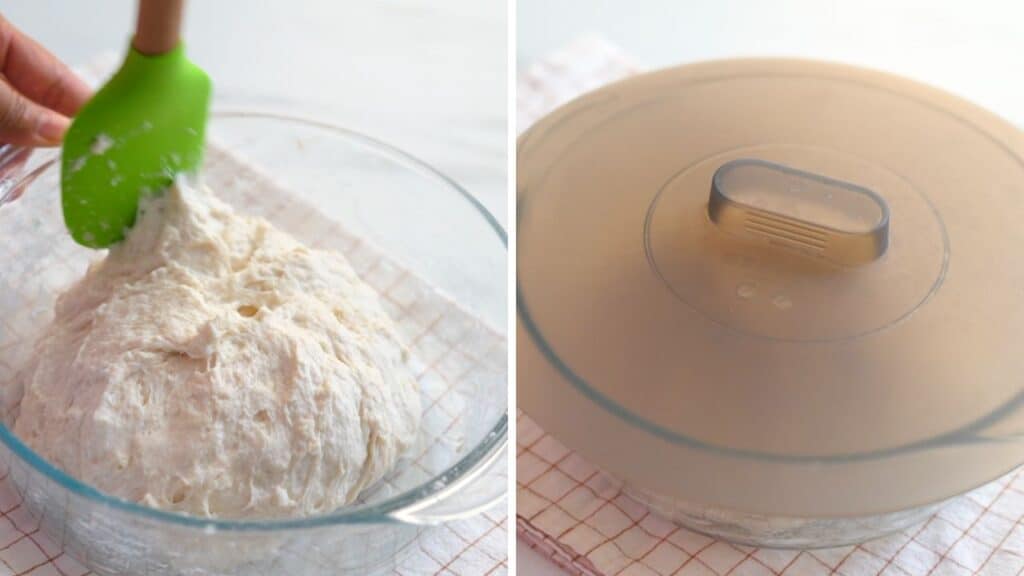
Making focaccia this way is incredibly easy and even relaxing — and the results are truly amazing!
Once the dough is prepared, cover the bowl with plastic wrap or a silicone lid and let it rest at room temperature.
Step 2. Proof and Fold the dough
Like any other bread recipes, we need to proof the dough.
Normally, kneading builds structure in bread dough. However, since this is a high-hydration dough, it’s quite wet and sticky, making traditional kneading difficult. So instead of kneading, we’ll use a simple yet effective technique that works like magic: “stretch and fold“.
This method gently strengthens the dough over time. To do this, you’ll stretch and fold the dough every 30 minutes during the proofing stage.
How to Handle Sticky Focaccia Dough
This Overnight Focaccia dough is very wet — it’s a high-hydration dough, nearly 80% hydration, compared to the usual 70% in most bread recipes.
Because of this, the dough is not kneaded like typical yeast doughs. Instead, it’s allowed to slowly ferment, while being gently strengthened through a series of short stretch-and-fold sessions.
Why Do We Stretch and Fold the Dough?
The stretch and fold technique plays a key role in the bread-making process. It serves two important purposes:
- Builds structure by gently developing the gluten network in the dough
- Evenly redistributes heat and fermentation activity, promoting a better rise and crumb
How to Perform the Stretch and Fold
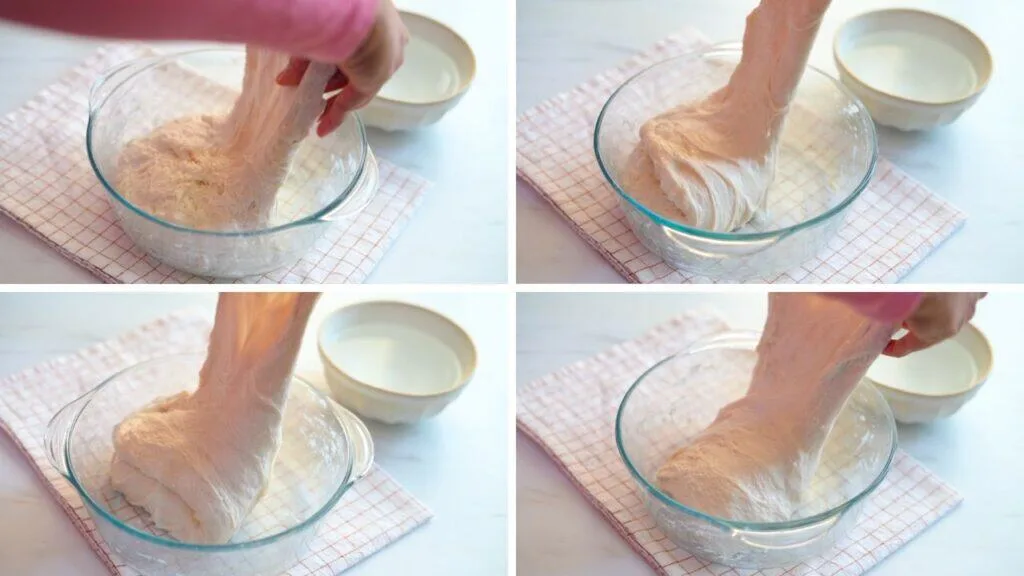
During the 1.5-hour(90 minute) bulk fermentation, you’ll perform 3 rounds of “stretch and folds”, spaced 30 minutes apart.
Here’s how to do it:
- Lightly wet your fingers (to prevent sticking).
- Grab one side of the dough, gently stretch it upward, then fold it over onto itself.
- Rotate the bowl 90 degrees and repeat the same movement.
- Continue until all four sides of the dough have been stretched and folded.
- Then cover the bowl, and let it rest for another 30 minutes before the next round.

This gentle process gradually strengthens the dough without traditional kneading, making it ideal for high-hydration breads like focaccia.
Step 3: Cold Retard
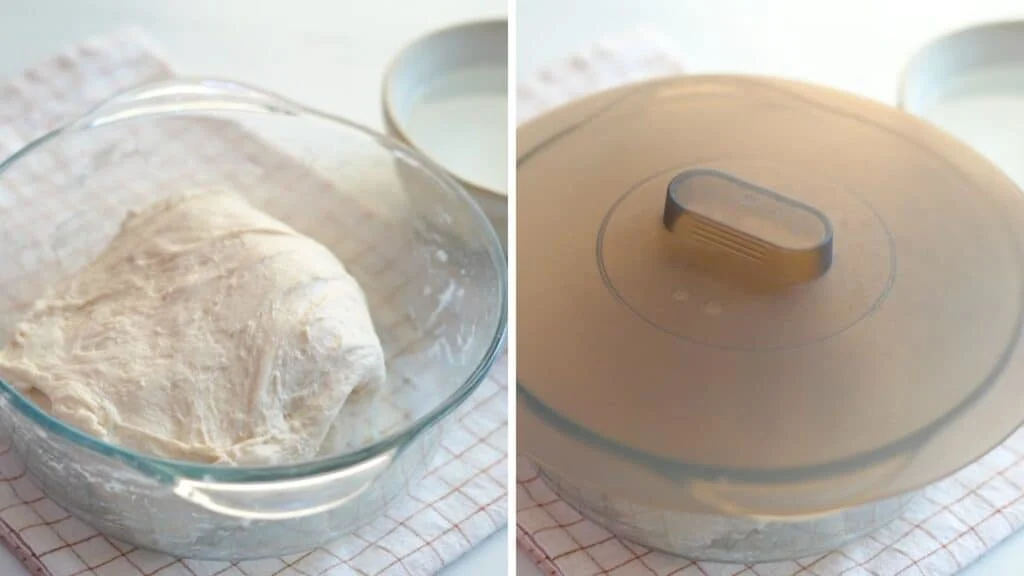
After 1.5 hours of proofing, along with the stretch-and-fold process, the dough will have noticeably risen and doubled in size.
At this point, lightly grease the surface of the dough with a bit of olive oil to prevent it from drying out. Then, cover the bowl and place it in the refrigerator for an overnight rest — this step is known as cold retardation.

You can keep the dough in fridge for 12-72 hours (up to 3 days). You can use this dough anytime during the cold retard from refrigerator and can make wonderfully fluffy focaccia with lots of open pores.
I took my dough after 24 hours of cold retard.
This slow, chilled fermentation helps to develop deeper flavor, enhances the dough’s structure, and makes it easier to handle the next day.
Step 4: Pre shaping
When you’re ready to bake the focaccia, take the dough out of the refrigerator.
Prepare your baking pan by greasing it generously with olive oil. This prevents the dough from sticking and also adds flavor and crispiness to the crust.
I have used 9×13 Baking Pan which is so good for making focaccia. It is metal pan and non sticky.
For making focaccia it’s better to use a metal pan than glass or ceramic.
If you’re using a ceramic or glass pan, you may need to increase the baking time by 5–8 minutes, as these pans take longer to heat up. This can lead to the bottom of the focaccia being underdone and may result in a slightly yeasty smell.

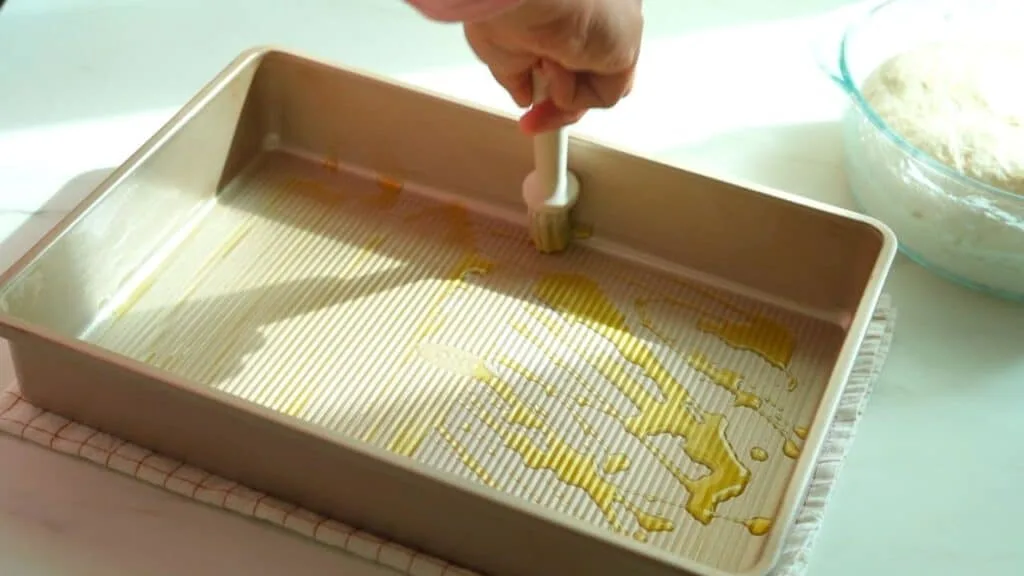
If your pan is not non-stick, it’s best to line it with parchment paper before oiling, for extra insurance against sticking.
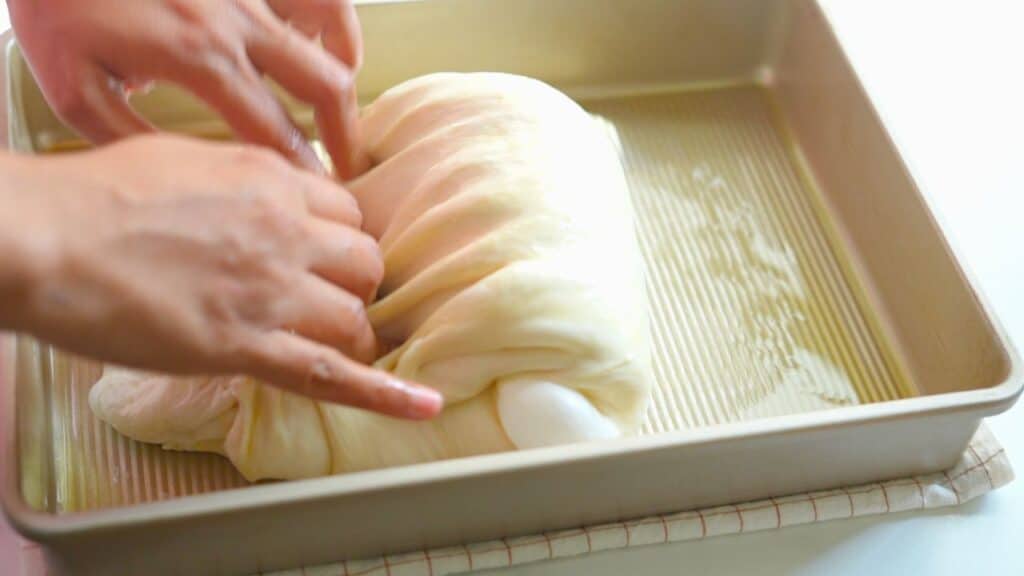
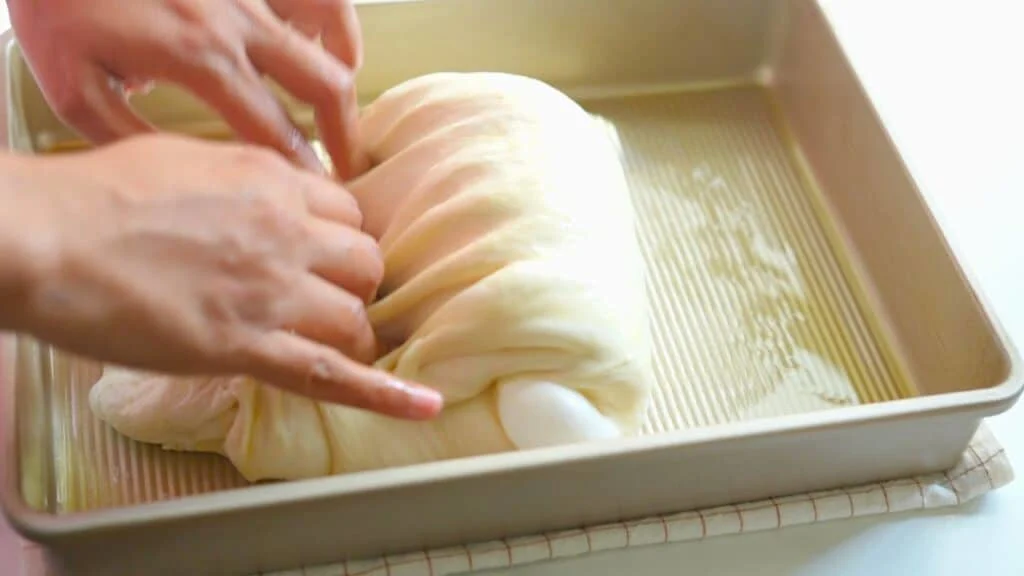
Next, flip the dough upside down onto the prepared baking pan.
To build structure and tension in the dough — which helps achieve a better oven spring — it’s important to Pre-shape the dough at this stage.
Fold the dough from all four sides, just like shown in the video, then flip it so the smooth side is facing up.
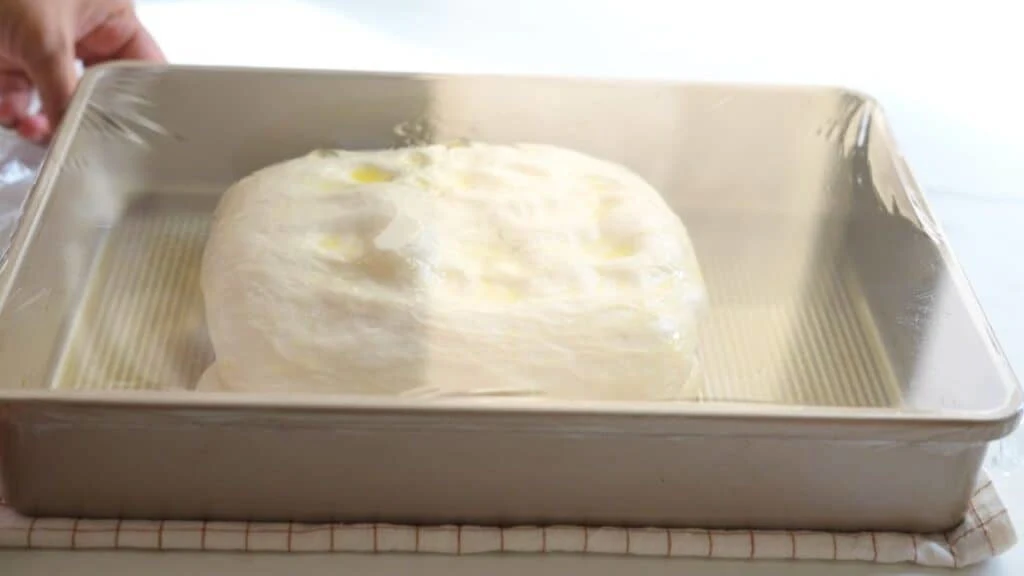
Finally, drizzle the top with olive oil and gently spread it across the surface and then cover it with a cling film.
This keeps the dough moist and ensures it won’t stick to the plastic wrap or cover during the final proofing.

Step 5: Final Rising
Let the dough sit and rise until it becomes visibly puffed up and airy. This final proof may take around 2 hours in a warm environment, or up to 2.5 hours if it’s cooler.
After about one hour of proofing, I like to gently flatten the dough. This helps ensure your focaccia bakes with an even thickness, instead of rising higher in the center and becoming domed.

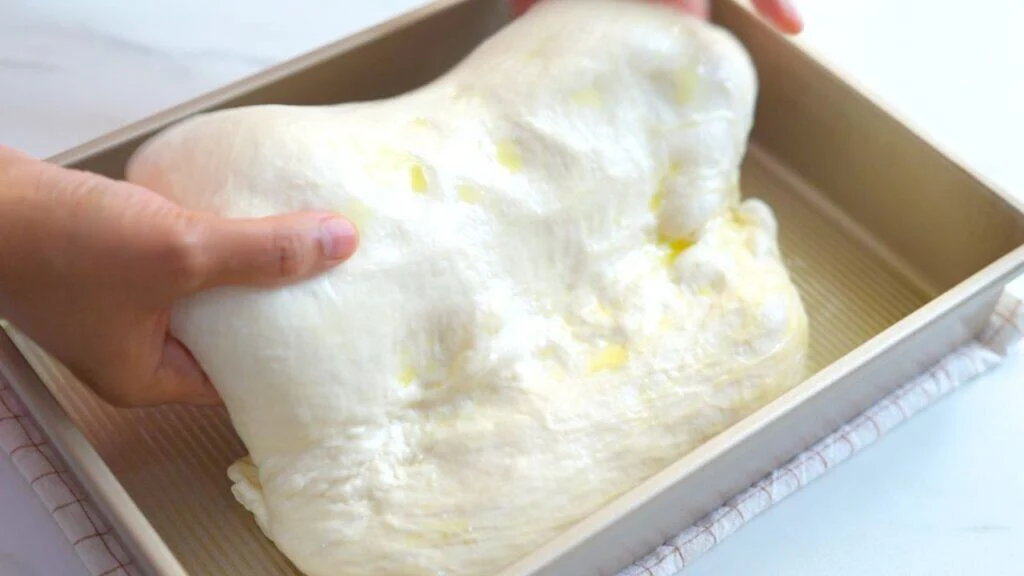
To do this, carefully lift and spread the dough from underneath, using just the tips of your fingers. Be gentle so you don’t deflate the precious air bubbles that have formed.
Once shaped, cover the tray with cling film and let the dough continue rising undisturbed for the remaining proofing time, until it’s soft, jiggly, and fully risen.
Step 6: Bake the Focaccia
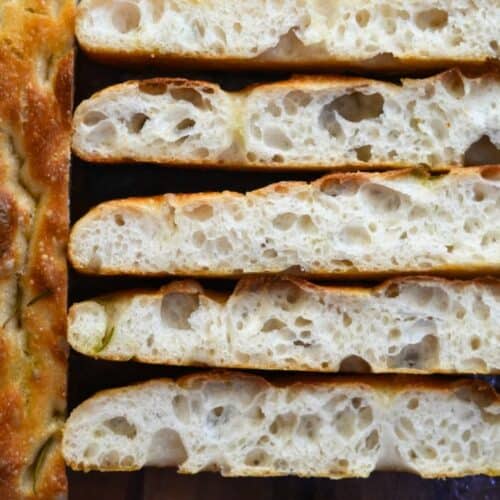
After the final rise, your focaccia should look soft, puffy, and full of large and small air bubbles — a sign that it’s beautifully fermented and airy.
Now, drizzle a little more olive oil over the top to keep the crust crisp and flavorful.

You can add your favorite toppings at this stage — like garlic, olives, caramelized onions, or fresh herbs.
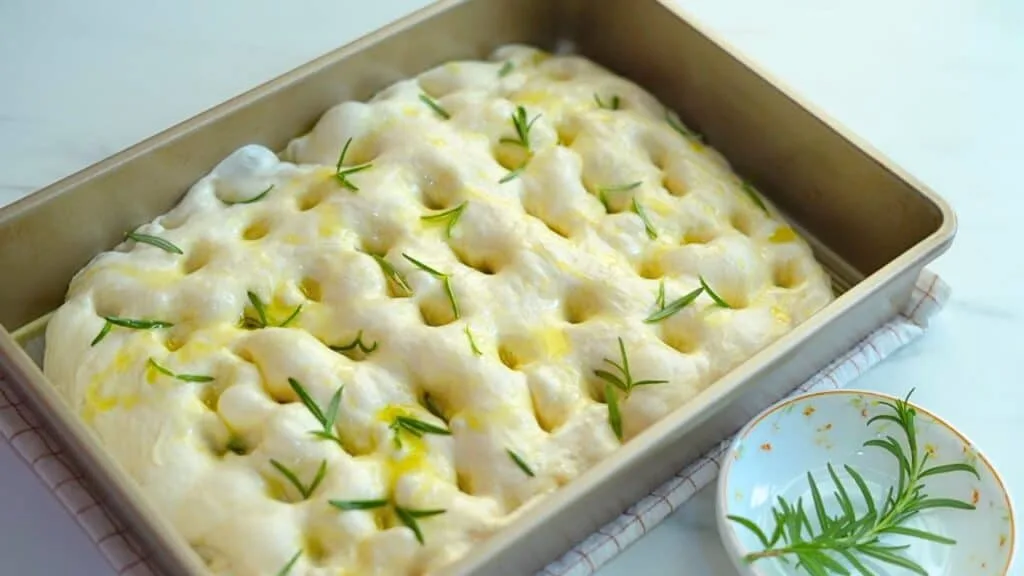
Here, I’m using a simple topping with fresh rosemary leaves, one of the most classic and delicious focaccia flavors. Gently spread them evenly over the surface.
Next, it’s time for dimpling. Using the tips of your fingers, press down to create dimples all over the surface of the dough. Don’t be afraid to go deep — these dimples help the focaccia bake evenly and allow the oil and toppings to seep into the dough, creating those rich, flavorful oil tunnels in every bite.
Now your focaccia is ready to go into the preheated oven!
Bake at 425 F or 220 C preheated oven for around 25 minutes.
Top of the focaccia should be deep golden brown and we need the bottom to be crispy and golden as well.

Cool and Serve
Once the focaccia is done baking, transfer it immediately to a cooling rack. This allows air to circulate underneath, preventing steam from getting trapped and making the bottom soggy.
Let it cool for a few minutes so the structure sets, but focaccia is best enjoyed warm, when the crust is still crisp and the inside is soft and fluffy.
How to Serve Focaccia
Focaccia is a versatile bread that can be served in many delicious ways. Here are some ideas:
1. As a Side
- Serve warm alongside soups, stews, or pasta dishes.
- It’s perfect to dip in Olive oil, balsamic vinegar bread dipping oil or sauces.


2. As a Snack or Appetizer
- Cut into small squares or strips and serve with a dip like hummus, tzatziki, or pesto.
- Top with cheese, olives, or cured meats for a party platter.
3. As Sandwich Bread
- Slice horizontally and use it to make gourmet sandwiches with layers of meat, cheese, roasted veggies, or spreads.
- Grill or toast it slightly for extra flavor.


4. For Breakfast or Brunch
- Enjoy it plain or topped with a little butter and jam.
- Pair with coffee or tea for a simple, savory start to the day.
How to Store Leftover Focaccia
1. At Room Temperature (Short-Term: 1–2 days)
- Let the focaccia cool completely after baking.
- Wrap it in parchment paper or a clean kitchen towel, then place it in a paper bag or loosely wrap in foil.
To reheat: Spray the focaccia with some water. Warm in a preheated oven (around 180°C / 350°F) for 5–10 minutes to refresh the crust.
2. In the Freezer (For longer storage: up to 2 months)
- Slice the focaccia into portions for easier use.
- Wrap each piece in plastic wrap, then place in a freezer-safe bag or airtight container.
- Label with the date.
To reheat: To reheat: Thaw at room temperature, then spray the focaccia with some water. Warm in a preheated oven (around 180°C / 350°F) for 5–10 minutes until warm and crisp.
Watch Video to see How Easy it is to make No Knead Overnight Focaccia

Overnight Focaccia Recipe for Fluffy, Open Crumb Focaccia.
Ingredients
For the dough
- 500 g Flour or approximately 4 cups – 2 tbsp (loosely packed)
- 400 ml Water or 1 and 3/4 cups – 1 tbsp
- 10 g Salt or 1.5 tsp
- 3 g Yeast or 1 tsp
For topping and greasing
- 30-45 ml Olive oil 2-3 tbsp
- 1-2 Rosemary Sprigs or you can add your favorite ingredients like garlic, caramelized onion or olives
Instructions
Prepare the Focaccia Dough
- Pour the water into a bowl. Add the yeast and salt, and stir to dissolve them. Then add the flour. Mix everything together. Make sure there are no dry patches left.You can use the rear end of a wooden spoon to mix he dough or can use a stand mixer.
- Once the dough is prepared, cover the bowl with plastic wrap or a silicone lid and let it rest at room temperature.
Proof and Fold the dough
- During the 1.5-hour(90 minute) bulk fermentation, you’ll perform 3 rounds of “stretch and folds”, spaced 30 minutes apart.
- Here’s how to do it:Lightly wet your fingers (to prevent sticking).Grab one side of the dough, gently stretch it upward, then fold it over onto itself.Rotate the bowl 90 degrees and repeat the same movement.Continue until all four sides of the dough have been stretched and folded.Then cover the bowl, and let it rest for another 30 minutes before the next round.
Cold Retard
- After 1.5 hours of proofing, along with the stretch-and-fold process, the dough will have noticeably risen and doubled in size.
- At this point, lightly grease the surface of the dough with a bit of olive oil to prevent it from drying out. Then, cover the bowl and place it in the refrigerator for an overnight rest — this step is known as cold retardation.
- You can keep the dough in fridge for 12-72 hours (up to 3 days). You can use this dough anytime during this cold retard from refrigerator and can make wonderfully fluffy focaccia with lots of open pores. I used the dough after 24 hours of cold retard.
Pre shaping
- When you’re ready to bake the focaccia, take the dough out of the refrigerator.Prepare your baking pan by greasing it generously with olive oil.
- If your pan is not non-stick, it’s best to line it with parchment paper before oiling, for extra insurance against sticking.
- Next, flip the dough upside down onto the prepared baking pan.To build structure and tension in the dough — which helps achieve a better oven spring — it’s important to Pre-shape the dough at this stage.Fold the dough from all four sides, just like shown in the video, then flip it so the smooth side is facing up.
- Finally, drizzle the top with olive oil and gently spread it across the surface and then cover it with a cling film.
Final Rising
- Let the dough sit and rise until it becomes visibly puffed up and airy. This final proof may take around 2 hours in a warm environment, or up to 2.5 hours if it’s cooler.After about one hour of proofing, I like to gently flatten the dough. This helps ensure your focaccia bakes with an even thickness, instead of rising higher in the center and becoming domed.
- To do this, carefully lift and spread the dough from underneath, using just the tips of your fingers. Be gentle so you don’t deflate the precious air bubbles that have formed.
- Once shaped, cover the tray with cling film and let the dough continue rising undisturbed for the remaining proofing time, until it’s soft, jiggly, and fully risen.
Bake the Focaccia
- After the final rise, your focaccia should look soft, puffy, and full of large and small air bubbles — a sign that it’s beautifully fermented and airy.Now, drizzle a little more olive oil over the top to keep the crust crisp and flavorful.
- You can add your favorite toppings at this stage — like garlic, olives, caramelized onions, or fresh herbs.
- Using the tips of your fingers, press down to create dimples all over the surface of the dough. Don’t be afraid to go deep — these dimples help the focaccia bake evenly and allow the oil and toppings to seep into the dough, creating those rich, flavorful oil tunnels in every bite.
- Now your focaccia is ready to go into the preheated oven!
- Bake at 425 F or 220 C preheated oven for around 25 minutes. Top of the focaccia should be deep golden brown and we need the bottom to be crispy and golden as well.
- Once the focaccia is done baking, transfer it immediately to a cooling rack. Let it cool for a few minutes so the structure sets, but focaccia is best enjoyed warm, when the crust is still crisp and the inside is soft and fluffy.
Video
Notes
Use a Metal Pan for making Focaccia
If you are using a glass or ceramic pan, then you may need to increase the baking time 5-8 minutes. Metal or cast iron gives the best crust. Glass or ceramic might lead to a soggier bottom. Cool on a Rack Immediately after bakingKeeps the bottom crisp. Don’t let it steam in the pan. Use a Generously Oiled Pan:
Prevent sticking and get that signature crispy, golden crust. Dough Will Be Sticky – That’s Good!
Use wet or oiled hands to handle it. Don’t add extra flour.
Aurora
Sunday 13th of July 2025
You said it’s better to use a convection oven. If I do should I bake it 20 degrees lower than your recipe indicated at 425