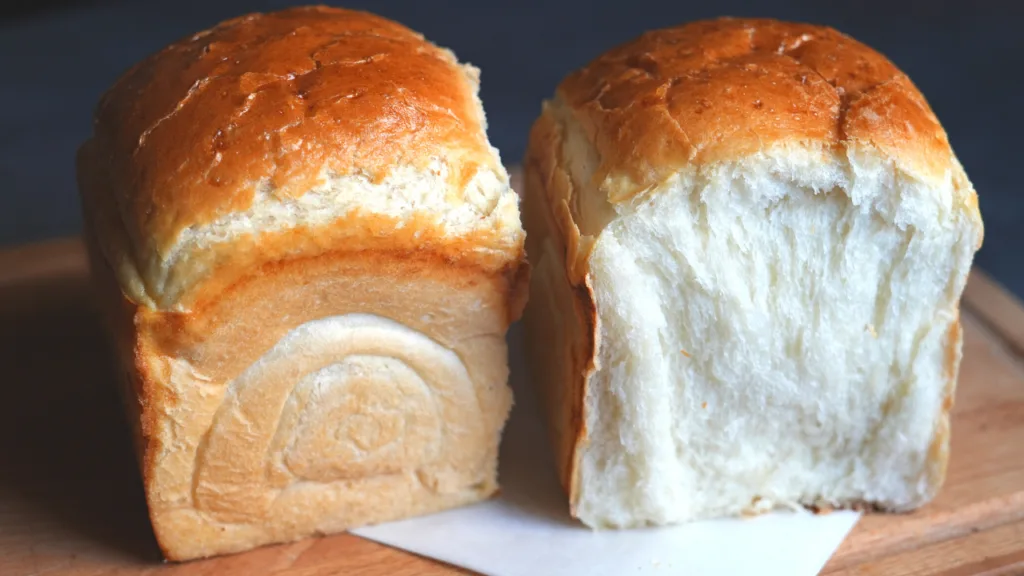
This Dairy free bread recipe will help you make soft and fluffy sandwich bread using only six basic ingredients in five simple steps.
This dairy free white bread recipe is completely free from milk and butter. If you are allergic to milk or milk products, you can use this dairy free bread recipe to make super soft sandwich bread.
Dairy free bread :Ingredients
- Flour: 357 g or 2 3/4 cup
- Warm water: 230 ml or 1 cup-2 tsp
- Instant yeast: 1 tsp(Active dry yeast 1 and 1/4 tsp)
- Salt : 6 g or 1 tsp
- Vegetable Oil: 14.8 ml or 1 tbsp(I’ve used olive oil)
- Sugar : 12.5 g or 1 tbsp or more according to your preference
How to make dairy free bread
You can make this soft Dairy free white bread in five simple steps
1.Prepare the Dairy Free Bread Dough
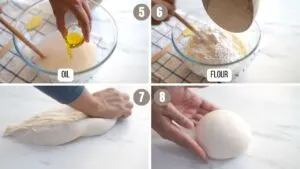
Into a bowl, add in the water, honey or sugar, salt, yeast and stir to dissolve the ingredients in water.
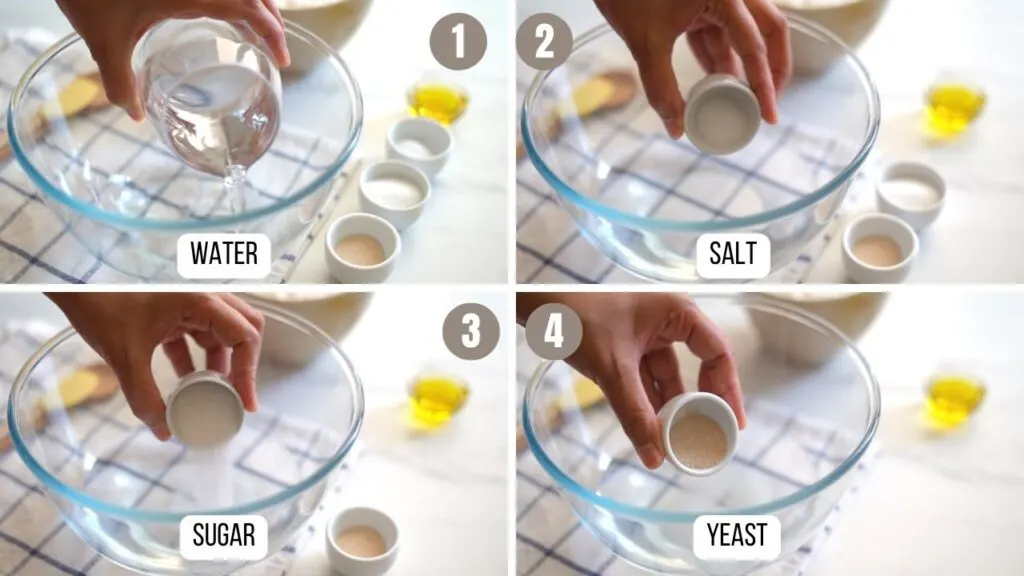
Add in the oil.
Add the flour.

Combine everything together to form a shaggy mass of dough.
Now transfer the dough on to a clean work surface and we need to knead the dough.
Kneading the dough helps to develop the gluten strands which later helps to create soft ,light, airy bread.
If you are kneading with stand mixer then it will be so much easier for you to knead the dough.
Use the dough hook attachment and knead the dough for around 10 minutes on low speed.
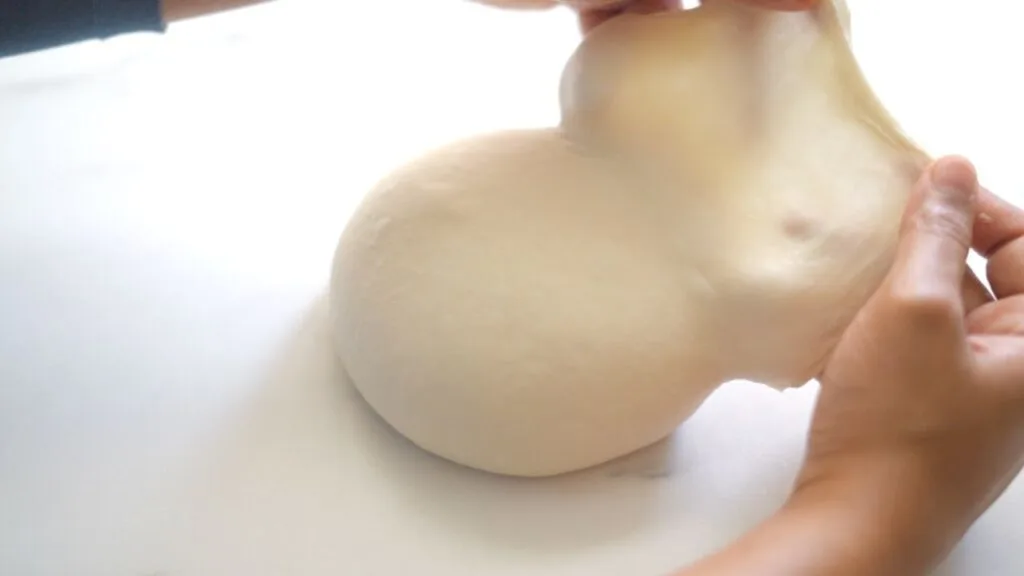
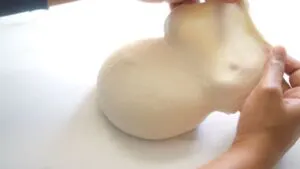
We need to knead the dough until it passes or almost pass the window pane test.
What is window pane test?
The windowpane test is one of the best ways to tell if you’ve sufficiently kneaded your bread dough. If you can stretch the dough to a thin membrane without easily breaking the membrane, that means the gluten is well-developed and your dough is ready to make wonderful bread.
If you feel tired in between the kneading, you can cover the dough for 10 minutes and then continue to knead it.
This will give some rest to your hands and more gluten power to the dough.
After kneading for 10-12 minutes ,our dough will be soft and smooth and it will bounce back when pressed and it will still show a tendancy to stick on to the surface.
Now our dough is ready for the first proofing.
If you don’t want to knead the dough, then you will love these No knead Bread recipes.
Light and Airy Ciabatta Bread recipe
Soft and delicious No knead dinner rolls
No knead Rustic Dutch oven bread
2.First Proofing
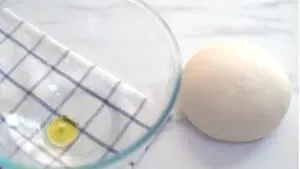
Lightly oil a clean bowl and place the dough inside it and then wrap it with a plastic film and let the dough rise in a warm environment for 50 minutes.

If you want to skip double proofing, you can try these Easy Faster One Rise Bread Recipes
Quick and Easy Dinner rolls recipe
Delicious One Rise Cinnamon Rolls Recipe
3.Shape the dough
After the proofing,degas the dough.

Transfer the dairy free bread dough on to a clean work surface.
Divide the dough into two equal parts(optional).If you like to make a single loaf in a pan then no need to divide the dough.
Then roll each portion to form a log shape.
Cover the rolled doughs with a cling film or wet cloth and stand it for 10 minutes on the counter.
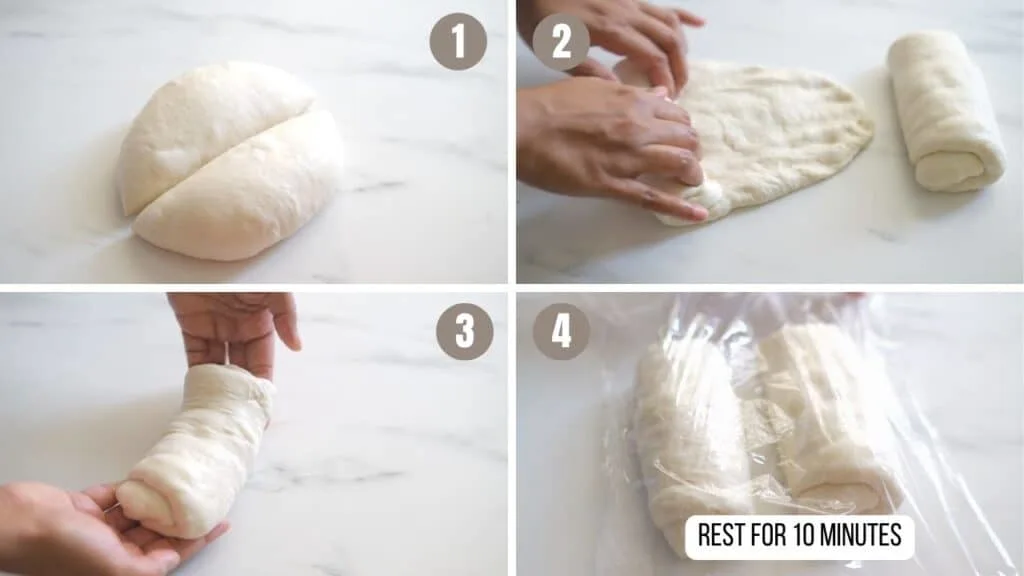
After 10 minutes,take one of the rolled dough.
Using a rolling pin ,roll it out to form a rectangle.(approximately 16cm x 26cm).
Fold the dough from both sides.
Now flatten this rectangle in to a long rectangle and then roll and fold the dough.
We need to make sure there are no air pockets inside; other wise there will be large air holes of different sizes in our bread.
Roll the dough just as we roll a jelly roll.
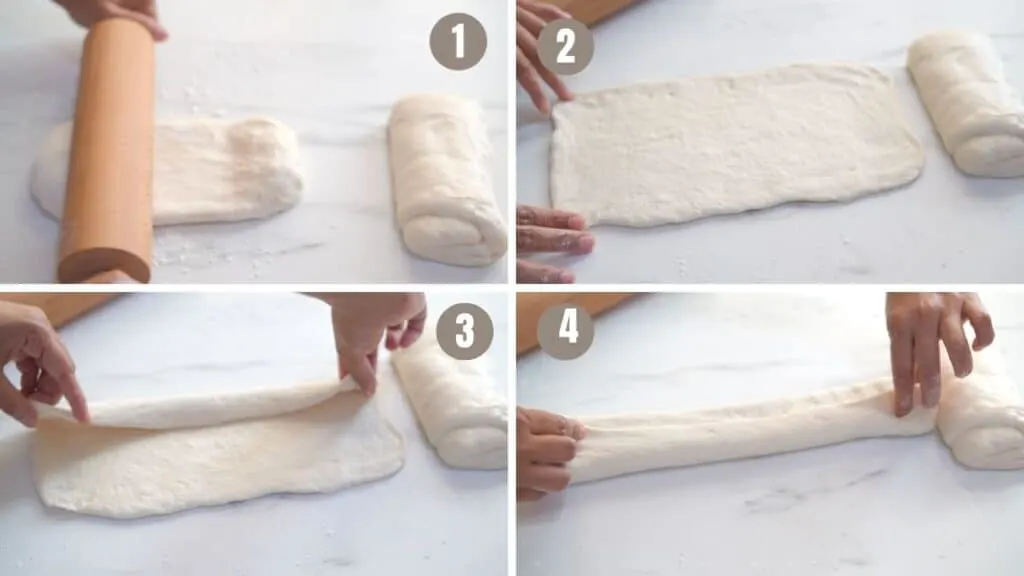
Pinch the edges to seal.
Place it into a greased baking pan.
Repeat the same with the second piece of dough.
Now our dough is ready for the final rising.
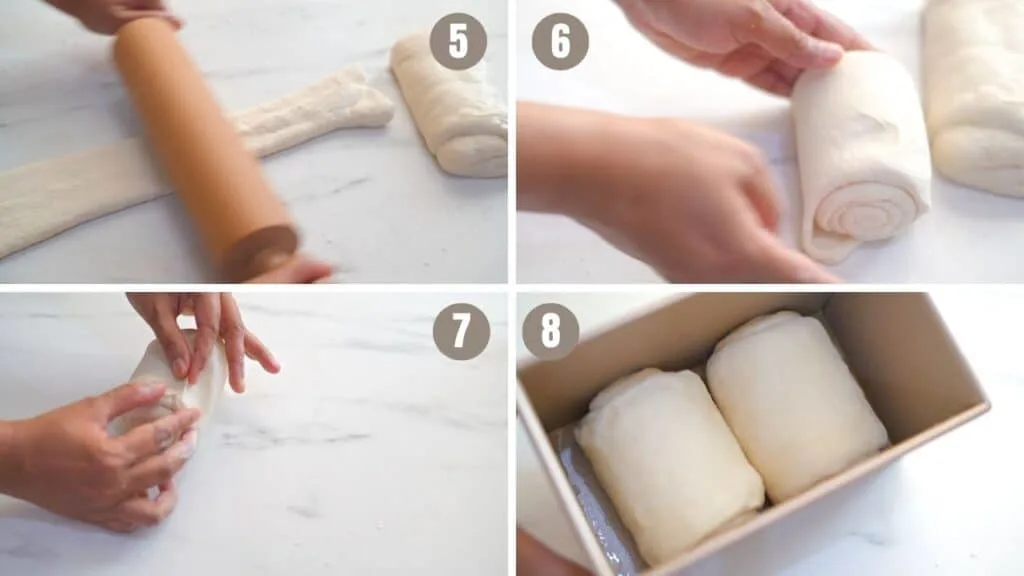
So cover it with a plastic film.
4.Final rising
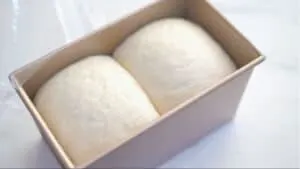
Let the dough sit and rise in warm environment for 70-75 minutes.
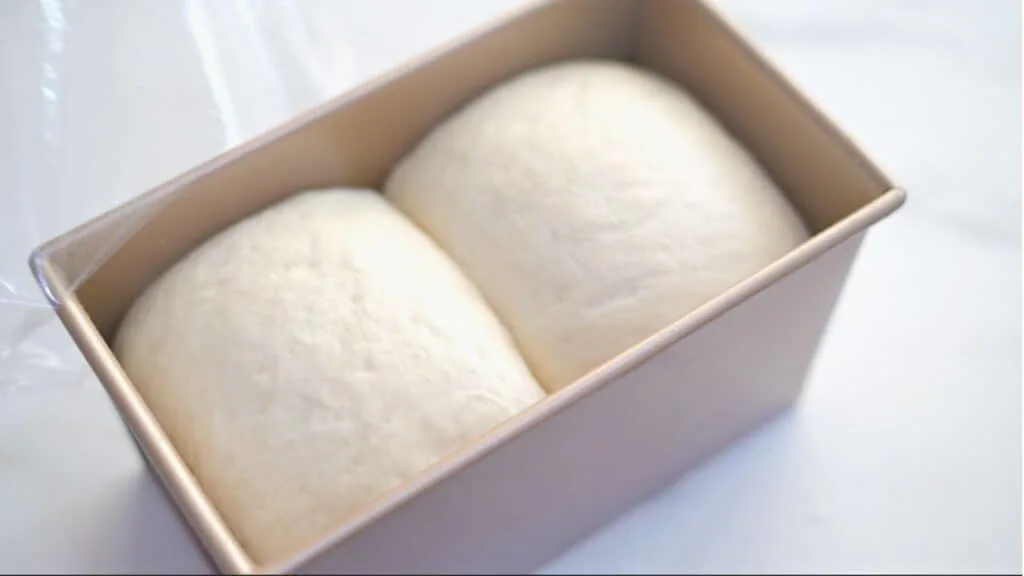
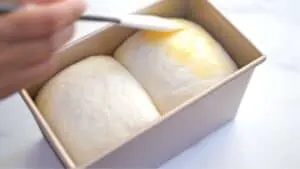
Give an egg wash on top of the dough before taking into the oven for baking(optional).This will give a nice shine and golden brown color to our “no dairy bread”.
5.Bake the bread
Bake at 350 F preheated oven for around 36-38 minutes.
The top of the bread will start browning at around 25 minutes of baking.It doesn’t mean our bread is done.
At this point if we take it out, the center of the bread will have a doughy texture and it will smell very “yeasty”
So wait for 36-38 minutes to bake it properly.
When the bread is done,take the pan out of the oven.
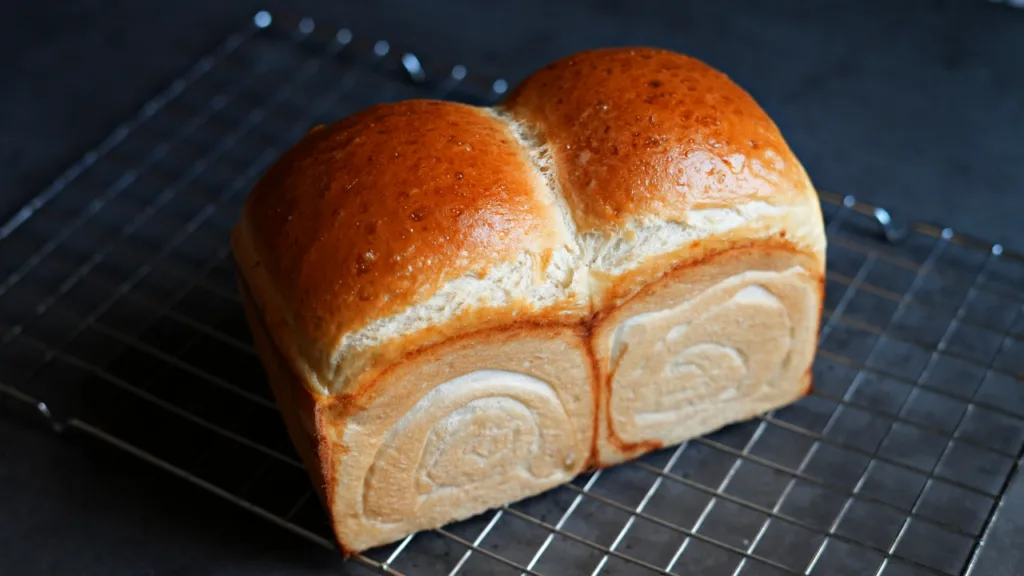
Demould the bread and place it on a wire rack and let it cool down completely before slicing it.
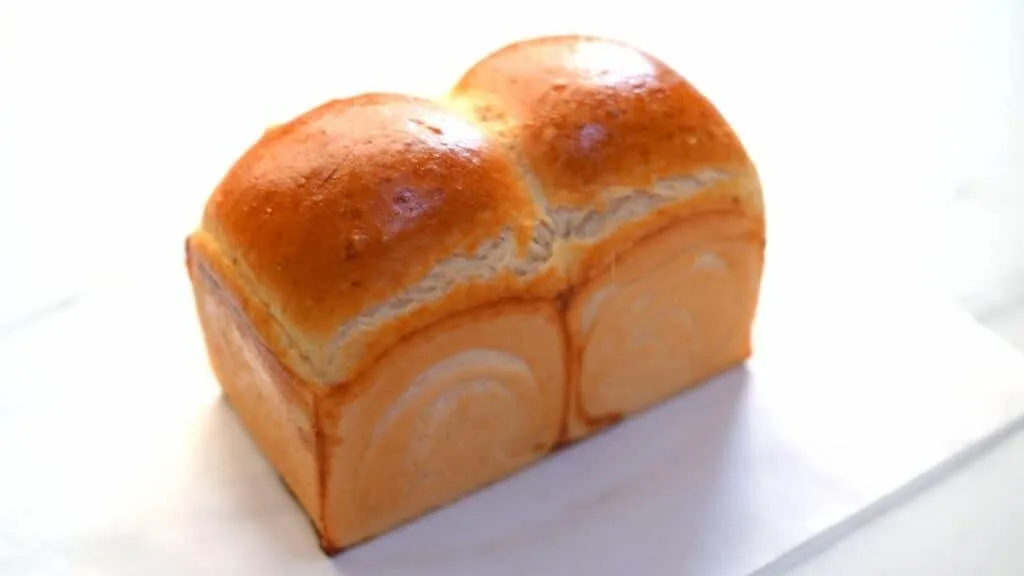
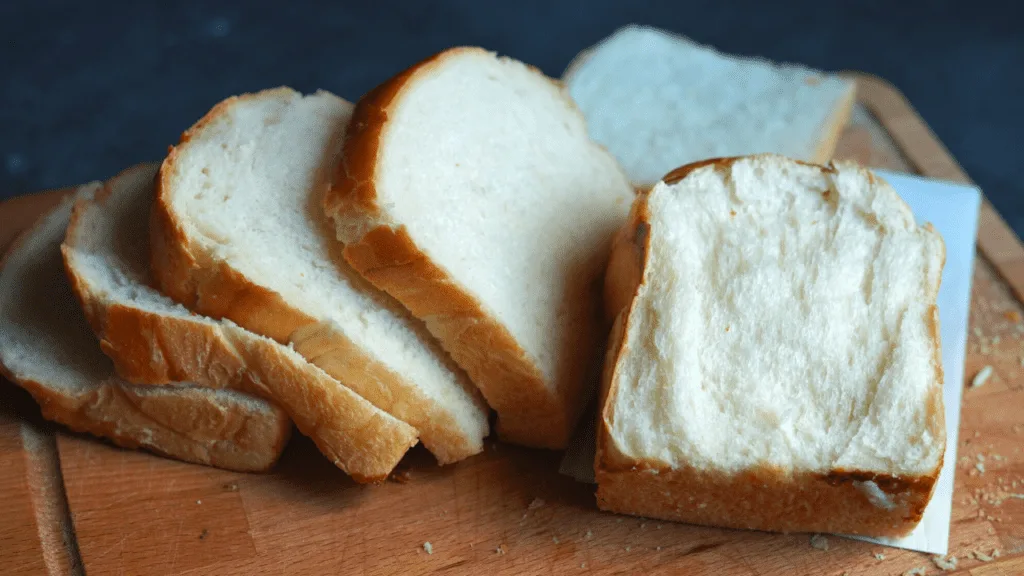
The bread will be golden brown in color,with a thin soft crust and soft and fluffy crumb inside.
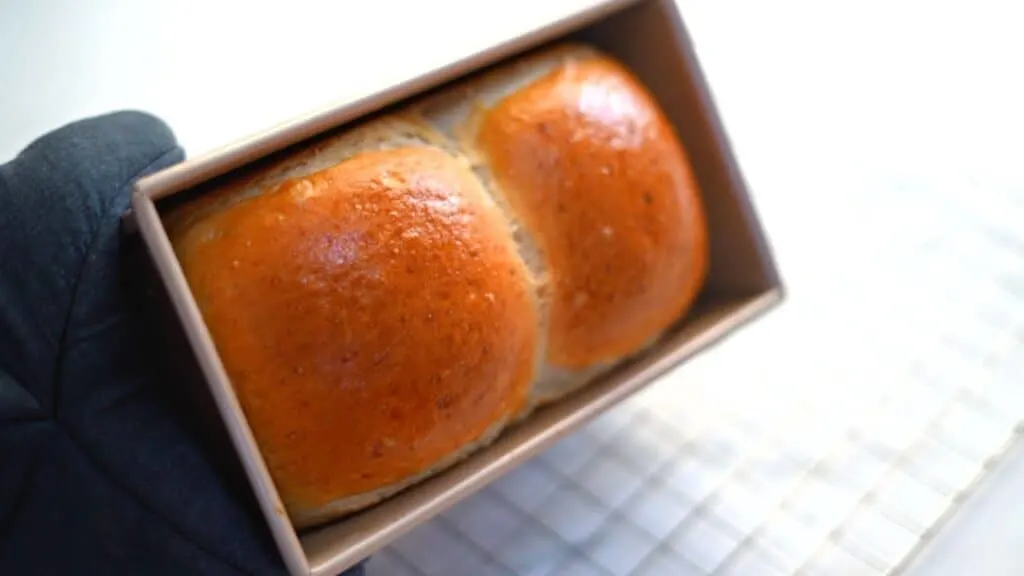
How to check the doneness of this dairy free sandwich bread
Different Ovens may perform slightly differently.And the baking duration vary according to the size of bread pan.But anyhow,we will get to the right conclusion of baking temperature about your oven in a few trials.
1. Visually :The Bread should be golden brown on all sides and not only on the top.If you see the sides are not golden brown in color ,most likely the inside will not be cooked enough.So bake for another five more minutes and check again.
2. Tap the Bottom – Take the loaf out of the oven and remove from the pullman loaf tin,and turn it upside down. Tap the bottom of bread with your thumb, like striking a drum. The bread will sound hollow when it’s done.
3. Take the Internal Temperature – Insert an instant read thermometer into center of the loaf. This pullman bread is done, when the internal temperature is closer to 200°.
If you’re ever in doubt, it’s better to cook the loaf a little longer than to undercook it. An extra five minutes isn’t going to burn the crust, and the worst that will happen is that your bread will be a bit on the dry side. But better dry than un-baked!
Also, if you’re consistently having trouble with over- or under-baked loaves, check the temperature of your oven with an oven thermometer.

By CANDeal$22.99$27.99Rated 4.5 out of 5 by 1157 reviewers on Amazon.comBuy Now
How to store this Dairy free white sandwich bread ?
The milk free bread can be stored at room temperature in a cool dry place for up to 2-3 days.Wrap it with plastic film or keep it in paper bag.
Heat and humidity causes bread to mold. So if you want to store it for longer, wrap it well and keep it in refrigerator.This lactose free bread will stay good for up to seven days in refrigerator.But the chance of bread getting dry is more if we keep it in refrigerator.
Can I freeze this non dairy bread ?
Yes you can freeze this milk free bread.Simply wrap the bread in plastic or aluminum foil to protect it from freezer burn and keep frozen for up to one month.
Take it out whenever you need and just put it in a toaster or in the preheated oven for 10 minutes, and you’ll get fresh bread ready to eat.
Why is my dairy free bread dense and heavy?
- Your rise is too short or too long. If the rising time is too short, the yeast won’t have a chance to create bubbles and Carbon dioxide to make the bubbles expand. If too long, the dough will collapse onto itself.
- The temperature during rise is too hot or too cold. The ideal temperature for yeast growth is just overy about 100F, though room temperature is fine as long as you give the yeast more time to work.
- Probably the yeast is not active. Try different yeast.
- Your dough can’t hold its shape because the flour lacks gluten.This usually happens when we make bread using whole grains like whole wheat flour.In such cases,you can try adding little bread flour or add vital wheat gluten to your dough.
Why is my white dairy free bread not cooked in the middle?
When the baking temperature is higher than the recipe suggests, the outer crust will get baked quickly and it may turn brown in a few minutes.But at the same time, the inside of the bread will remain uncooked.
- Oven too hot at beginning; If the crust browns too early, the loaf can’t expand to its maximum volume. This interferes with the inner texture of the bread.
- If it’s taken from the oven too soon; just because the outside looks done, and the baking is actually incomplete, the inner crumb will be gummy and lacking in flavor.
Solution:You should decrease the baking temperature and take more time to bake bread and you’ll get perfectly cooked and colored bread 🙂
Why my dairy free sandwich bread collapse ?
Overproofing the bread dough can cause structural weakness, resulting in collapse.
When the second rise (or the rising of dough after it is been shaped) is longer than the recipe suggests, the gluten strands will expand much higher; and when baked in oven, the starch gelatinize and the proteins coagulate and thus the gluten strands curl up, tightening their links with each other, and solidifying the bread’s structure and it will loose its strength and will not be able to hold its structure or shape and it will collapse.
Why my dairy free white bread didn’t rise ?
If the Bread did not rise, the probable reasons are connected with yeast and its activity.
- So Its better to Proof the yeast before using.
- Check the proper water temperature before dissolving the yeast. (Ideal Temperature:110F)
- Some experts says ,Salt added directly to the yeast inhibits or kills it.
- Dough too stiff because too much flour during mixing or kneading; dough should be tacky after mixing, smooth after kneading
How to reheat the dairy free bread ?
- Preheat the oven to 350 °F (177 °C). This is the best temperature for reheating bread. Any hotter and the bread could burn quickly. A lower temperature would require a longer cooking time, resulting in dry bread. If you want a soft interior with a chewy crust, 350℉ (175℃) is the way to go.
- Spray some water on the bread or cover the bread with an aluminum foil (so that the bread will not get dry when baked)
- Place you bread inside the preheated oven and bake for about 10 minutes.You will get bread as it is freshly baked.Larger bread loaf may require 5 more minutes of baking.
- If you want to make your bread moist, warm and chewy, then you can steam the bread.
- Toast your bread in a toaster.
Why my dairy free bread is having strong yeast smell?
- Over-risen bread dough. Stop the rising when the dough has almost doubled in size (use finger-top test).
- Incomplete baking. If the bread is not baked properly in the middle ,the bread will smell “yeasty”
- Not kneading enough.
- Too much yeast.
Why the crust of my dairy free sandwich bread is too thick ?
- Kneading problems. When finished kneading, dough should be ‘tacky’, not dry.
- Oven temperature too low.Which leads to longer baking time which can result in thick crust.
- Bread overbaked.
How to make Dairy free bread:Step by step video
5 Tips for making the best sandwich bread every time you bake.
- Measure your ingredients using a weighing scale because every cup of flour can weigh differently depending on how you fill it.
- Yeast is one of the most important ingredient in bread making.So always check the expiry of the yeast. If unsure, combine the yeast with water/milk and sugar/honey,from the recipe and let stand 5 minutes. If it gets foamy the yeast is good to go if not,its best to buy fresh yeast.
- The temperature of liquid ingredient in the recipe can kill(if hot) or make the yeast inactive(if cold).So it is crucial in making bread.Ideal temperature should be around 110 F (must be warm but not hot) .In my opinion, if not sure about the temperature, keep in mind that higher temperature will kill yeast which cannot be reversed but low temperature will make the yeast dormant for a few time but it will get activated even if it takes some time.
- While kneading the dough, you may find the dough to be too sticky to handle in the beginning.At this time, we may get tempted to add more flour in to this but don’t do that.A soft loose well-hydrated dough is not necessarily a bad thing, it often will give you soft fluffy bread.
- Baking temperature should be not too hot, as it will cause the crust to form too fast and the inside to be uncooked.Baking temperature should not be too low, because it may not help to bake our bread properly, we may need to bake for a very long time and it will create a very thick crust which is unpleasant and make the bread more dry.
Dairy free bread recipe
Ingredients
To make Dairy free bread dough
- 357 g Flour or 2 3/4 cup(loosely packed)
- 230 ml Water or 1 cup-2 tsp
- 3 g Instant yeast or 1 tsp (Active dry yeast 1 and 1/4 tsp)
- 6 g Salt or 1 tsp
- 14.8 ml Vegetable Oil or 1 tbsp (I 've used olive oil)
- 12.5 g Sugar or 1 tbsp or more according to your preference
Instructions
Prepare the dairy free bread dough
- Into a bowl, add in the water,sugar,salt,yeast and stir to dissolve the ingredients in water.Add in the oil.Add the flour.

- Combine everything together to form a shaggy mass of dough.Now transfer the dough on to a clean work surface and we need to knead the dough.Kneading the dough helps to develop the gluten strands which later helps to create soft ,light, airy bread.
- After kneading for 10-12 minutes ,our dough will be soft and smooth and it will bounce back when pressed and it will still show a tendancy to stick on to the surface.Now our dough is ready for the first proofing.
Proof the dough
- Lightly oil a clean bowl and place the dough inside it and then wrap it with a plastic film and let the dough rise in a warm environment for 50 minutes.
Divide and shape the dough
- After the proofing,degas the dough.
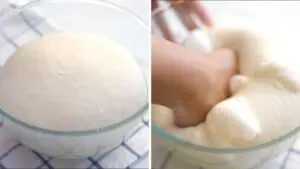
- Transfer the dairy free bread dough on to a clean work surface.Divide the dough into two equal parts(optional).If you like to make a single loaf in a pan then no need to divide the dough.
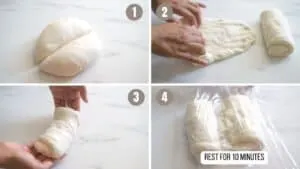
- Then roll each portion to form a log shape.Cover the rolled doughs with a cling film or wet cloth and stand it for 10 minutes on the counter.
- After 10 minutes,take one of the rolled dough.Using a rolling pin ,roll it out to form a rectangle.(approximately 16cm x 25cm).Fold the dough from both sides.Now flatten this rectangle in to a long rectangle and then roll and fold the dough.We need to make sure there are no air pockets inside; other wise there will be large air holes of different sizes in our bread.
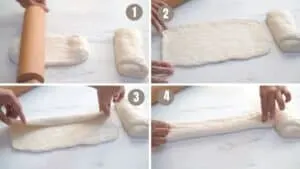
- Roll the dough just as we roll a jelly roll.Pinch the edges to seal.

- Place it into a greased baking pan.Repeat the same with the second piece of dough.Now our dough is ready for the final rising.So cover it with a plastic film.
Proof the shaped bread dough
- Let the dough sit and rise in warm environment for 70-75 minutes.
- Give an egg wash (optional) before taking into the oven.This will give a nice shine and golden color to the bread when baked.
Bake the Dairy free bread
- Bake at 350 F preheated oven for around 36-38 minutes.
- The top of the bread will start browning at around 25 minutes of baking.It doesn’t mean our bread is done.At this point if we take it out, the center of the bread will have a doughy texture and it will smell very “yeasty”So wait for 36-38 minutes to bake it properly.
- When the bread is done,take the pan out of the oven.Demould the bread and place it on a wire rack and let it cool down completely before slicing it.The bread will be golden brown in color,with a thin soft crust and soft and fluffy crumb inside.
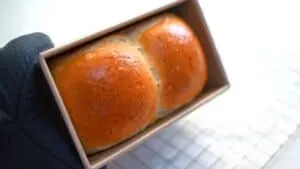
- Enjoy!
Michelle
Thursday 8th of June 2023
Best bread ever and is super soft. I had a ham and cheese sandwich with this bread and it was divine.
Bincy Chris
Saturday 10th of June 2023
Yum Yum!Hi Michelle,I am so happy to hear you made this bread and it turned out really well.Thank you so much for taking your time to share your feedback with us.
Nadia
Wednesday 16th of November 2022
Thank you so much for the detailed explanation! I appreciate this so much. All the tips needed is here for bread making. I have made bread using this recipe 2 times and I am absolutely in love with it. Its really amazing how soft and delicious this vegan bread is and i am so glad i dnt need milk and eggs.
Bincy Chris
Sunday 20th of November 2022
Hi Nadia,I am so happy to hear you made this Dairy free Bread twice and they turned out really well.Thank you for taking your time to write back me and for rating this recipe.
Dudula
Wednesday 14th of September 2022
Hi I have tried most of your recipes and all of them came out very well.Your demonstrations are precise, clear and easy to understand.I would say you are a wonderful gift to this world. As a woman I am really proud of you.Please keep up you work.
Bincy Chris
Wednesday 14th of September 2022
Thank you for the kind words.I am so happy to hear you made many of our recipes and they turned out really well.Thank you so much for taking your time to write back me and for rating this recipe.